In part 1 of this article series the RMS server was installed, part 2 now deals with the configuration. As a reminder, here is the environment from part 1:
Surroundings
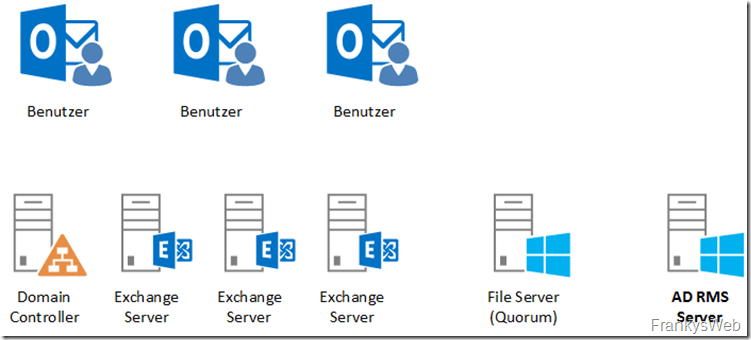
The environment in which the Active Directory rights management services are installed is as follows:
There are a few users with Outlook 2016, a domain controller, 3 Exchange servers (one DAG), a file server for the quorum and a Windows Server 2012 R2 that was installed in part 1 as a rights management services server.
The Active Directory is called frankysweb.de, the users use Windows 10 with Outlook 2016.
Preparation
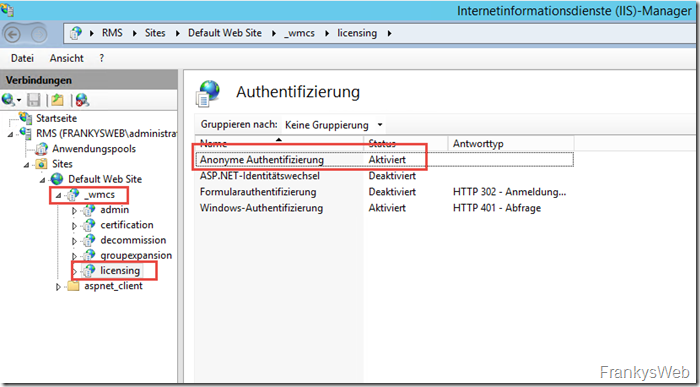
For RMS to function correctly, the authentication settings in IIS must first be adjusted. In the IIS Manager, there is an application called "_wmcs" under the "Default Web Site". Anonymous authentication" must be activated for this application:
The "licensing" application is located below "_wmcs"; "Anonymous authentication" is also activated here.
The remaining applications do not need to be adapted:
A new Active Directory group can now be created. The group is for the AD RMS administrators:
The accounts that are allowed to manage AD RMS are now added as members of the group. In my case, this is "Administrator"
The admin group requires an e-mail address, so the group must be activated as a distribution group on the Exchange server.
Enable-DistributionGroup SG_RMSAdmins
A share is required for the distribution of the RMS templates. I have created a folder on drive C: with the name "ADRMS Templates":
The folder is released for the RMS service account:
New-SmbShare -Name ADRMSTemplates -Path "c:\ADRMS Templates" -FullAccess frankysweb\ADRMSServiceAccount
Configuration of Active Directory Rights Management Services (AD RMS)
After installing AD RMS, you will find a corresponding administration console in the start menu, which is now required for configuration:
The first step is to activate the export of templates for user rights policies to the previously created share:
The UNS path of the release is specified for the export:
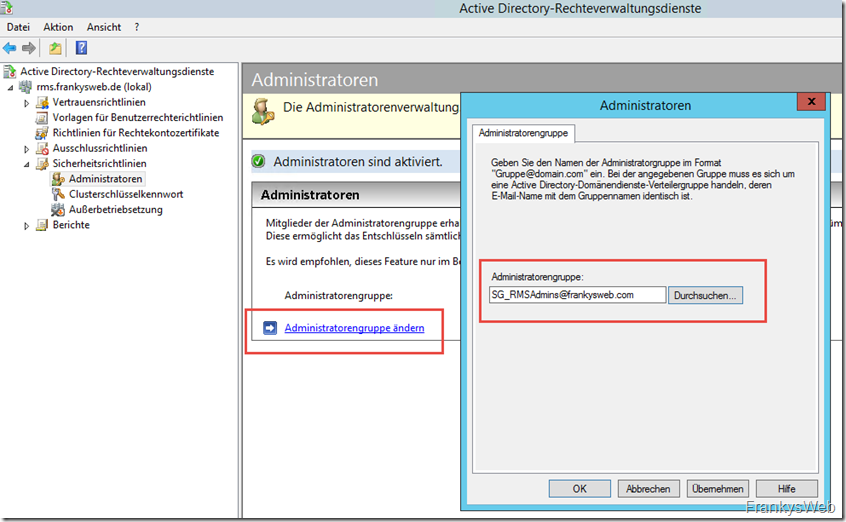
The Administrators item can be found under Security guidelines. Administrator access can be activated here and the previously created group "SG_RMSAdmins" can be entered. To do this, first click on "Activate administrators":
The created distribution group can now be specified under "Change administrator group":
Configuration of the first "template for user rights policies"
As the name suggests, user rights policies control which rights are granted to users for documents or emails. For example, user rights policies are used to specify that a recipient (the user) may read an email but not forward or print it. In this example, a "Read only" policy is created.
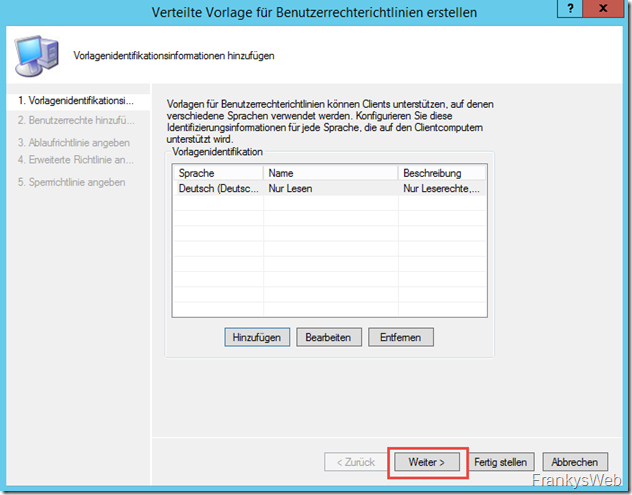
A "Distributed template for user rights policies" is created for this purpose:
A wizard starts, here the languages must first be added. A user rights policy supports several languages to inform users which rights are assigned via the policy. I initially only add "German" as a language:
Name and description are displayed to users, so short and descriptive names/descriptions are useful here:
Once the languages have been configured, you can continue:
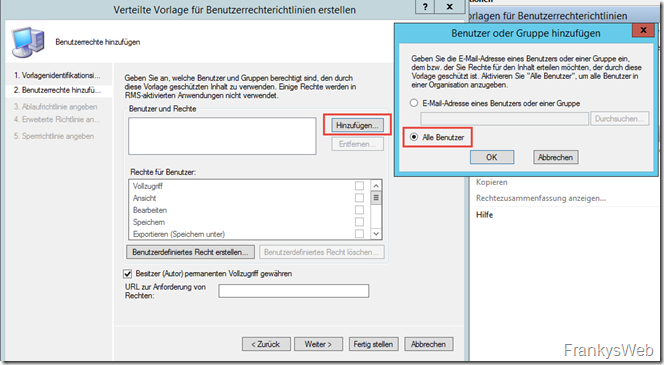
The rights for the corresponding users are configured in the following dialog. Different rights for different groups can also be configured here.
I initially use all users:
And award the right "View"
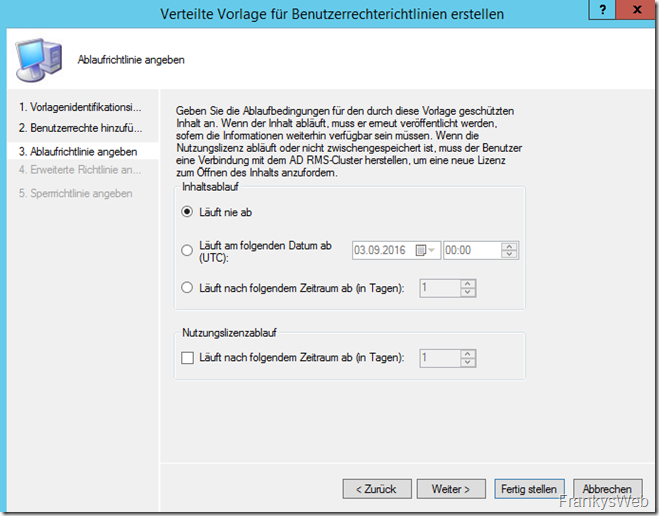
The expiry policy can be used to control how long the license is valid. For example, it can be configured so that a recipient can read an email for one day, but then no longer.
I don't let licenses expire for the time being:
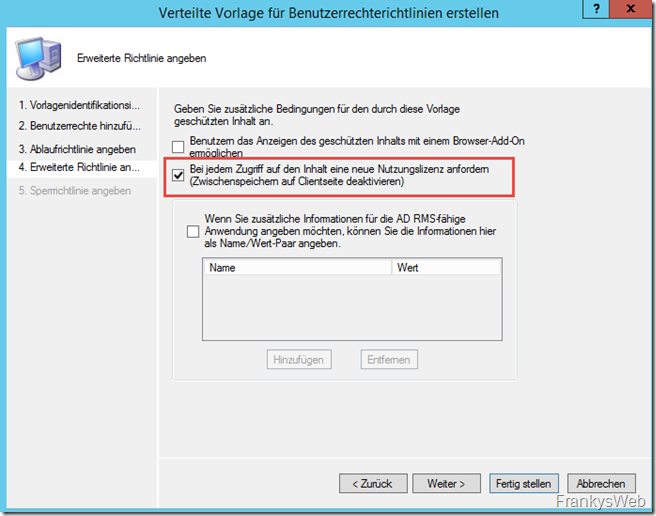
For my test, I activate that a new license must be requested each time it is accessed:
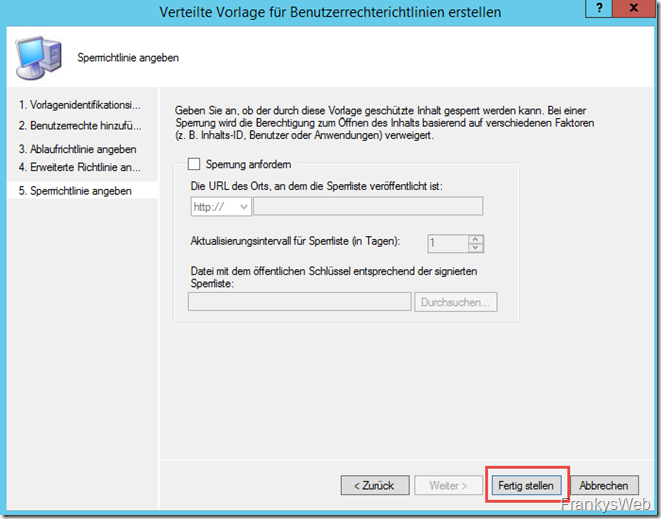
A blocking policy is not configured here initially. The first policy is ready and the wizard can be closed:
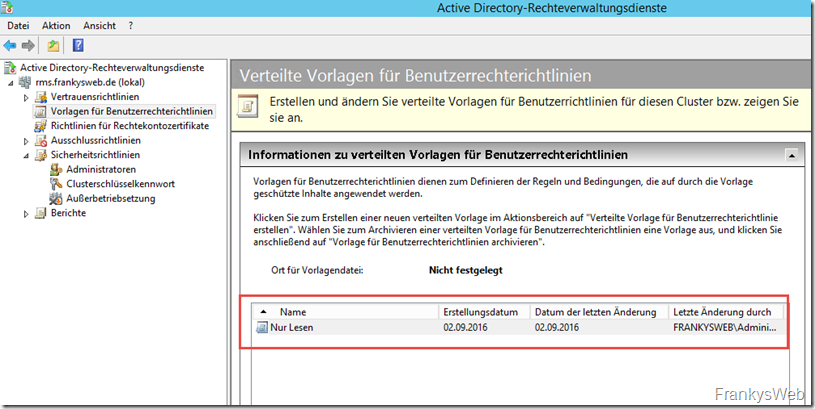
In the RMS console we now find the previously created policy:
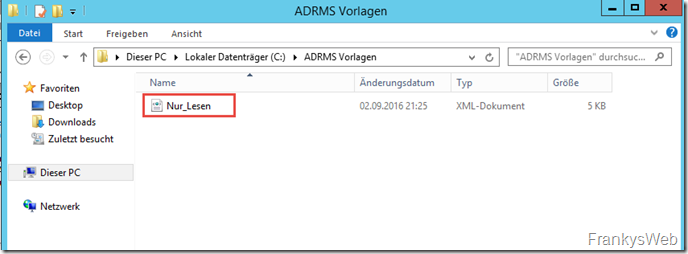
The guideline was also exported to the release:
So far so good. In the next article, it's the turn of Exchange.







Hi
ich verzweifle noch und frage daher gerne den Profi.
Habe ADRMS erfolgreich auf einem Server 2019 interne Datenbank installiert. Da bei mir bereits der https Port 443 besetzt war, änderte ich bei der Installation diesen Port auf 4443 ab. Der Server heisst SS1 und wird so auch in der Konsole angezeigt [ss1 (lokal)]
Das Zertifikat ist ein Wildcard Cert von GoDaddy. Clusteradresse lautet adrms.xy.com
Leider erhalte ich bei der Verbindung zum RMS Dienst immer folgende Fehlermeldung:
Mit dem AD RMS Cluster „ss1“ konnte keine Verbindung hergestellt werden. Grund:
Die zugrunde liegende Verbindung wurde geschlossen. Unerwarteter Fehler beim senden.
Vergewissern sie sich, dass für die Verbindung das korrekte Protokoll (bsp HTTP oder HTTPS) sowie die korrekte Portnummer verwendet wird.
Der Versuch einen Cluster hinzuzufügen mit „adrms.xy.com mit Port 4443 hinzuzufügen scheitert mit demselben Verbindungsfehler.
Woran scheitere ich, bzw. was muss ich korrigieren damit es klappt?
Danke und Gruss
Markus