It often happens that some programs can send status messages or reports by e-mail, but do not offer any kind of authentication. Often you can only specify an SMTP server, but unfortunately no account information. For such cases, you can create a new receive connector that also accepts and forwards mails without prior authentication. However, this option should be used with caution and should be limited to IP addresses, as a relay can easily be misused for SPAM.
A new receive connector can be created either via the Management Console or via the Management Shell:
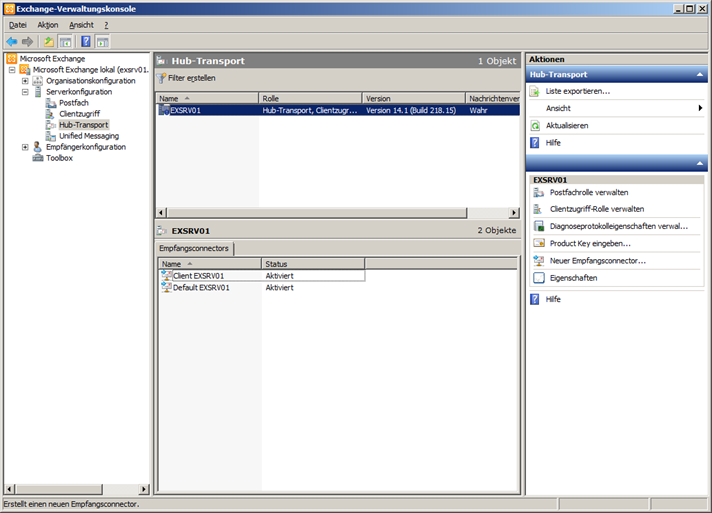
Under Server configuration / Hub transport, click on "New receive connector" in the action field
In the next dialog, enter the name of the connector and specify the type of use, in this case "Internal", then confirm with "Next".

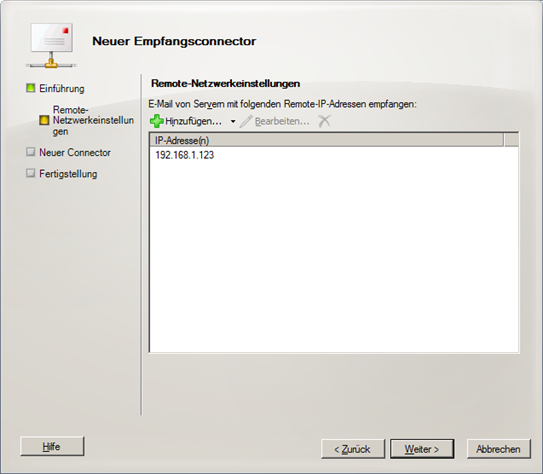
In the following dialog, it is important to only specify the servers or systems that are actually authorised to send mails without authentication. Under no circumstances should the entire subnet or too large a range be specified here. In this case, only the IP 192.168.1.123 will be authorized to use this connector. Click on "Next" and in the next dialog on "New" to create the connector.
The connector is created via the management shell with this command:
new-ReceiveConnector -Name 'Allow Interal Relay' -Usage 'Internal' -RemoteIPRanges '192.168.1.123' -Server 'EXSRV01'
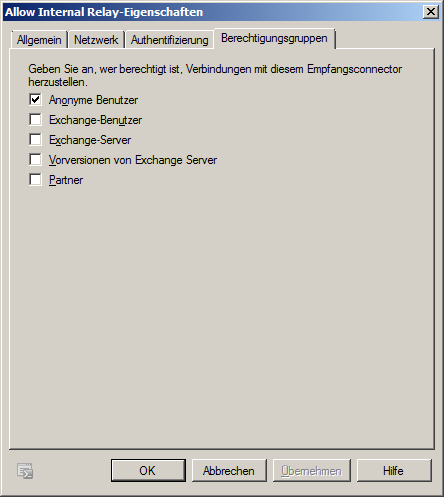
Now we define in the properties of the new connector that anonymous users are allowed to send mails to this connector, i.e. check the box "Anonymous users":
Or again via Powershell:
Set-ReceiveConnector -PermissionGroups 'AnonymousUsers' -Identity 'EXSRV01\Allow Interal Relay'
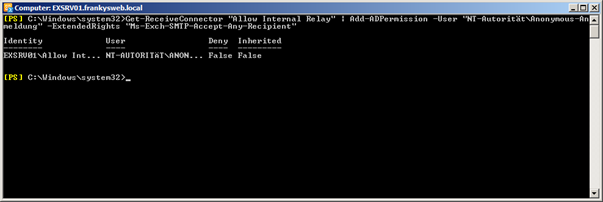
Finally the most important step, we have allowed the IP 192.168.1.123 to access the connector without specifying user and password, but not that mails can be sent via this connector, to change this we have to use the Powershell, because there is no corresponding setting in the console:
Get-ReceiveConnector "Allow Internal Relay" | Add-ADPermission -User "NT-Authority\Anonymous-Logon" -ExtendedRights "Ms-Exch-SMTP-Accept-Any-Recipient"
There is a small stumbling block here:
- For German servers it is called "NT-Authority\Anonymous login"
- For English servers it is called "NT AUTHORITY\ANONYMOUS LOGON"
The output of the command should look like this:
From now on, the computer with the IP 192.168.1.123 should be able to send mails via this connector.
If you want to revoke the right again, you can do so using this command:
Get-ReceiveConnector "Allow Internal Relay" | Remove-ADPermission -User "NT-Authority\Anonymous-Logon" -ExtendedRights "Ms-Exch-SMTP-Accept-Any-Recipient"

Bei den ersten zwei Powershell Befehlen in der Anleitung steht „Allow Interal Relay“ beim letzten steht es korrekt „Allow Internal Relay“. Also wem es nicht auffällt bei Internal fehlt das „n“.
Hallo und vielen Dank für diesen Beitrag. Vor einiger Zeit habe ich mich an die Anleitung gehalten und es hat wunderbar funktioniert. Nun läuft der Connector nicht mehr, obwohl weder Einstellungen noch IP-Adressen geändert wurden. Am Kyocera TASKalfa 3050ci kommt immer die Fehlermeldung „Ziel ist nicht festgelegt. (0x1104)“, welche soweit nicht valide ist, als das auch die Mailadressen unverändert sind (die Meldung kommt sogar beim senden an interne Adressen).
Beste Grüße
Michael
Die SMTP Logs können dort sicher weiterhelfen:
C:\Program Files\Microsoft\Exchange Server\V14\TransportRoles\Logs
Gruß, Frank
Hallo Frank,
ich habe es nochmals getestet und vom Gerät eine Mail versenden lassen (was nicht geklappt hat und wieder mit der Meldung „Ziel ist nicht festgelegt. (0x1104)“ fehlschlug).
Leider gibt es in den Log-Dateien und auch in der Windows Ereignisanzeige kein Ereignis, welches die passende Zeit oder einen passenden Fehler (Warnung, etc.) hätte. Vielleicht schreibt er die Log aber auch erst später auf die Platte, so das ich es jetzt noch gar nicht finden kann?
Schöne Grüße
Michael
Die Logs werden mit Zeitverzögerung und mit UTC Timestamps geschrieben. Hast du mal die Verbindung mittels Telnet getestet?
Vielen Dank für das Posten. Hat mir viel Mühe gespart ! Warum das aber nicht über die Mgmt-Console einzustellen geht, weiss wohl nur MS.
Sch… sorry das war für den Exchange-Reporter gedacht und nicht für hier, bitte einfach den Comment löschen oder verschieben. Thx.
Super Bericht, nach dem zweiten Anlauf hat auch die Installation geklappt :-)
Folgender Verbesserungsvorschlag:
Sendelimit von Postfächern:
Du läufst über die „Globale Einstellung“ der Datenbank, wenn bei einem User, aber eine Individuelle Einstellung getroffen wurde, wird das hier nicht berücksichtigt und wie in meinem Fall falsch ausgegeben.
Schöne Grüße