I recently encountered the problem of converting a cloud-only shared mailbox into a user mailbox in a customer project.
However, as the Active Directory (AD) is synchronized with Azure Active Directory (AAD), I have described the procedure here.
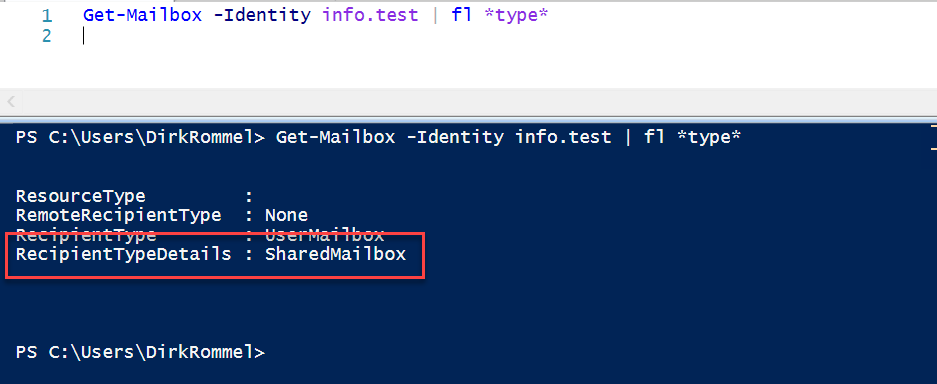
First you have to connect to the Exchange Online PowerShell to check whether the mailbox to be customized is also a shared mailbox. This can be recognized by the fact that the attribute RecipientTypeDetails the value Shared mailbox has.
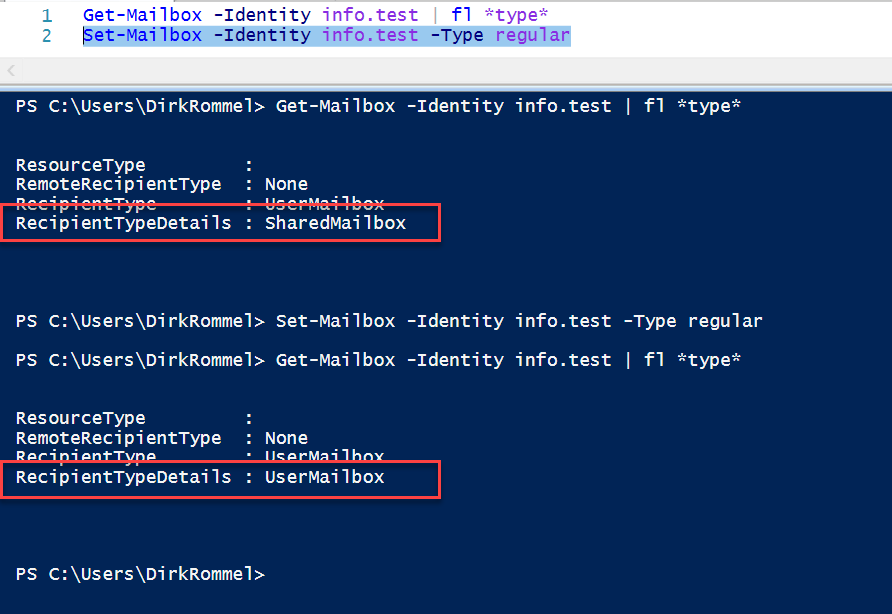
You can then convert the mailbox with the following Powershell command.
Set-Mailbox -Identity -Type Regular
When we check again, we see that the type under RecipientTypeDetails now UserMailbox is.
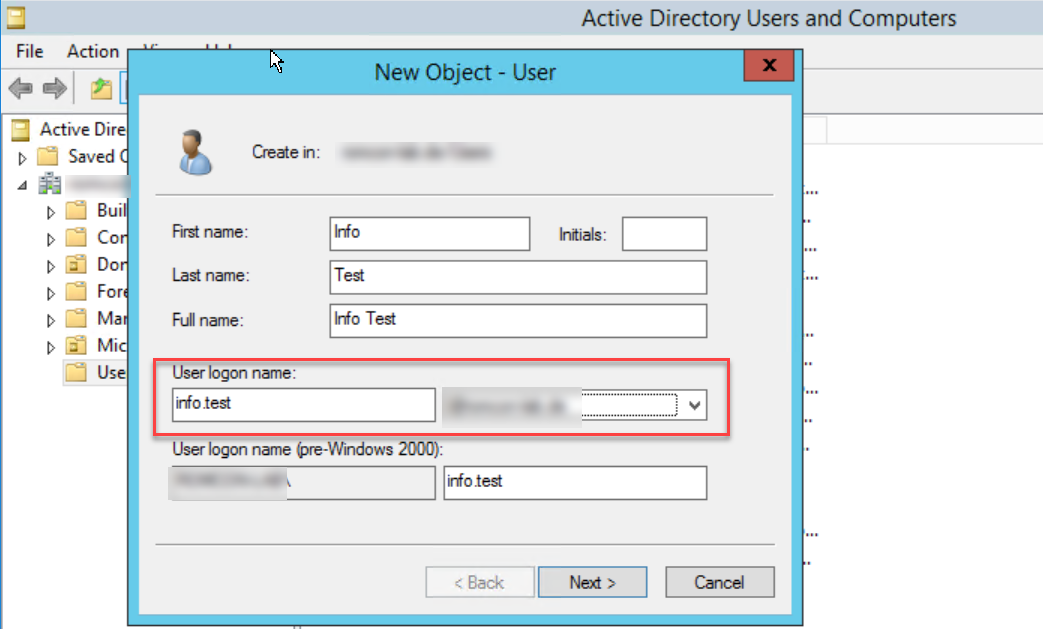
A user must now be created for the mailbox in the local AD. It is important here that the user has the same User Principal Name (UPN), such as the address of the mailbox that has just been changed. This means that the UPN is checked for the e-mail address and "matched" accordingly.
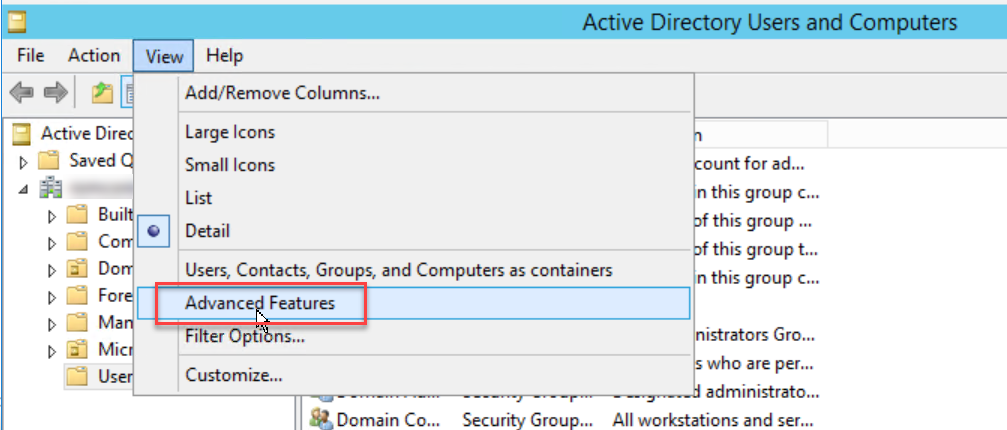
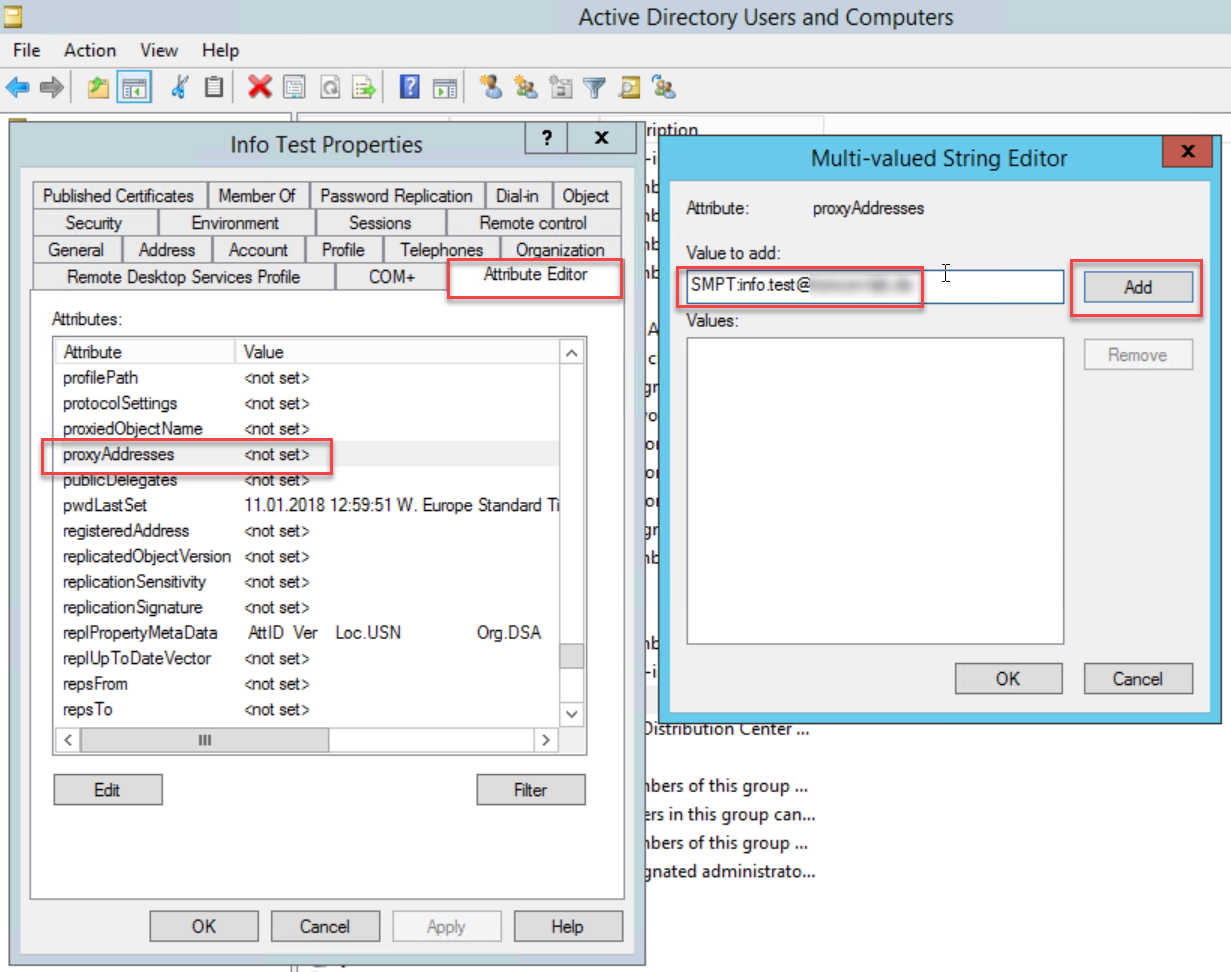
After the user has been created in the AD, the default SMTP must be entered. The address is entered in the user object under the Attribute Editor tab. However, this tab is not displayed by default in the Active Directory Users and Computers Management Console. To do this, you must go to View the Advanced Features activate.
As the rider Attribute Editor is only visible in the Organization Unit (OU) of the user object, you must first switch to the OU of the user. To find the OU in larger organizations, you can search for the user using the search function and select it under the Object you will find the path where the user object is stored.
In the properties of the user, you can now change the Attribute Editor Open the tab and click on Attributes proxyAddress enter the default SMTP (sender) address. It is important that SMTP: is capitalized, which declares the default address. If the address is preceded by a lower-case smtp:, an additional receiving address (alias) is created.
Once the changes have been saved in the local AD, all you have to do is wait for the AAD Connect Sync or start it manually. As soon as the user has been synchronized, it appears in the Office 365 Admin Center under Users where you can now assign a corresponding license and the mailbox becomes active.

Hallo Herr Rommel,
einige Sachen lassen sich in Bezug auf Office 365 am schnellsten über den ADSI-Editor setzen. Bei den Proxy-Adressen zum Beispiel, aber auch hier. Auch hilft es weiter um besser zu verstehen, mit welchen Funktionen die Attribute selbst verknüpft sind. Da die ADSI-Attribute aus Microsoft Support Sicht ohne die Anweisung des selbigen „Taboo“ sind, sollte auf eine Lösung mit den zur Verfügung stehenden Cmdlets zurückgegriffen werden. In dem Fall sähe das folgender Maßen aus:
In der Exchange Online Powershell:
get-mailbox info.test@domain.com | select ExchangeGuid
In der OnPrem Exchange Powershell:
enable-mailuser info.test -externalEmailAddress info.test@domain.com
enable-remoteMailbox info.test
set-remoteMailbox info.test -exchangeGuid $ExchangeOnlineGuid
Damit ist eine RemoteMailbox mit dem Exchange Online Postfach verknüpft, ohne dass man an die Attribute ran muss. So lässt sich im übrigen der Vorgang besser in ein Skript packen, da man nicht mit set-ADUser -replace arbeiten muss.
Hallo,
Wir hatten ein ähnliches Szenario … es mussten Cloud User ins AD migriert werden und dann wieder mit AAD nach Office365 Synchronisiert werden … ist ähnlich wie in Ihrem Beitrag …wir mussten damals aber die bestehenden AD user mit der ID des cloud accounts Mappen:
Import-Module Msonline
Connect-MSOLService
$LocalUserName = „h.user“
$CloudUserUPN = „h.user@cloudtest.com“
$guid = (get-Aduser $LocalUserName).ObjectGuid
$immutableID = [System.Convert]::ToBase64String($guid.tobytearray())
Set-MSOLuser -UserPrincipalName $CloudUserUPN -ImmutableID $immutableID
Andernfalls wurden die User doppelt erstellt, bzw nicht richtig zugewiesen …
Hallo Christian,
manchmal ist es nötig, das Matching der Accounts über das setzen der ImmutableID manuell vorzunehmen. Bei einer großen Anzahl von Nutzern wird das leider schnell unbequem. Man kann deswegen auch das UPN-Matching auf Tenant-Ebene aktivieren:
Set-MsolDirSyncFeature -Feature EnableSoftMatchOnUpn -Enable $true
Leider ist damit nicht immer weitergeholfen, wo man dann auf Deine Lösung zurückgreifen muss, bei großen Nutzerzahlen kann es die Arbeit aber erleichtern.
Gruß
Thorsten