

I recently encountered the problem of converting a cloud-only shared mailbox into a user mailbox in a customer project.
However, as the Active Directory (AD) is synchronized with Azure Active Directory (AAD), I have described the procedure here.
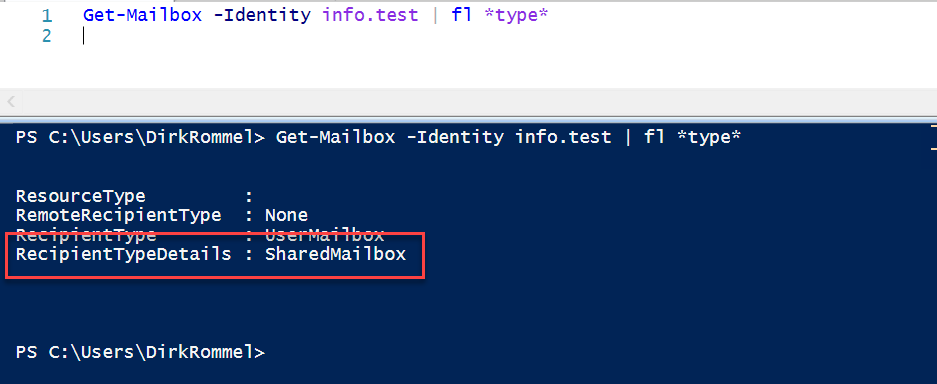
First you have to connect to the Exchange Online PowerShell to check whether the mailbox to be customized is also a shared mailbox. This can be recognized by the fact that the attribute RecipientTypeDetails the value Shared mailbox has.
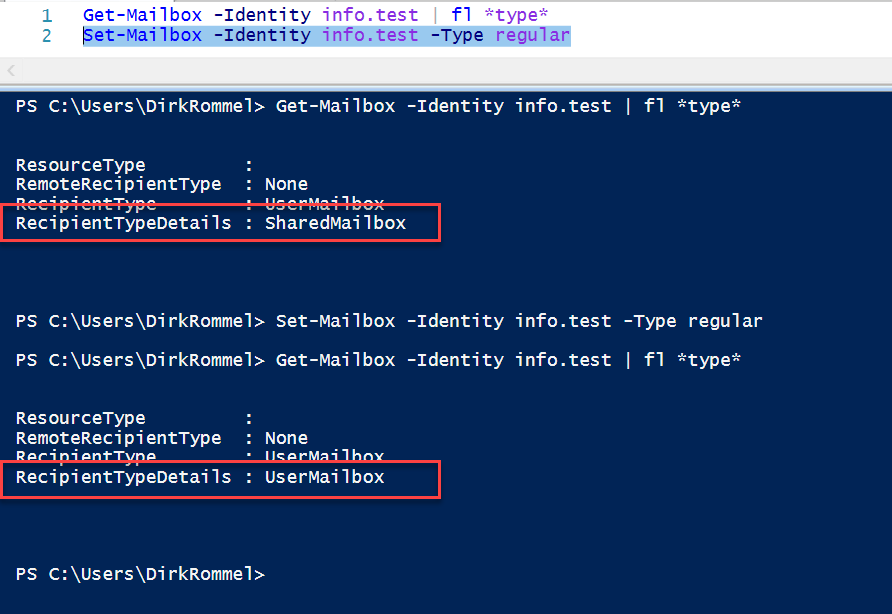
You can then convert the mailbox with the following Powershell command.
Set-Mailbox -Identity -Type Regular
When we check again, we see that the type under RecipientTypeDetails now UserMailbox is.
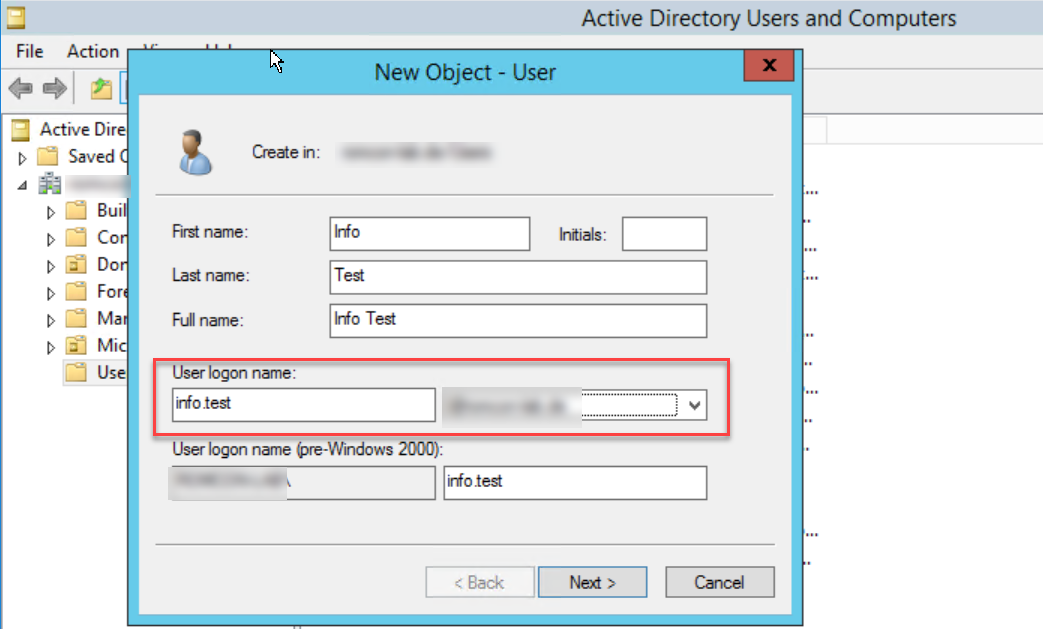
A user must now be created for the mailbox in the local AD. It is important here that the user has the same User Principal Name (UPN) bekommt, wie die Adresse der soeben geänderten Mailbox. Dadurch wir der UPN auf die E-Mail Adresse geprüft und entsprechend „gematched“.
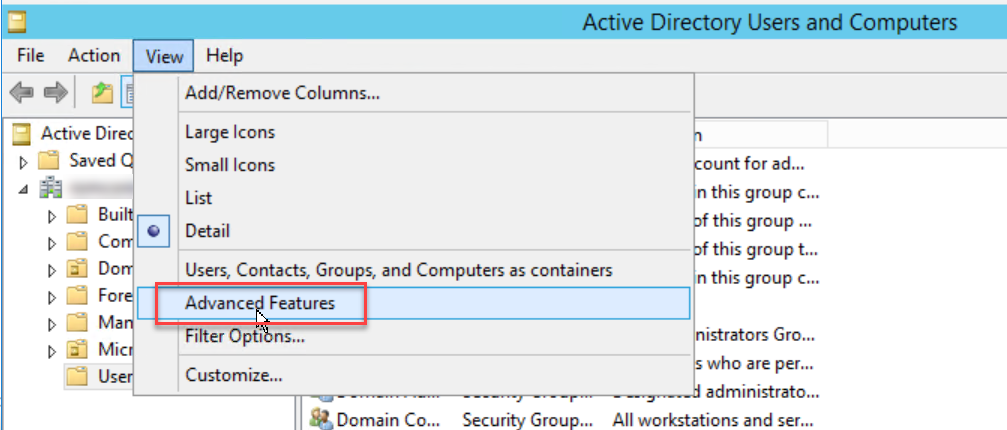
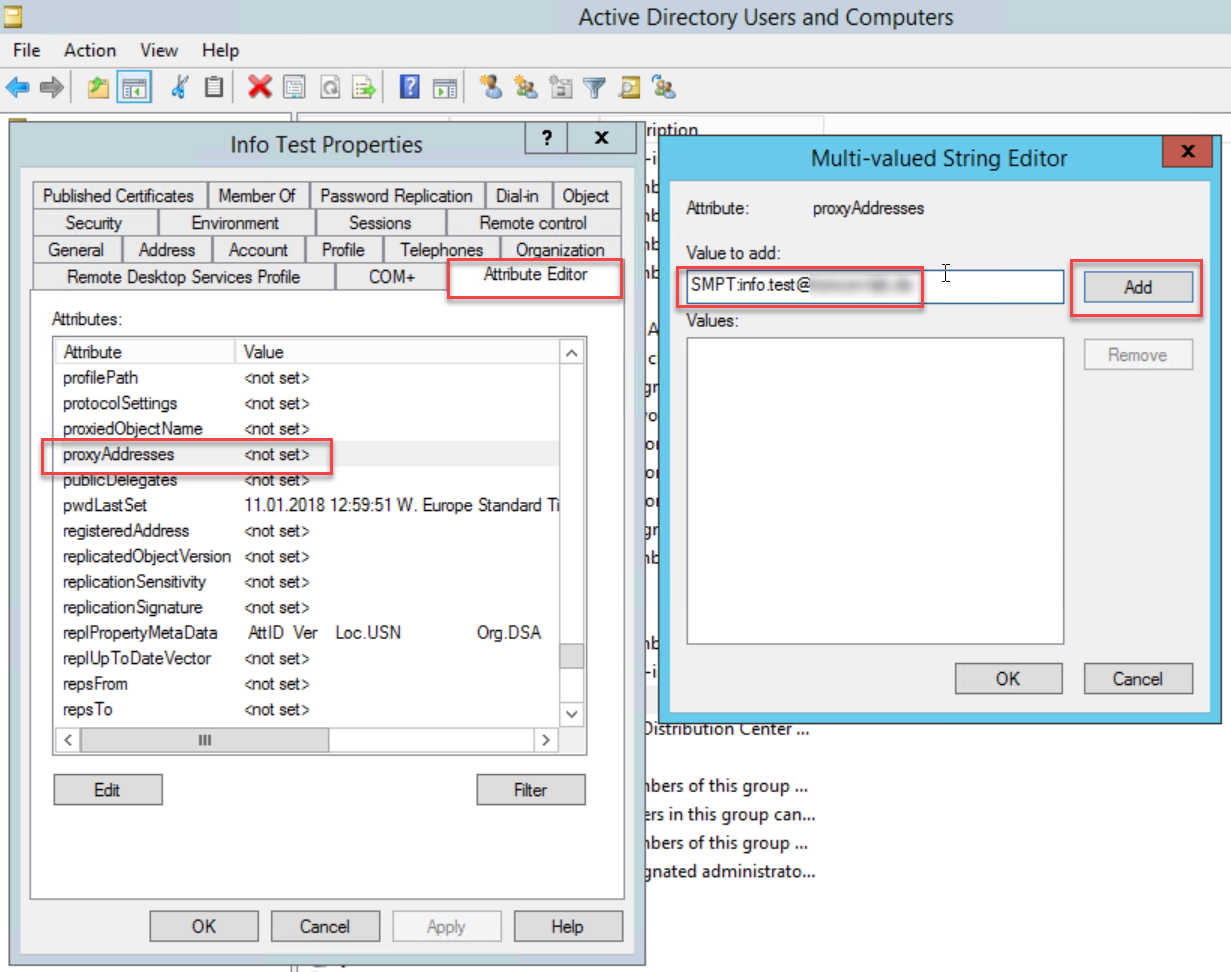
After the user has been created in the AD, the default SMTP must be entered. The address is entered in the user object under the Attribute Editor tab. However, this tab is not displayed by default in the Active Directory Users and Computers Management Console. To do this, you must go to View the Advanced Features activate.
As the rider Attribute Editor is only visible in the Organization Unit (OU) of the user object, you must first switch to the OU of the user. To find the OU in larger organizations, you can search for the user using the search function and select it under the Object you will find the path where the user object is stored.
In the properties of the user, you can now change the Attribute Editor Open the tab and click on Attributes proxyAddress enter the default SMTP (sender) address. It is important that SMTP: is capitalized, which declares the default address. If the address is preceded by a lower-case smtp:, an additional receiving address (alias) is created.
Once the changes have been saved in the local AD, all you have to do is wait for the AAD Connect Sync or start it manually. As soon as the user has been synchronized, it appears in the Office 365 Admin Center under Users where you can now assign a corresponding license and the mailbox becomes active.