

More and more companies now want to migrate to Exchange 2010. In my opinion, the most common case is the migration from Exchange 2003 to Exchange 2010. Exchange 2007 was left out by many companies. How Exchange 2003 is migrated to Exchange 2010 is described in this article.
The test environment
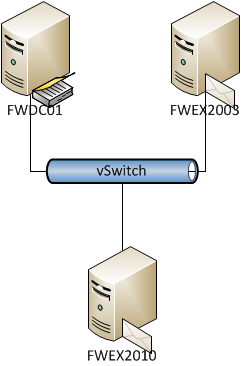
FWDC01 is a Windows Server 2003 R2, this server acts as domain controller (frankysweb.local) and DNS server. FWEX2003 is a Windows Server 2003 with Exchange 2003 installed. 3 mailboxes (Bart, Lisa, Maggie) and a public folder with 3 contacts (Homer, Marge, Mr. Burns) are located on the Exchange 2003.
Only the Windows Server 2008 R2 operating system is currently installed on the FWEX2010 server. The server has also joined the frankysweb.local domain as a member server.

Preparing Exchange 2003 for migration
Zunächst erledigen wir die Vorbereitungen für die Migration. Wenn noch nicht geschehen muss das Service Pack 2 für Exchange 2003 installiert werden. Das Service Pack 2 ist Voraussetzung für die Migration. Wenn das SP2 installiert ist, bringen wir Exchange 2003 in den „Einheitlichen Modus“. Dieser Vorgang ist vergleichbar mit dem Anheben des Funktionslevels einer Domäne oder Gesamtstruktur und kann nicht rückgängig gemacht werden. Für den „Einheitlichen Modus“ dürfen sich nur Exchange 2000 Server oder höher in der Organisation befinden. Für die Migration auf Exchange 2010 dürfen sich allerdings nur noch Exchange 2003 Server in der Organisation befinden. Ältere Exchange Versionen müssen zunächst auf Exchange 2003 migriert werden.
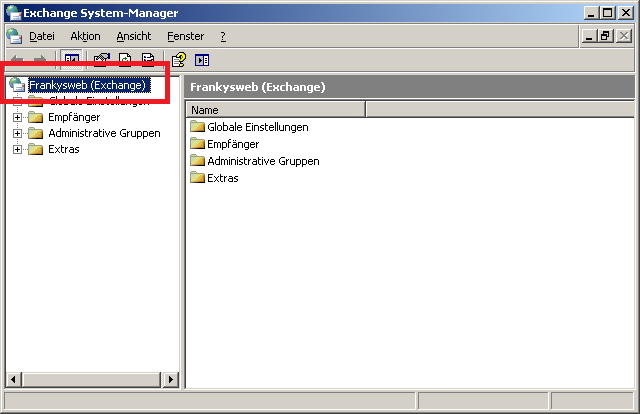
Um Exchange in den Einheitlichen Modus zu bringen, klicken wir im Systemmanager mit der rechten Maustaste auf die Exchange Organisation und wählen im Kontext Menü „Eigenschaften“.

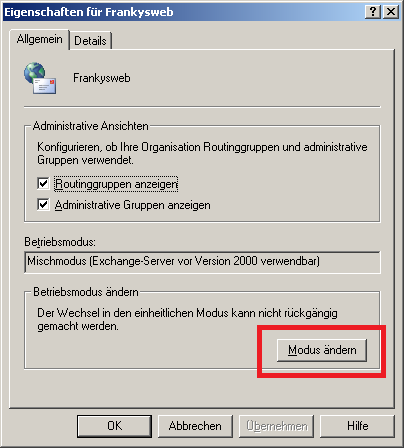
Um den Betriebsmodus zu ändern klicken wir dann auf „Modus ändern“

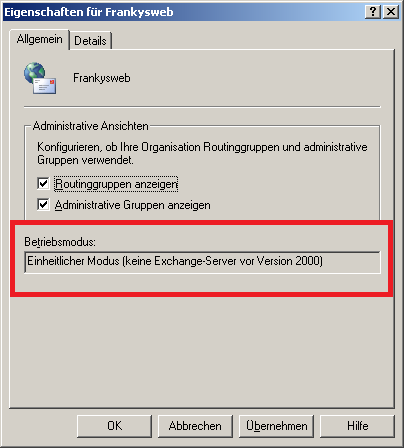
Die Warnung wird mit „Ja“ bestätigt. Danach sollte der Betriebsmodus „Einheitlicher Modus“ angezeigt werden


Installation Exchange Server 2010
On the server FWEX2010, which currently functions as a member server, we first install the prerequisites for Exchange 2010. In this article I have described which prerequisites must be installed for the 3 Exchange roles (Mailbox, Hub Transport, ClientAccess). A complete overview of which Windows roles/features are required for which Exchange roles can be found here:
http://technet.microsoft.com/de-de/library/bb691354.aspx
Once the necessary Windows roles have been installed, we run the Exchange 2010 setup. We first run a normal Exchange setup, but at one point we select the Exchange 2003 server.
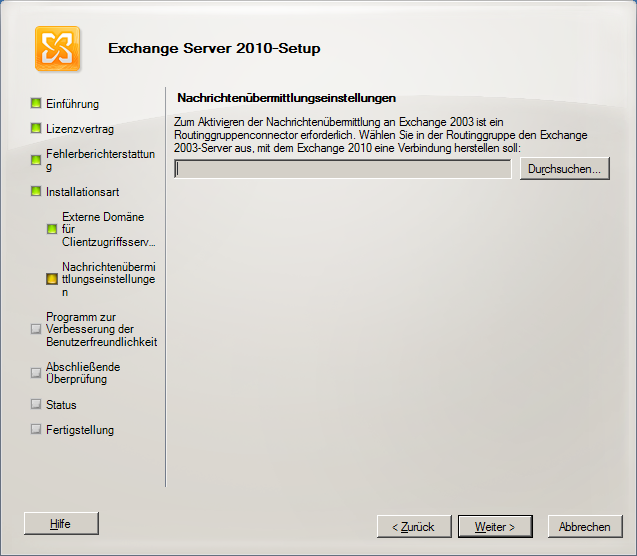

Mit einem Klick aus „Durchsuchen“ können wir hier den Exchange 2003 Server angeben. Dies hat zur Folge dass die Routinggruppenconnectoren zwischen Exchange 2010 und Exchange 2003 automatisch erstellt werden. Die Connectoren lassen sich auch nachträglich manuell anlegen. Dies funktioniert über die Exchange Management Shell
New-RoutingGroupConnector -Name „MigrationConnector“ -SourceTransportServers „FWEX2010.frankysweb.local“ -TargetTransportServers „FWEX2003.frankysweb.local“ -Cost 100 -Bidirectional $true
After successful Exchange 2010 setup we execute the following command from the Exchange 2010 DVD:
Setup.com /PrepareLegacyExchangePermissions
The command causes the RUS service (Recipient Update Service) to continue to function during the migration according to the Update for Exchange 2010 schema (which is automatically updated during the installation).
Control and configuration Exchange 2010
Exchange 2010 has been installed and the routing group connectors between Exchange 2003 and Exchange 2010 should have been created by the setup. We can check this with the Exchange 2003 System Manger
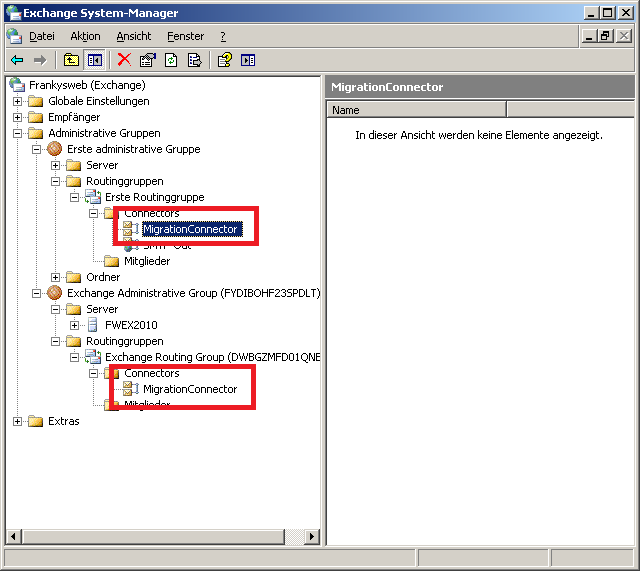

Of course, we can also check this via the Exchange 2010 Management Shell
Get-RoutingGroupConnector


Now it's time to configure Exchange 2010. I will only briefly list which points are necessary:
- Configuration of the Exchange 2010 databases
- Configuration Exchange 2010 Send Connector
- Configuration Exchange 2010 Receive Connector
- Configuration OWA, Outlook Anywhere
The configuration of Exchange 2010 does not differ from the configuration of a normal Exchange 2010 installation. A corresponding article for the Exchange 2010 basic configuration is in progress J
Wir sollten nun in der Lage sein Mails zwischen Exchange 2003 und Exchange 2010 zu senden. Um das zu Prüfen legen wir einen neuen Benutzer an, dessen Postfach auf dem Exchange 2010 gespeichert wird. Ich lege zum Test den Benutzer „Frank“ an.
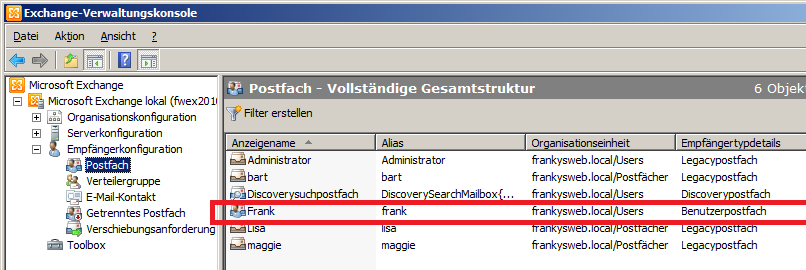

We can use OWA on both servers to test the mail routing. So I send a mail from Frank to Bart and then reply to this mail from Bart. If the mail routing works, we move on to the next step.
Setting up public folder replication
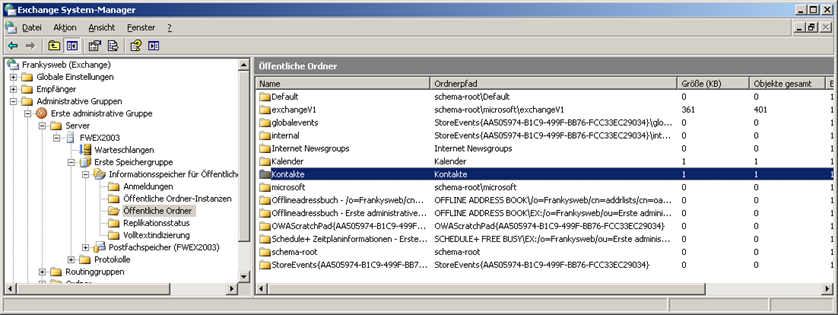
Ich habe in meiner Testumgebung 2 Öffentliche Ordner angelegt (Kontakte und Kalender“. Der Ordner „Internet Newsgroups“ wird bei der Installation von Exchange 2003 angelegt, alle Öffentlichen Ordner müssen nun auf den Exchange 2010 repliziert werden.
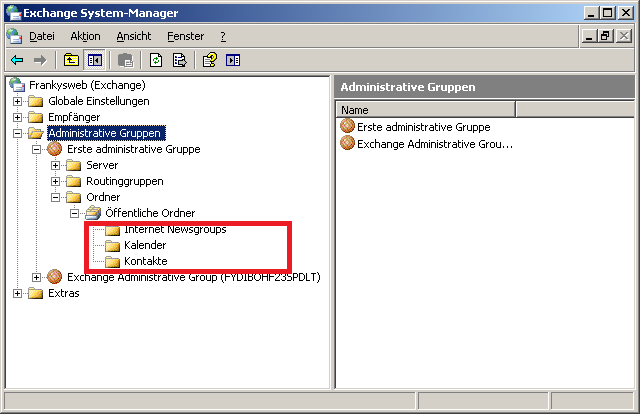
Wenn es nur wenige Öffentliche Ordner gibt, kann die Replikation manuell für jeden Ordner konfiguriert werden, dies geschieht per Exchange 2003 System Manager unter dem Punkt „Öffentliche Ordner“ im Informationspeicher:

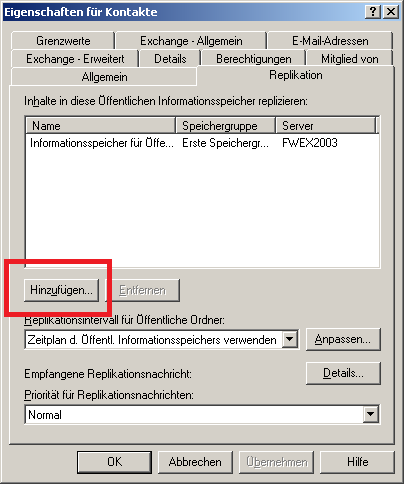
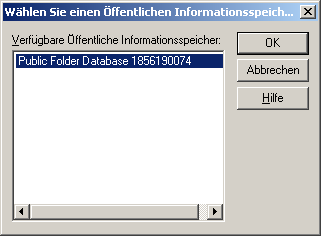
Mit einem Rechtklick können die Eigenschaften des Öffentlichen Ordners geöffnet werden, unter dem Reiter „Replikation“ wird dann die Öffentliche Ordner Datenbank auf dem Exchange 2010 Server hinzugefügt


These steps are now repeated for all public folders. However, it is easier to do this with the Exchange 2010 Management Shell. First change to the script directory of the Exchange 2010 server:
Cd C:\Program Files\Microsoft\Exchange Server\V14\Scripts


Jetzt kann das Script „AddReplicaToPFRecursive“ ausgeführt warden:
.\AddReplicaToPFRecursive.ps1 -TopPublicFolder \ -ServerToAdd FWEX2010


Damit der Replikationspartner im Exchange 2003 System Manager sichtbar wird, muss der System Manager einmal geschlossen und wieder geöffnet werden. Das Replizieren der Inhalte der Öffentlichen Ordner kann je nach Datenmenge recht lange dauern. Darum empfliehlt es sich Geduld zu haben. Um zu prüfen ob alle Elemente der Öffentlichen Ordner repliziert wurden, können die Spalten „Objekte gesamt“ und „ItemCount“ miteinander verglichen werden:
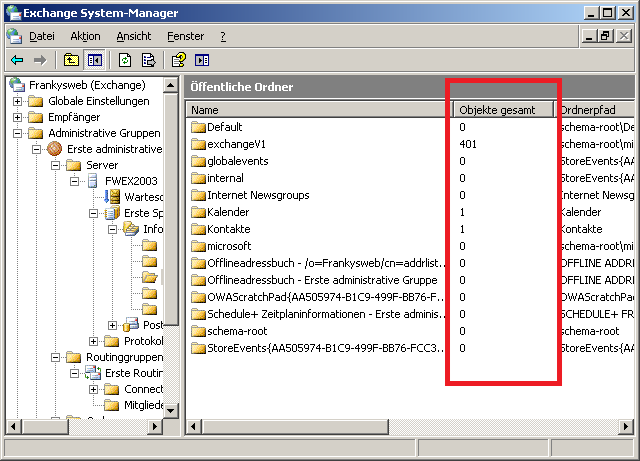


The command to display the elements on Exchange 2010 servers is:
Get-PublicFolderStatistics | ft Name,itemcount
Some public folders only exist on the respective Exchange server, which is why the number of public folders differs on both Exchange servers. Both lists can be exported as CSV files and compared with Excel, for example. However, as the CSV files differ in their structure, manual work is required to compare the files. Special tools can do this work for you.
Once the public folders have been replicated, the address books and the RUS service can be moved.
Moving the recipient update service and the address lists
To move the recipient update service to Exchange 2010, Exchange 2010 is set as the server for address list generation. This setting can be made via the Exchange 2003 System Manager:
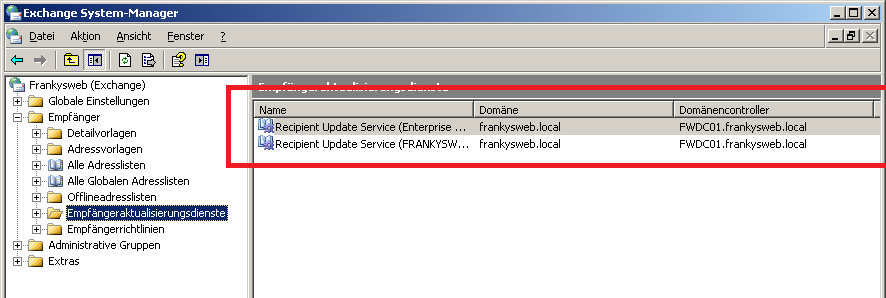

The new server can be defined by double-clicking on the two RUS (Recipient Update Service) entries
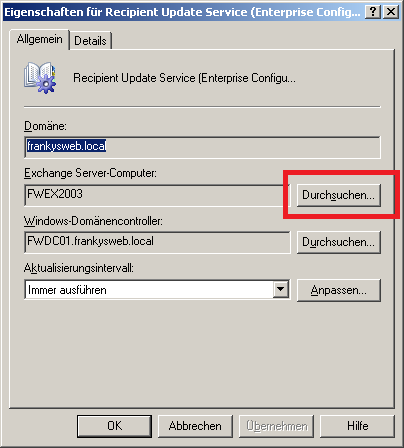
Mit einem Klick auf „Durchsuchen“ wird das Computer Konto des Exchange 2010 Servers ausgewählt. Jetzt kann das Offline Adressbuch verschoben werden.
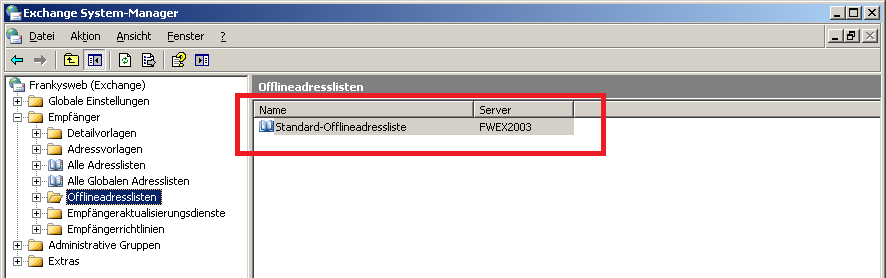

Auch hier kann mit einem Doppelklick auf „Standard-Offlineadressliste“ als Server Exchange 2010 festgelegt werden.
The address lists can now be updated to Exchange 2010 by entering the following commands in the Exchange 2010 Management Shell:
Set-AddressList „Alle Benutzer“ -IncludedRecipients MailboxUsers
Set-AddressList „Alle Gruppen“ -IncludedRecipients MailGroups
Set-AddressList „Alle Kontakte“ -IncludedRecipients MailContacts
Set-AddressList „Öffentliche Ordner“ -RecipientFilter { RecipientType -eq „PublicFolder“ }
Set-GlobalAddressList „Globale Standardadressliste“ -RecipientFilter {(Alias -ne $null -and (ObjectClass -eq „user“ -or ObjectClass -eq „contact“ -or ObjectClass -eq „msExchSystemMailbox“ -or ObjectClass -eq „msExchDynamicDistributionList“ -or ObjectClass -eq „group“ -or ObjectClass -eq „publicFolder“))}


Now all mailboxes can be moved from Exchange 2003 to Exchange 2010
Moving the mailboxes
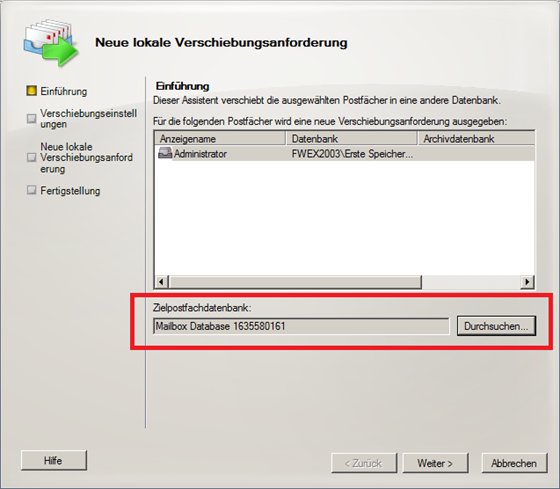
To move the mailboxes, either the Exchange 2010 Management Console or the shell can be used to create a move request for each mailbox
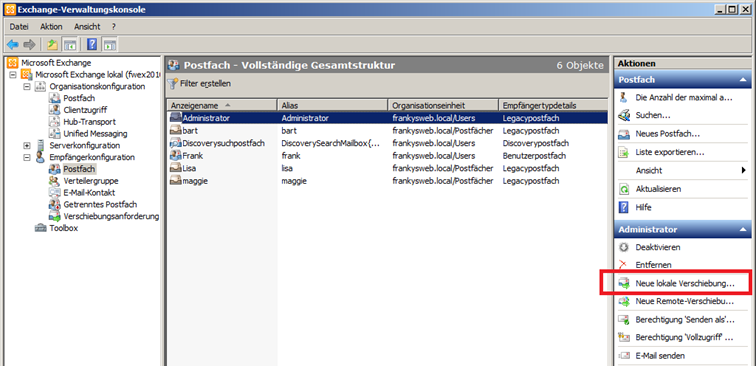

The mailbox database on the Exchange 2010 server is specified as the target database. If required, the mailboxes can also be moved back to the Exchange 2003 server.

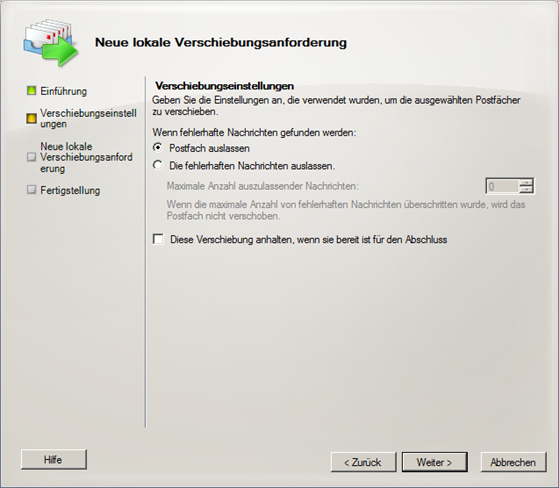
In the next dialog, you can specify whether a mailbox should be moved despite incorrect messages. The incorrect messages are then omitted and not moved.

The mailbox is now moved
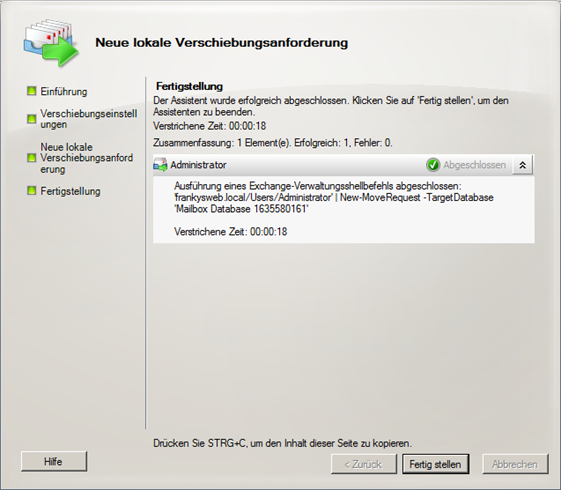

The following command can be used to move a mailbox with the shell:
Get-Mailbox „Bart“ | New-MoveRequest -TargetDatabase „Name der Exchange 2010 Datenbank“


This command can be used to move all mailboxes:
Get-Mailbox | New-MoveRequest -TargetDatabase „Name der Exchange 2010 Datenbank“
This command is sufficient to check the status of the move requests:
Get-MoveRequest


Nun heißt es „Warten“ bis alle Postfächer verschoben sind. Je nach Größe und Anzahl der Postfächer dauert es seine Zeit. Meine Erfahrung hinsichtlich Dauer sind etwa 100MB/min.
Move all public folder replicas to Exchange 2010
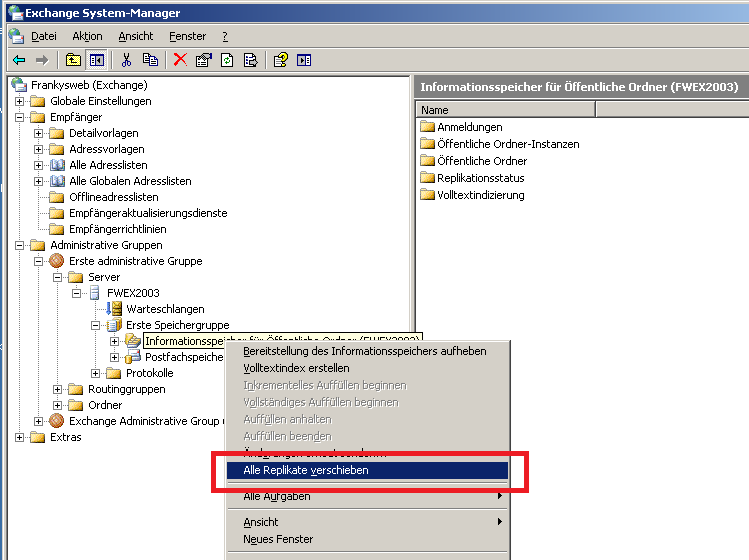
If all mailboxes have been moved to the Exchange 2010 server, Exchange 2003 can be removed as a replication partner for public folders. The replicas can be moved via Exchange 2003 System Manager or via Management Shell:

Management Shell:
.\MoveAllReplicas.ps1 -Server FWEX2003 -NewServer FWEX2010

Wie auf dem Bild zu sehen ist, liegt das Script wieder im Ordner „C:\Program Files\Microsoft\Exchange Server\V14\Scripts“. Damit die Replikation vollständig durchgeführt werden kann empfiehlt es sich hier auch wieder etwas zu warten.
Uninstall Exchange 2003
Um die Migration abzuschließen entfernen wir nun zunächst die Exchange 2003 Sendeconnectoren und die beiden Routinggruppenconnectoren. Mit einem Rechtsklick auf die betreffenden Connectoren öffnet sich das Kontextmenü, mit „Löschen“ werden die Connectoren entfernt.


Now Exchange 2003 can be uninstalled via Control Panel -> Software
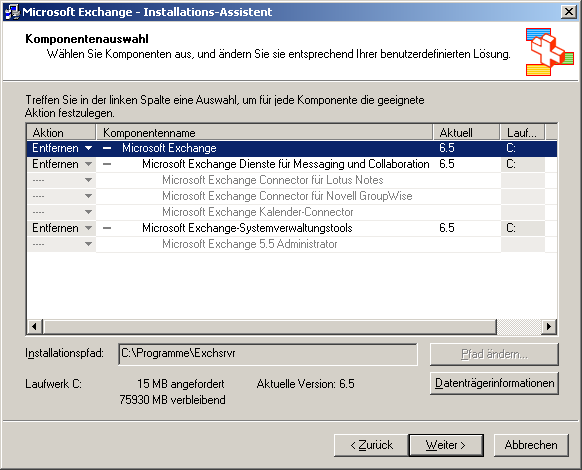

The installation CD is required to uninstall Exchange 2003. After Exchange 2003 has been uninstalled, the server can be removed from the domain (if no other roles are installed) and switched off.