Anyone who has made several Exchange servers highly available via a load balancer uses NTLM for the authentication of Outlook users by default. With a few adjustments, however, Kerberos can also be used for authentication. Compared to NTLM, Kerberos reduces the number of logins compared to the Active Directory, which can lead to better speed. Kerberos is also considered a more secure authentication protocol than NTLM.
In order for Kerberos to be used, the DNS names for the SPNs must first be determined. A highly available Exchange environment will often look something like this:
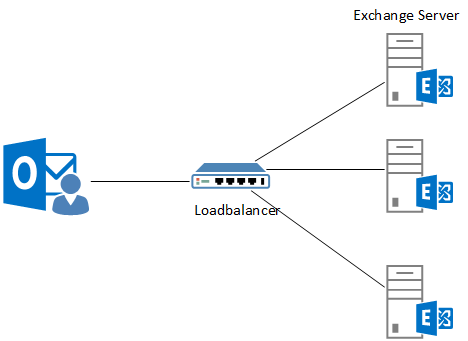
A load balancer is connected upstream of the Exchange servers and distributes the user load evenly across the Exchange servers. The DNS entries for the connection point to the IP address of the load balancer's virtual server. As a rule, the following DNS entries therefore point to the load balancer:
- outlook.domain.tld
- autodiscover.domain.tld
Exactly these DNS entries are relevant for the SPN, which must be registered later. In some environments there may be other DNS names, as OutlookAnywhere and MAPIoberHTTP may use different DNS names. The DNS entries should also exist as HOST-A entries and not as CNAME. Normally, the host names entered on the certificate can also be used here.
Configure Kerberos
In order to use Kerberos authentication, a computer account must first be created. The following command can be used for this:
New-ADComputer -Name EXCH2019ASA -AccountPassword (Read-Host 'Enter new password' -AsSecureString) -Description 'Alternate Service Account credentials for Exchange' -Enabled:$True -SamAccountName EXCH2019ASA -Path "OU=Server,DC=frankysweblab,DC=en"
The Distinguished Name after "-Path" specifies the OU in which the computer account is to be created. The parameter can also be omitted, in which case the account is created in the standard "Computer" OU:

The next command adds the required encryption types to the account. The value 28 indicates that RC4-HMAC, AES128-CTS-HMAC-SHA1-96 and AES256-CTS-HMAC-SHA1-96 are supported:
Set-ADComputer EXCH2019ASA -add @{"msDS-SupportedEncryptionTypes"="28"}

Now the SPNs for the account can be registered. In my case it is "outlook.frankysweblab.de" and "autodiscover.frankysweblab.de". These two SPNs are registered for the new computer account:
setspn -S http/outlook.frankysweblab.de frankysweblab\EXCH2019ASA$
setspn -S http/autodiscover.frankysweblab.de frankysweblab\EXCH2019ASA$

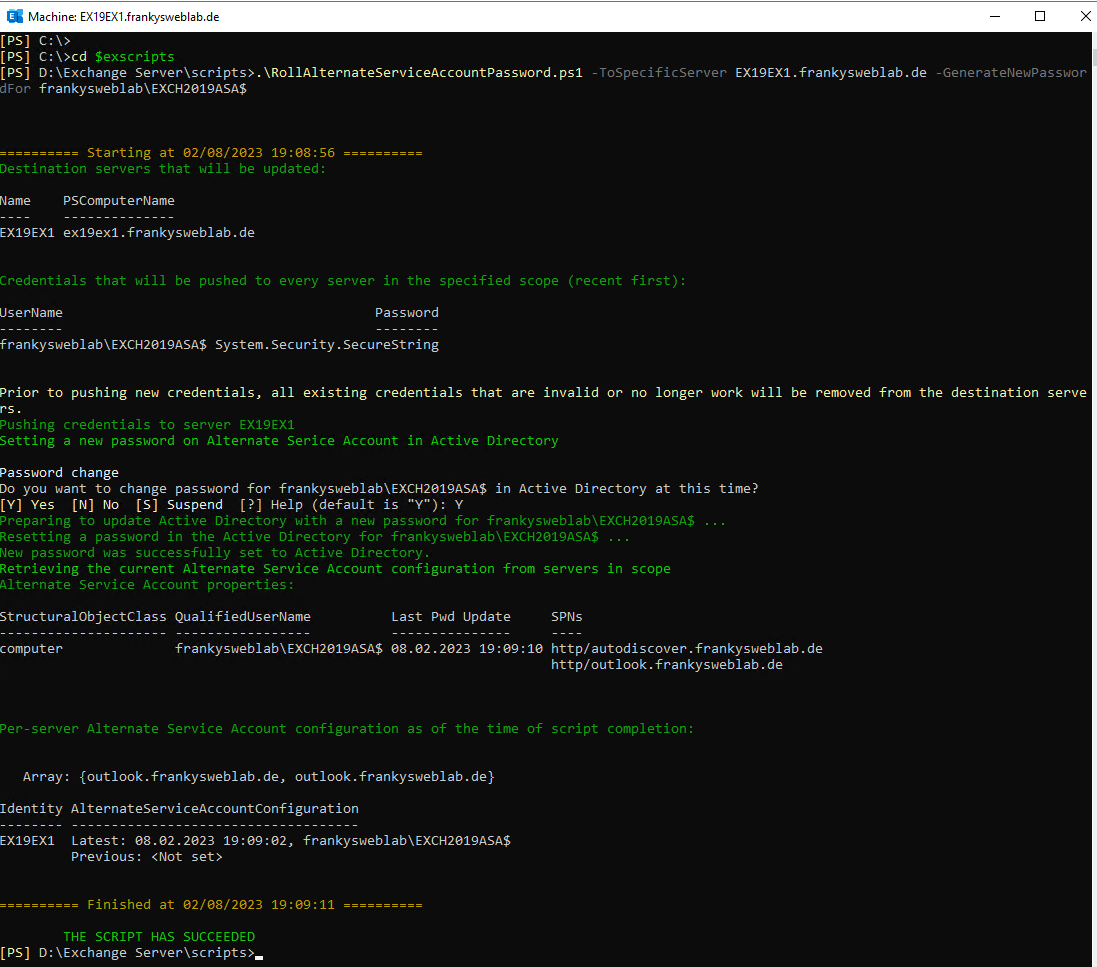
In order for the computer account to be used as a service account for Kerberos authentication, it still needs to be configured on the Exchange servers. On the first Exchange server, a script from the Exchange script directory can be used for this purpose. The script then also generates a new password for the account:
cd $exscripts
.\RollAlternateServiceAccountPassword.ps1 -ToSpecificServer EX19EX1.frankysweblab.de -GenerateNewPasswordFor frankysweblab\EXCH2019ASA$
Once the first Exchange server has been configured, all other Exchange servers can be configured. The following command can be used to copy the settings from the first server (this must be executed on all other Exchange servers):
cd $exscripts
.\RollAlternateServiceAccountPassword.ps1 -ToSpecificServer EX19EX2.frankysweblab.de -CopyFrom EX19EX1.frankysweblab.de
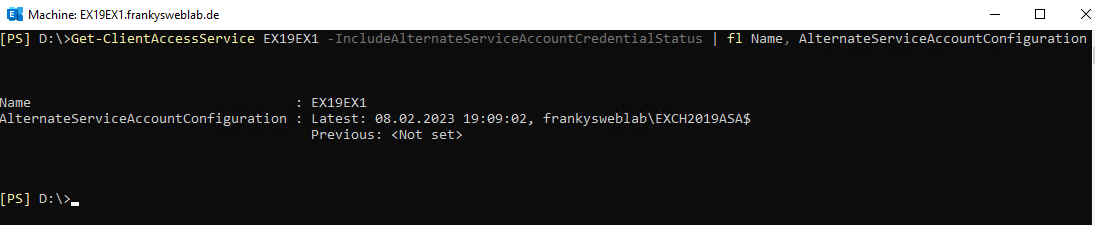
If the account has been configured on all Exchange servers, the settings can be checked with the following command:
Get-ClientAccessService EX19EX1 -IncludeAlternateServiceAccountCredentialStatus | Format-List Name, AlternateServiceAccountConfiguration
The last step is to change the authentication for OutlookAnywhere and MAPIoverHTTP to "Negotiate". The following two commands can be used for this:
Get-OutlookAnywhere -Server EX19EX1 | Set-OutlookAnywhere -InternalClientAuthenticationMethod Negotiate
Get-MapiVirtualDirectory -Server EX19EX1 | Set-MapiVirtualDirectory -IISAuthenticationMethods Ntlm,Negotiate

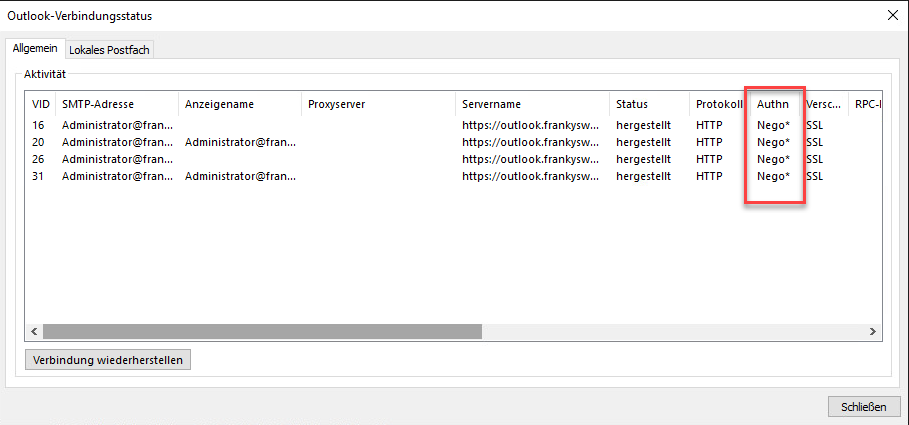
Outlook should now connect to the Exchange servers using Kerberos, but unfortunately this is not displayed directly in the Outlook connection overview. In the Outlook connection overview, however, the value "Nego" should now be displayed in the "Authn" template:
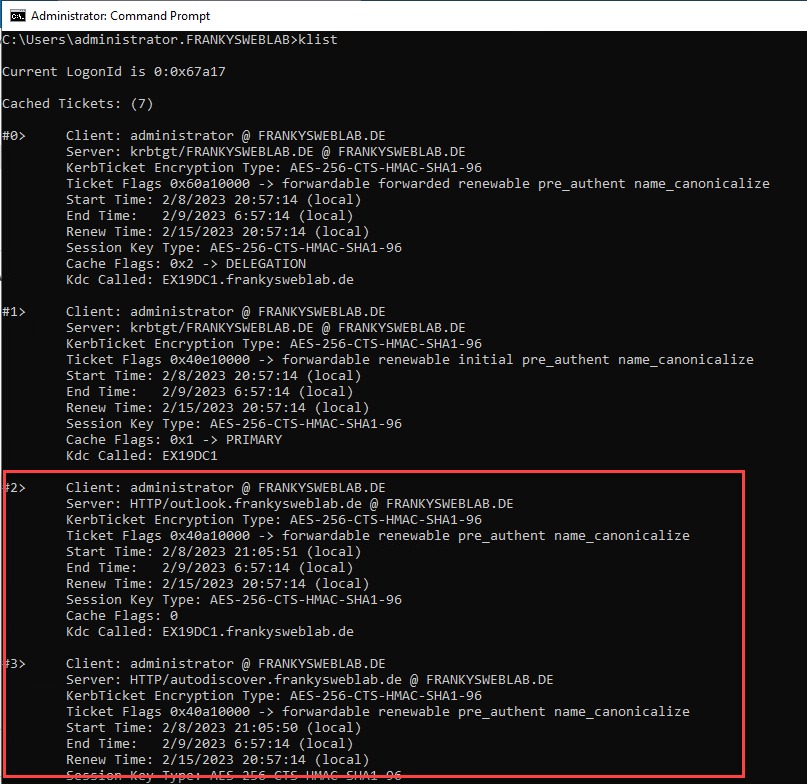
If Kerberos authentication has been successful, the "klist" command displays two Kerberos tickets on the client: