In the last Exchange 2019 Hybrid In the previous article, we discussed the migration of Exchange on-prem mailboxes to Microsoft 365. This last article is about ending hybrid mode and uninstalling the last on-prem Exchange server. Once all mailboxes have been migrated to Microsoft 365 and the synchronization of the local Active Directory accounts with Azure Active Directory has been completed, the on-prem Exchange server can be uninstalled.
Check settings
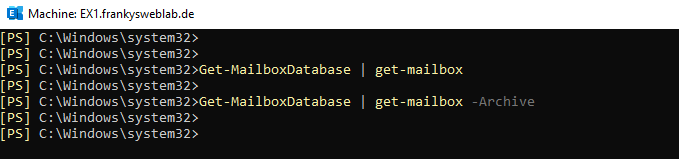
Before exiting hybrid mode, you should check once again to make sure that no more mailboxes are stored on the local Exchange server. The following commands should therefore no longer return any results:
Get-MailboxDatabase | get-mailbox
Get-MailboxDatabase | get-mailbox -Archive
If public folders were in use, this command should also no longer display mailboxes:
Get-MailboxDatabase | get-mailbox -PublicFolder
The MX entry for the email domain must also point to MX from Microsoft 365. Before the on-prem Exchange server is uninstalled, the message tracking logs should also be checked over a longer period of time. This ensures that no local devices are sending emails via Exchange on-prem. It is often the case that one or two devices are still sending status mails or similar via the on-prem Exchange.
Exit Exchange Hybrid Mode
Only a few steps are required to exit Exchange Hybrid Mode. First, the DNS entries on the local DNS server can be adjusted. As a rule, split-split DNS was used for Exchange on-prem. The DNS entries for the local Exchange server can now be deleted here or adjusted for Autodiscover:
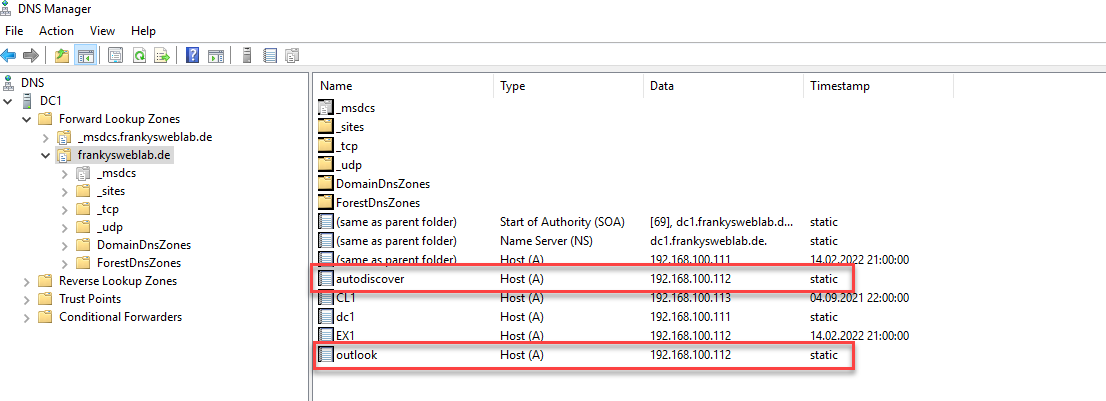
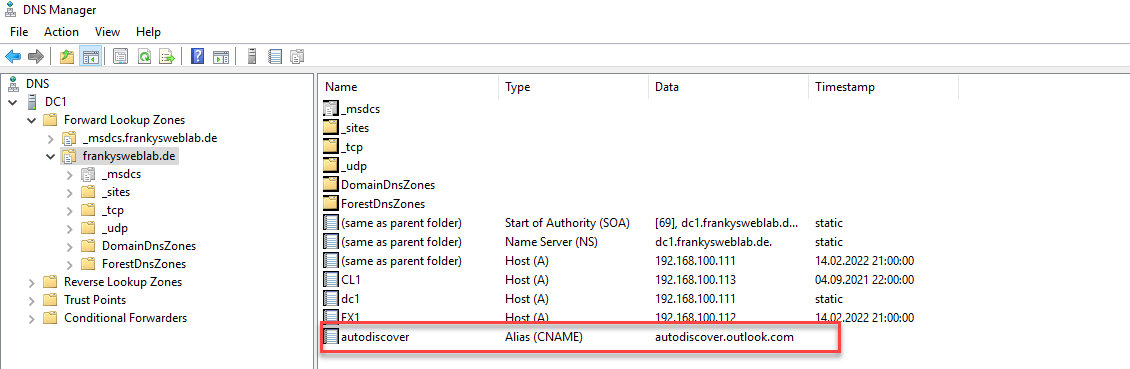
In my case, the entry "outlook.frankysweblab.de" is no longer required, as all clients already connect to Microsoft 365. However, the entry for Autodisocver "autodiscover.frankysweblab.de" is still required. The HOST-A entry "autodiscover.frankysweblab.de" can be seen in the previous screenshot. The Host-A for Autodiscover can be deleted and replaced by a CNAME entry with a reference to "autodiscover.outlook.com":
After the DNS settings have been adjusted, the On-Prem Autodiscover and the IntraOrganization Connector can be deactivated. To do this, the following commands can be executed in the Exchange Admin Shell:
Get-ClientAccessService | Set-ClientAccessService -AutoDiscoverServiceInternalUri $Null
Get-IntraOrganizationConnector | Set-IntraOrganizationConnector -Enabled $false

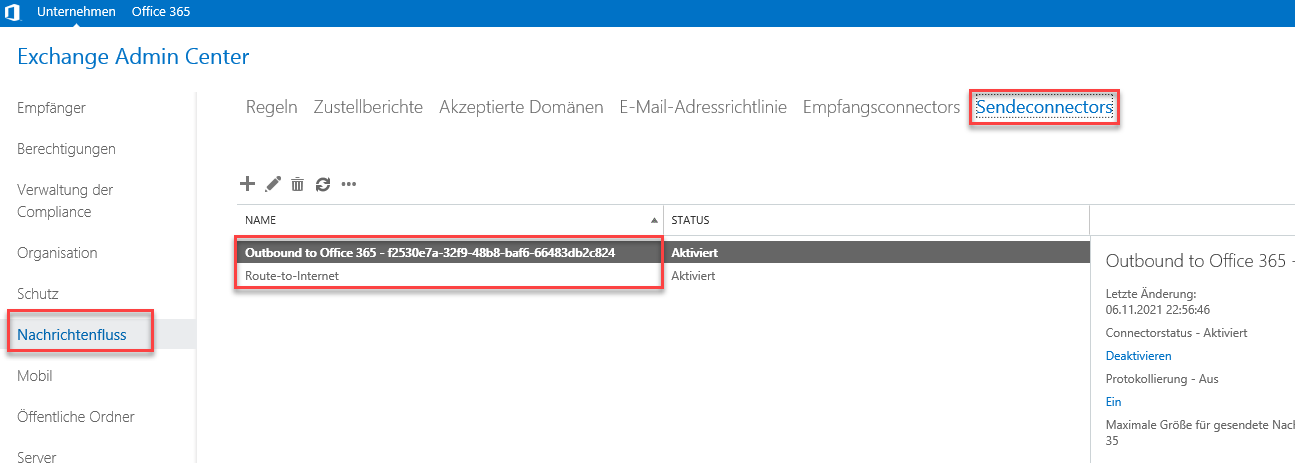
The send connectors can now be deleted in the Exchange Admin Center. As the Exchange on-prem server is to be uninstalled, all send connectors can be deleted here. The on-prem Exchange server is therefore no longer able to deliver emails:
The connectors can now also be deleted in the Exchange Online Admin Center, Exchange Online then no longer routes mails via the local Exchange server:

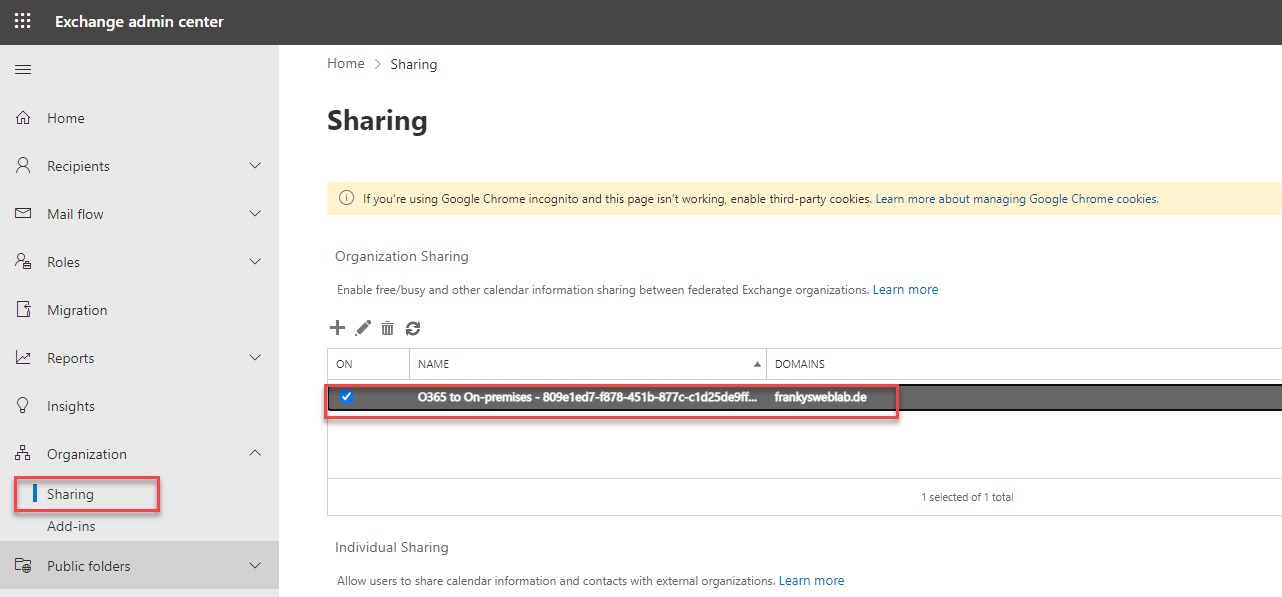
The configuration for the free/busy information can also be deleted:
Deactivate and uninstall Azure AD Connect
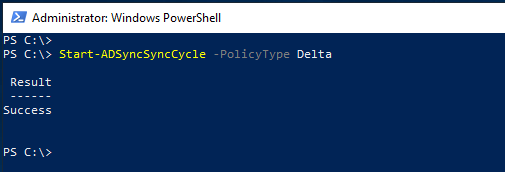
Before uninstalling AAD Connect, it is advisable to carry out one last synchronization:
Start-ADSyncSyncCycle -PolicyType Delta
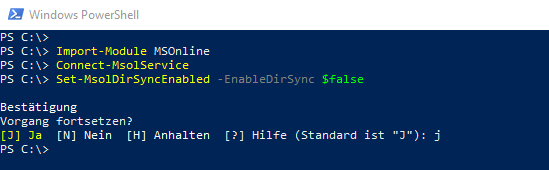
Now the synchronization with AAD Connect is switched off in the Exchange Online Shell:
MSOnline import modules
Connect-MsolService
Set-MsolDirSyncEnabled -EnableDirSync $false
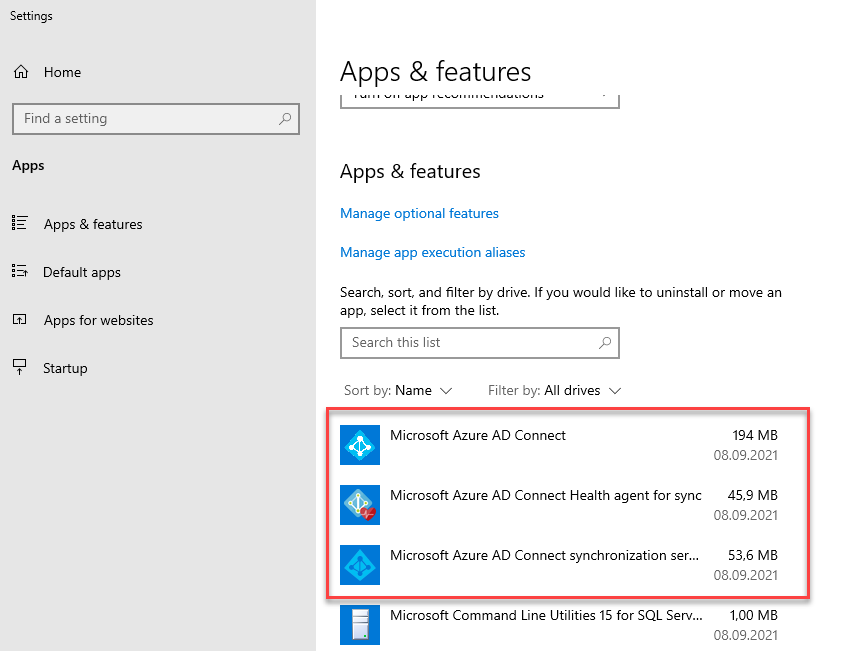
AAD Connect can already be uninstalled now:
The ImmutableID of the user is now deleted in the Exchange Online Shell. The ImmutableID is the objectGUID of the on-prem Active Directory user. Using the ImmutableID, AAD Connect has linked the onPrem AD user with the Azure AD user. As synchronization between AD and AAD no longer takes place, the ImmutableID is no longer required:
Get-MsolUser | where {$_.ImmutableID -ne $NULL} | Set-MsolUser -ImmutableID "$null"
In the Microsoft 365 Admin Center, the users are now displayed as "Cloud Only" users:
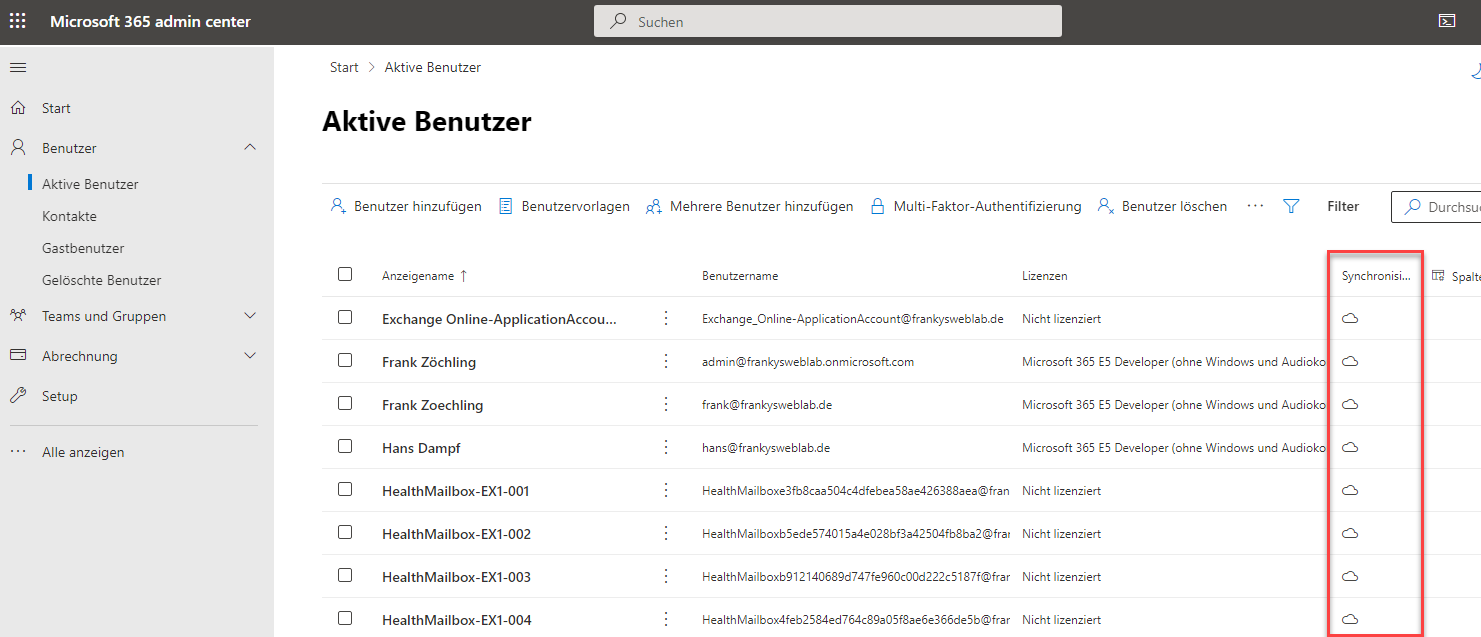
Exchange Online and Exchange on-Prem are now separate worlds again, which also means that there are now 2 user accounts for each user: The local AD account and the Azure AD account. The two accounts must therefore be managed separately from each other from now on (AzureAD and onPrem AD).
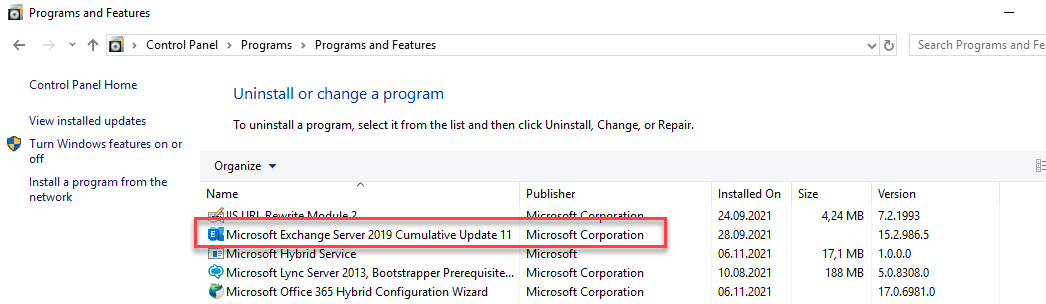
Uninstall Exchange Server
When uninstalling the last Exchange Server, the following error message will appear:
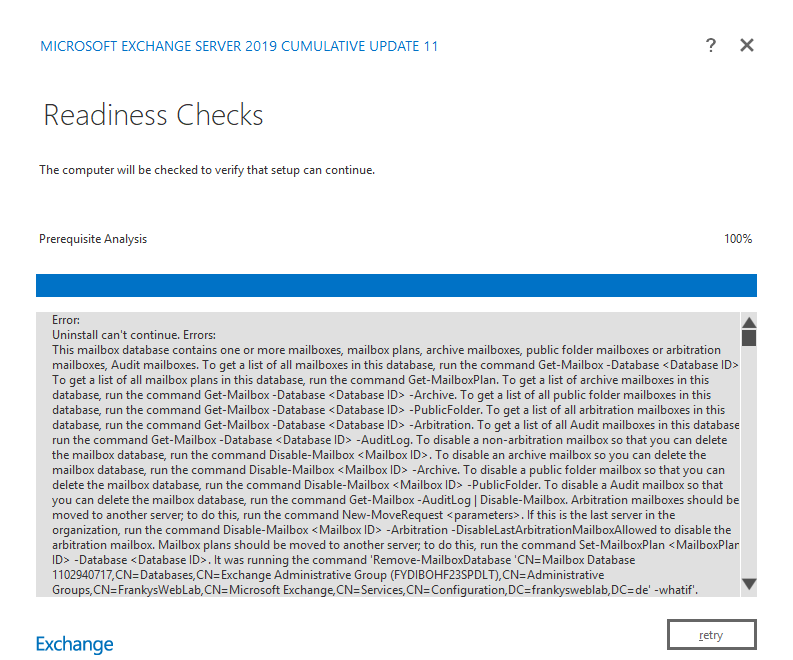
Uninstall can't continue. Errors:
This mailbox database contains one or more mailboxes, mailbox plans, archive mailboxes, public folder mailboxes or arbitration mailboxes, audit mailboxes. To get a list of all mailboxes in this database, run the command Get-Mailbox -Database . To get a list of all mailbox plans in this database, run the command Get-MailboxPlan. To get a list of archive mailboxes in this database, run the command Get-Mailbox -Database -Archive. To get a list of all public folder mailboxes in this database, run the command Get-Mailbox -Database -PublicFolder. To get a list of all arbitration mailboxes in this database, run the command Get-Mailbox -Database -Arbitration. To get a list of all Audit mailboxes in this database, run the command Get-Mailbox -Database -AuditLog. To disable a non-arbitration mailbox so that you can delete the mailbox database, run the command Disable-Mailbox . To disable an archive mailbox so that you can delete the mailbox database, run the command Disable-Mailbox -Archive. To disable a public folder mailbox so that you can delete the mailbox database, run the command Disable-Mailbox -PublicFolder. To disable an Audit mailbox so that you can delete the mailbox database, run the command Get-Mailbox -AuditLog | Disable-Mailbox. Arbitration mailboxes should be moved to another server; to do this, run the command New-MoveRequest . If this is the last server in the organization, run the command Disable-Mailbox -Arbitration -DisableLastArbitrationMailboxAllowed to disable the arbitration mailbox. Mailbox plans should be moved to another server; to do this, run the command Set-MailboxPlan -Database . It was running the command 'Remove-MailboxDatabase 'CN=Mailbox Database 1102940717,CN=Databases,CN=Exchange Administrative Group (FYDIBOHF23SPDLT),CN=Administrative Groups,CN=FrankysWebLab,CN=Microsoft Exchange,CN=Services,CN=Configuration,DC=frankysweblab,DC=en' -whatif'.
For more information, visit: http://technet.microsoft.com/library(EXCHG.150)/ms.exch.setupreadiness.UnwillingToRemoveMailboxDatabase.aspx
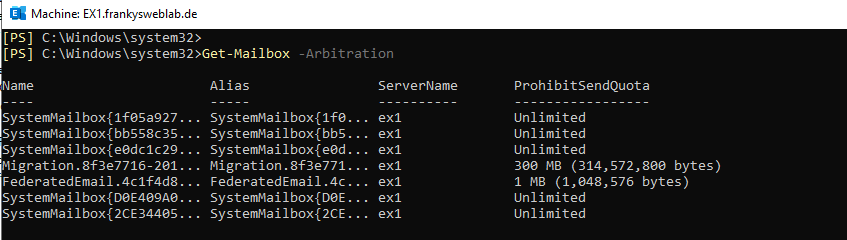
The problem at this point is the arbitration mailboxes which are still stored in the mailbox database:
In this case, the associated Active Directory users can be deleted:
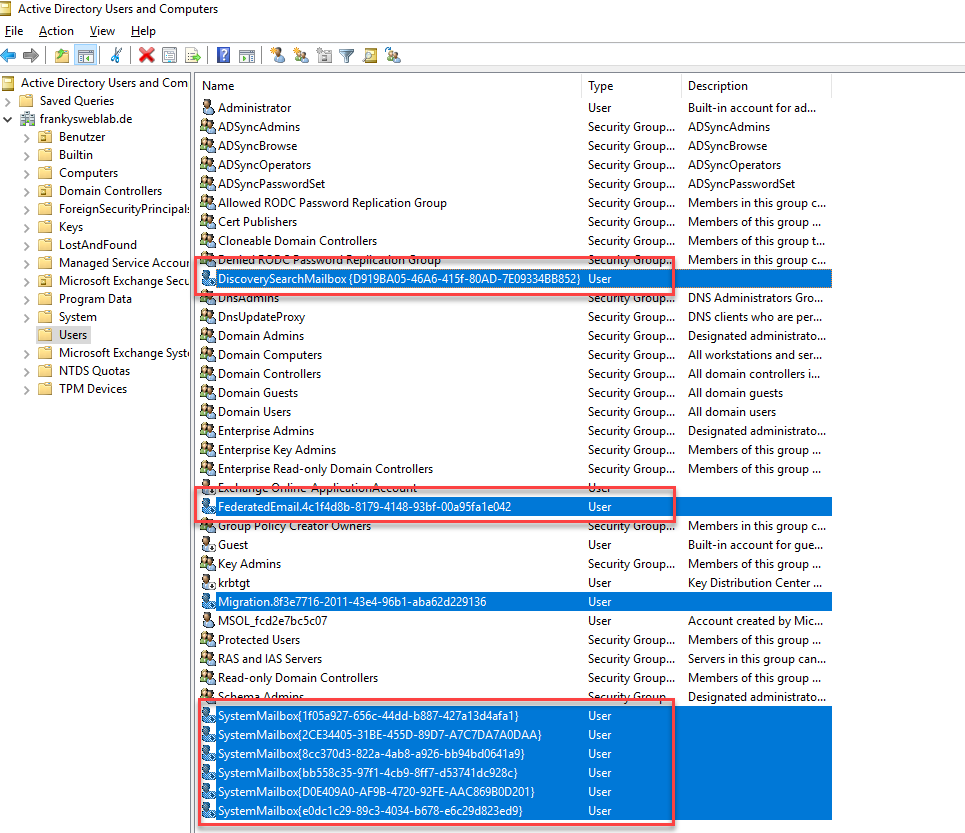
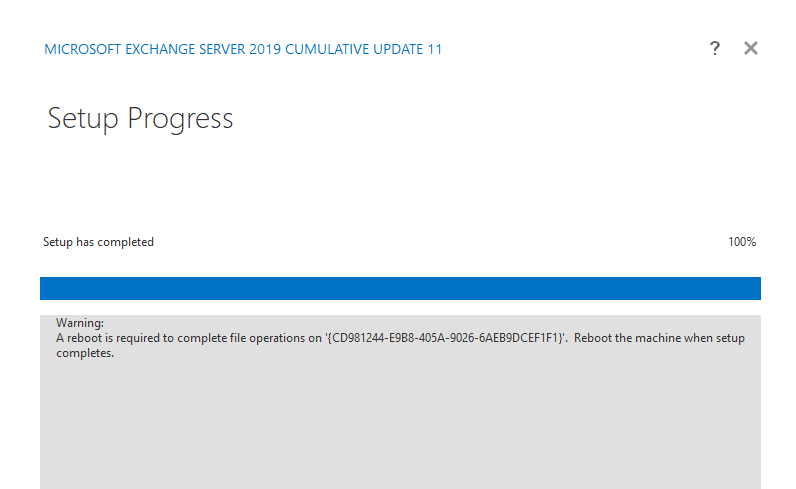
The uninstallation of the last Exchange server should now run successfully:
")
")
: Admin Tiers")
")
")
")
Hallo zusammen,
wie ist das denn jetzt? Muss oder kann ich das Azure Entra ID Connect deinstallieren oder kann ich es laufen lassen, wegen Hashsync und Benutzer Sync?
Also meine Frage bezieht sich auf die Auflösung des Hybriden Exchange Server, wo explizit die Deinstallation durchzuführen ist.
Antwort wäre super.
Hi,
wenn der ADSync weiter genutzt wird und die User On-Premise gepflegt werden, darf der Exchange Server NICHT deinstalliert werden.
Wir haben diesen Weg gewählt.
https://learn.microsoft.com/en-us/exchange/hybrid-deployment/enable-exchange-attributes-cloud-management
Soweit ich erkennen kann, gibt es die MSOnline Befehle zum Deaktivieren von Azure Connect nichtmehr und müssen mit MicrosoftGraph ausgeführt werden.
(Quelle: https://www.alitajran.com/disable-active-directory-synchronization/)
Connect-MgGraph -Scopes „Organization.ReadWrite.All“
Prüfen des aktuellen Stand:
Get-MgOrganization | Select-Object DisplayName, OnPremisesSyncEnabled
Ergebnis:
DisplayName OnPremisesSyncEnabled
———– ———————
EXOIP True
Dekativieren Sync:
$OrgID = (Get-MgOrganization).Id
$params = @{
onPremisesSyncEnabled = $false
}
Update-MgOrganization -OrganizationId $OrgID -BodyParameter $params
Erneute Prüfung:
Get-MgOrganization | Select-Object DisplayName, OnPremisesSyncEnabled
Ergebnis:
DisplayName OnPremisesSyncEnabled
———– ———————
EXOIP
Zur Löschung der Immutable ID habe ich folgende Befehle genutzt:
(Quellen: https://learn.microsoft.com/en-us/answers/questions/1333250/how-to-set-users-onpremisesimmutableid-field-to-nu)
Connect-MgGraph -Scopes „User.ReadWrite.All“
$users = Get-MgUser -All -Property Id,DisplayName,UserPrincipalName,OnPremisesImmutableId | Where-Object {
$_.OnPremisesImmutableId -ne $null
}
foreach ($user in $users) {
$uri = „https://graph.microsoft.com/v1.0/users/$($user.Id)“
$body = @{ onPremisesImmutableId = $null } | ConvertTo-Json -Compress
Invoke-MgGraphRequest -Method PATCH -Uri $uri -Body $body
}
Habe einen „Spezialfall“.
Kann man den lokalen Exchange komplett entfernen (Hybrid-Mode), aber Azure bzw. Entra-Connect zum Abgleich des AD mit MS365 Entra weiter nutzen und dann die Postfächer nur noch online verwalten oder ist hier tatsächlich weiterhin der Exchange erforderlich?
Wenn letzteres -> kann man dann hier die Postfachrolle entfernen (und später nur die Verwaltung updaten)?
Kann man hier dann aber 443 extern zum Exchange schließen oder ist das weiterhin erforderlich?
Danke im voraus für Antworten.
würde mich wirklich auch interessieren. Genau das gleiche würde ich auch machen, vor Allem benötige ich dies für die Kennworthashsynchronisierung.
Ich muss meine Frage nochmals genauer stellen: Ich habe nach Anleitung alles migriert und auch Entra AD Connect am Ende entfernt, der alte Exchange ist entfernt. Nun würde ich gerne auf einer VM wieder Entra installieren für die Kennworthashsynchronisierung, damit Kennwort im lokalen AD gleich ist wie für M365 Dienste.
Es gibt inzwischen eine Möglichkeit. In diesem Fall, wird der Exchange Server nach den nötigen Anpassungen heruntergefahren. Wichtig ist, dass dieser NICHT deinstalliert wird. Es reicht dann ein Client oder Server, auf dem die neuesten Exchange Management Tools installiert wird. Es ist zwar keine reine Cloud Verwaltung aber zumindest muss kein On-Prem Exchange mehr betrieben werden.
Siehe: https://learn.microsoft.com/en-us/Exchange/manage-hybrid-exchange-recipients-with-management-tools
Hallo und vielen Dank für die tolle Anleitung.
Was mich noch interessiert ist, wie es sich mit den Verteilerlisten verhält, die derzeit den Synchronisierungsstatus „von lokal synchronisiert“ haben. Muss ich diese Verteilerlisten neu anlegen oder passiert das automatisch bei der Umstellung?
Vielen Dank für die Info
Gruß
Alex
Erst einmal Dankeschön für diesen ausführlichen Artikel.
Kann ich Azure Connect auch nach der Deinstallation entfernen, also zuerst den Exchange deinstallieren und danach den Connect Client?
Hallo, wenn man im lokalen AD keine Exchange Attribute nutzen würde und sonst auch keine anderen Systeme diese verwenden, was spricht denn dagegen den letzen Exchange Server zu deinstallieren? Werden per AD Connect etwas gesynct was in der Cloud verwendet wird? Es wird ausschließlich Exchange online verwendet.
Der adsync ist der Grund für den lokalen Exchange. Liest denn niemand mal beim Hersteller nach?
„ Wenn die Verzeichnissynchronisierung für einen Mandanten aktiviert ist, und ein Benutzer der lokalen Bereitstellung synchronisiert wird, können die meisten Attribute nicht über Exchange Online verwaltet werden und müssen lokal verwaltet werden. Das liegt nicht an der Hybridkonfiguration, sondern an der Verzeichnissynchronisierung. Selbst wenn Sie die Verzeichnissynchronisierung einsetzen ohne den Hybridkonfigurationsassistenten auszuführen, können Sie die meisten Empfängeraufgaben nicht über die Cloud verwalten.“
https://docs.microsoft.com/de-de/exchange/decommission-on-premises-exchange
„ Es wird häufig die Frage gestellt, ob ein Verwaltungstool eines Drittanbieters oder ADSIEDIT verwendet werden kann. Die Antwort ist, Sie können Sie diese verwenden, aber sie werden nicht unterstützt. Die Exchange-Verwaltungskonsole, das Exchange Admin Center (EAC) und die Exchange Verwaltungsshell sind die einzigen unterstützten Tools, die zum Verwalten von Exchange Empfängern und Objekten verfügbar sind. Wenn Sie sich entscheiden, Verwaltungstools von Drittanbietern zu verwenden, geschieht das auf eigenes Risiko. Drittanbieter-Verwaltungstools funktionieren häufig, aber Microsoft überprüft diese Tools nicht.“
Könnte ich nach der deinstallation des Exchage den Azure Ad Connect wieder neu einrichten, damit ich das lokale ad wider mit der cloud abgleichen kann? (nur halt ohne den loalen msx)
Dann wärst du unsupported unterwegs. Der adsync ist der Grund, warum man den Hybrid Exchange lt. Ms support Statement überhaupt benötigt. Und ja es geht auch ohne exchange, aber dann eben derzeit ohne support.
Ist dies 2025 immer noch der Fall, oder hat es sich geändert?
Hallo,
danke für den Artikel, ich vermisse den Abschnitt bei dem im Hybrid Config Wizzard Transfer Org to cloud durchgeführt wird. Istdas hier nicht notwendig?
Hallo,
den Hybrid Config Wizard deinstallieren vom Exchange.
Anschließend im Online Exchange unter Migration -> oben rechts Endpunkte die bestehenden Endpunkte entfernen.
Fertig.