The second part of the article series "Setting up a hybrid environment" deals with the preparations for Exchange hybrid mode. The Microsoft 365 tenant must be set up accordingly and Azure AD Connect must be installed and configured. The necessary steps are described in this article.
Setting up the Micosoft 365 Tenant is usually done quickly, but access to the domain's hoster is required. You should therefore have the corresponding access data for the hoster and its DNS to hand.
Prepare Microsoft 365 Tenant
First of all, a Microsoft 365 tenant with the corresponding licenses (plans) is required. For an Exchange Hybrid environment, a Microsoft 365 subscription with the Exchange Online feature is required. Exchange Online is included in every Microsoft 365 subscription except for the F1 plan, so you can't really go wrong when selecting the appropriate licenses. The licenses can be mixed within a tenant, the PowerUser could, for example, get E3 or E5 plans, while the "normal user" only gets cheaper licenses with fewer features. A comparison between the plans can be found here:
Tip: The Microsoft 365 plans do not necessarily have to be purchased directly from Microsoft. It may be worthwhile to obtain the plans via a Cloud Solution Provider (CSP). CSPs can usually offer the plans at a slightly lower price and may also provide support with services and know-how. Microsoft also offers free trial versions for test environments and the Microsoft Visual Studio subscription also includes 25 E5 Developer plans.
As soon as you have purchased the corresponding plans, the tenant is created and can then be accessed via the "Microsoft 365 Admin Center". The Admin Center can be found at the following URL:
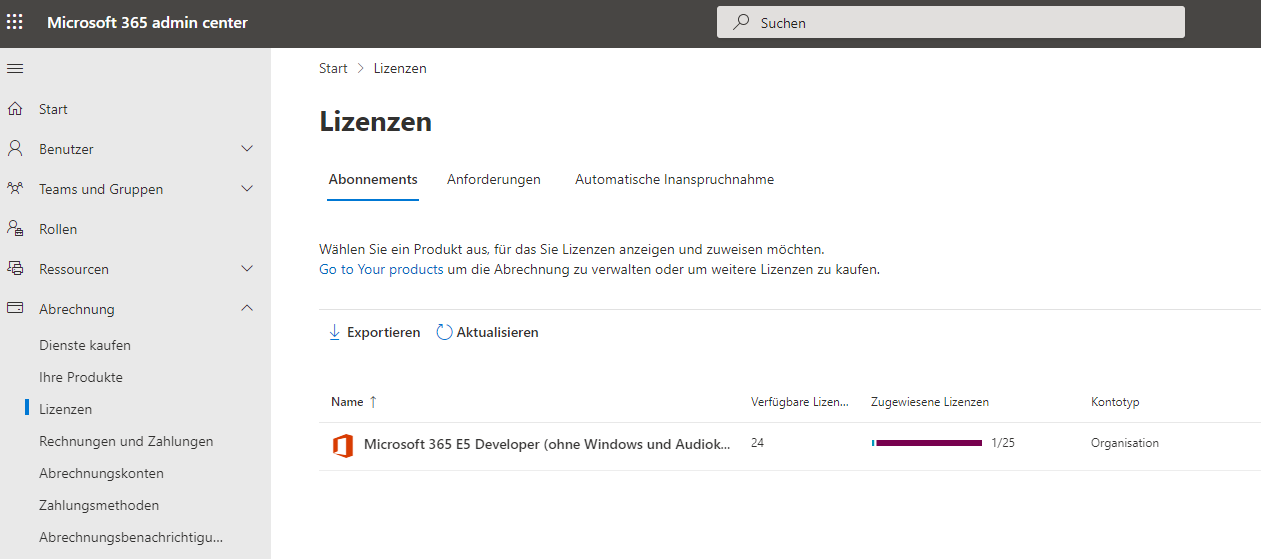
After registration, the purchased licenses / plans can be found under "Billing / Licenses":
For an Exchange Hybrid environment, there is little configuration work to be done in the tenant itself. Essentially, it is sufficient to register the SMTP domain(s). In my lab environment, I only use the SMTP domain frankysweblab.de, so I only need to add this domain to the M365 tenant. The domains can be added under "Settings / Domains":
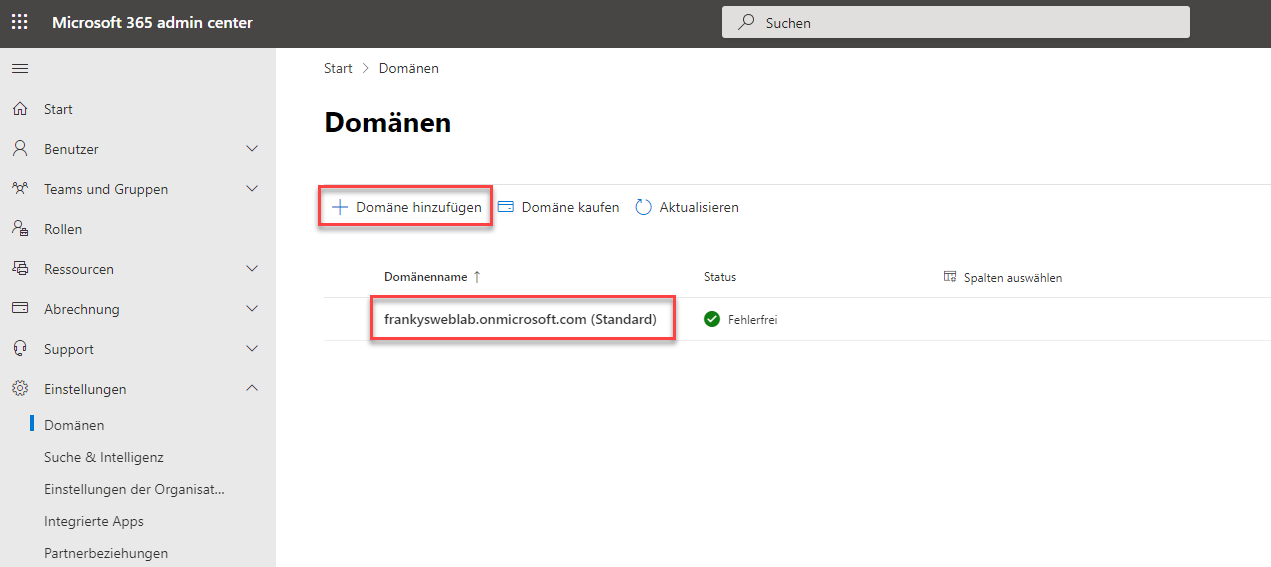
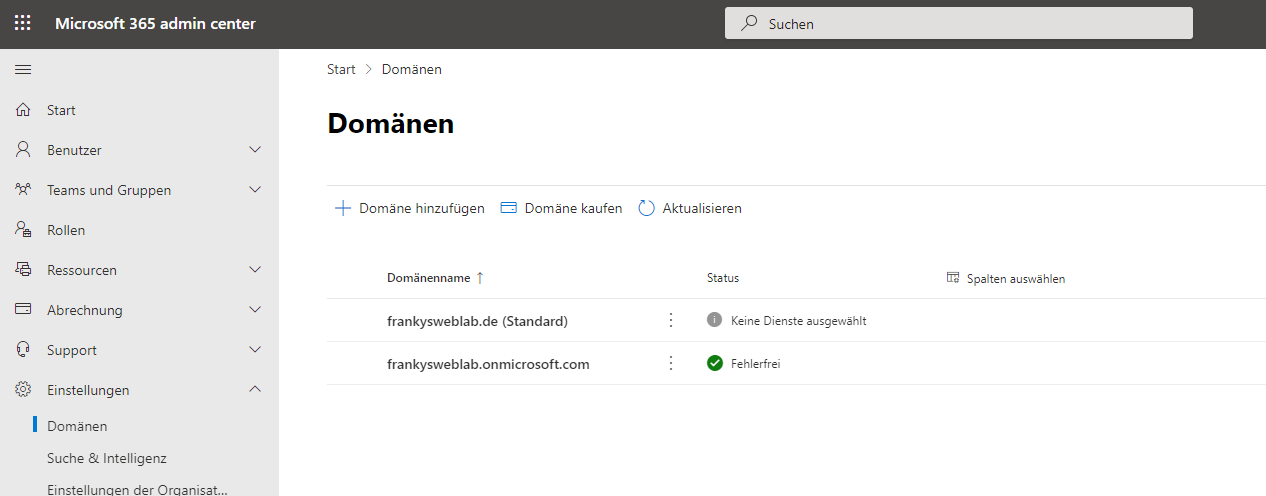
In the overview of domains, there is already a default domain that ends with the name .onmicrosoft.com. This is the name of the Azure Active Directory, which was automatically created when the tenant was provisioned. Using "Add domain", you can now add further domains, in my case the domain "frankysweblab.de":

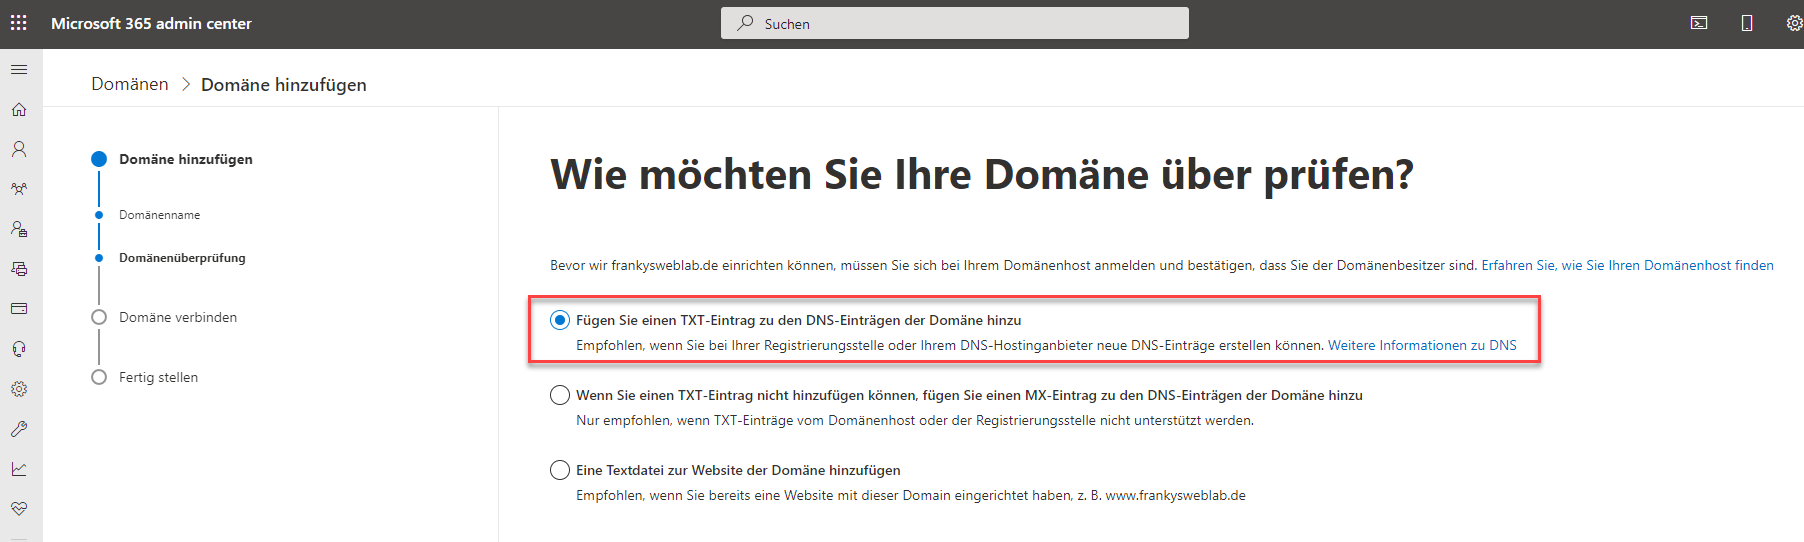
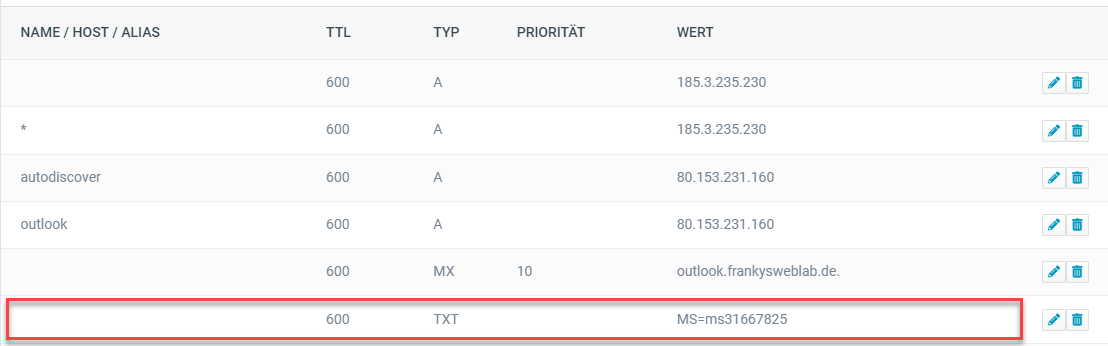
In the next dialog of the wizard, the domain must be checked. Actually, this only checks whether you are the owner of the domain. In order for the domain to be checked by Microsoft, it is sufficient to enter a DNS TXT record in the public DNS:
The required DNS TXT record is displayed in the next dialog of the wizard. This DNS TXT record must now be created with the hoster of the domain:
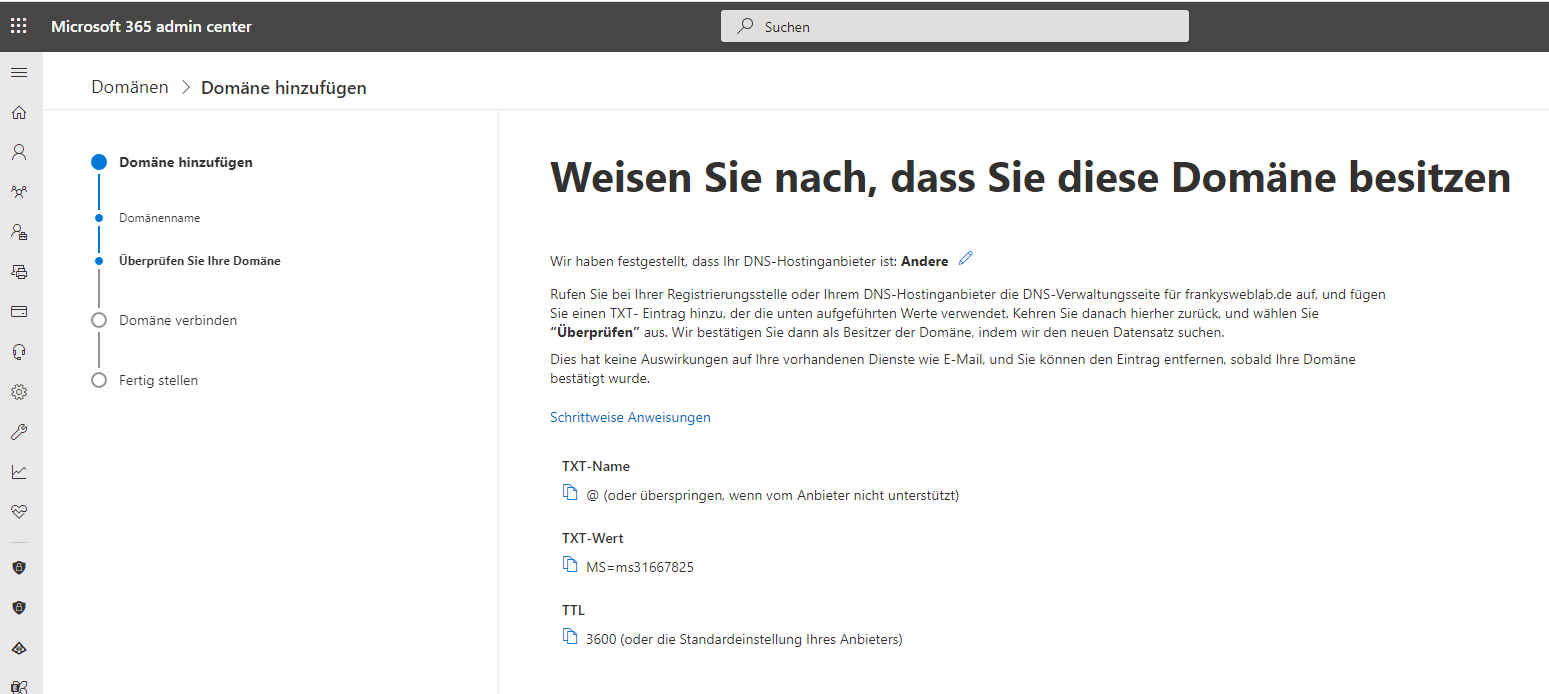
I have now made this TXT entry with my hoster, depending on the hoster this will of course look slightly different:
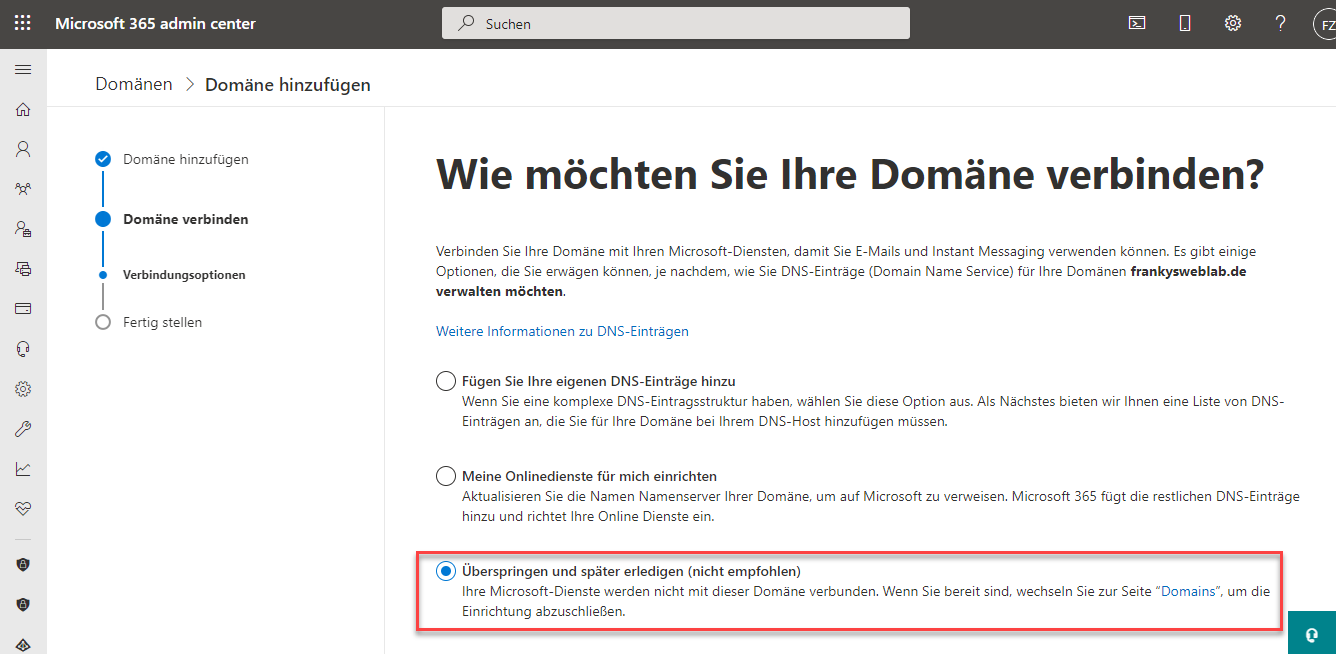
Under "Connection options", I initially selected "Other options":

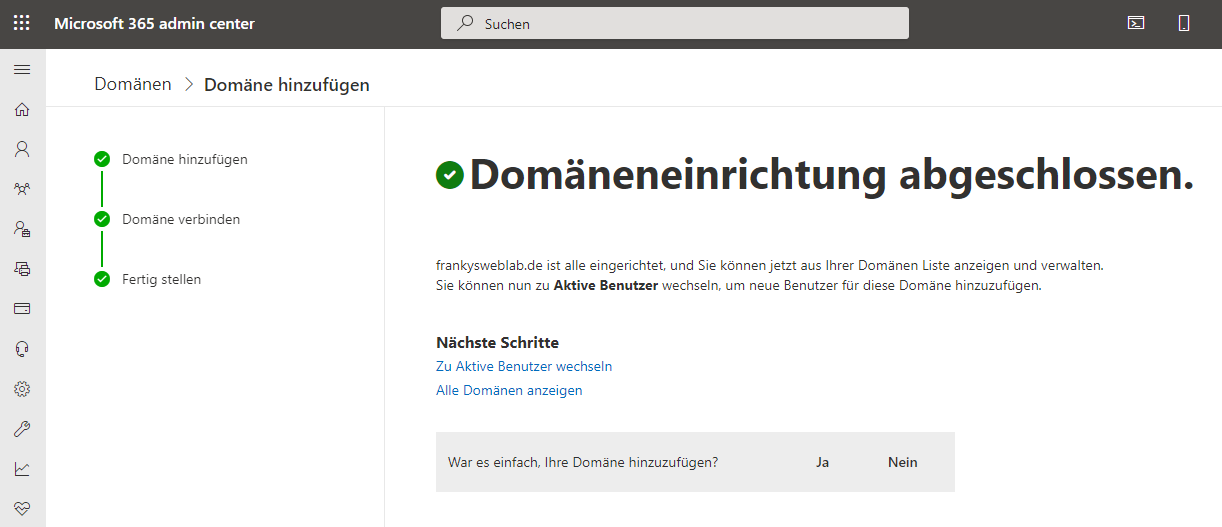
Once the domain has been set up, the domain set up first becomes the new default domain. The rest of the configuration will only become important later.
Optional: Non-public domains (.local / .firma / .company)
Many companies have previously used non-resolvable domains for the Active Directory, for example firmenname.local, firma.company or firma.intern. These domain names are not unique and cannot be resolved by the public DNS, so these domain names cannot be used for Microsoft 365. So that an ActiveDirectory with .local or similar in the name can also be used with Microsoft 365, an "Alternate UPN suffix" must first be created:
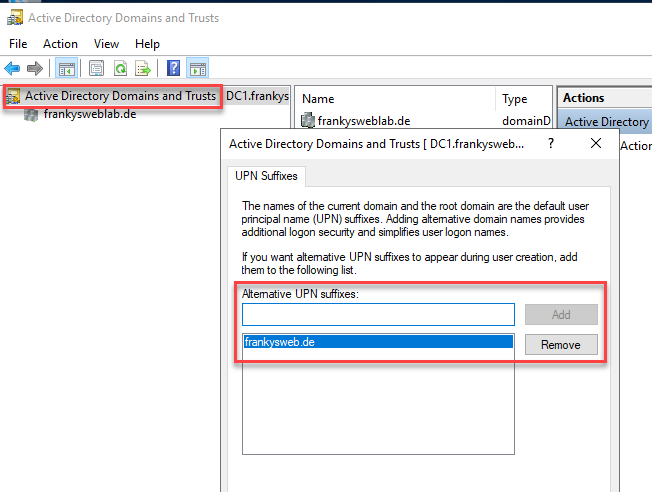
For an Active Directory with the name frankysweb.local, for example, the alternative UPn suffix frankysweb.de can be entered. The domain frankysweb.de can then be used and added in Microsoft 365 as described above.
If an alternative UPN is used, the corresponding suffix must be assigned to all Microsoft 3655 users:
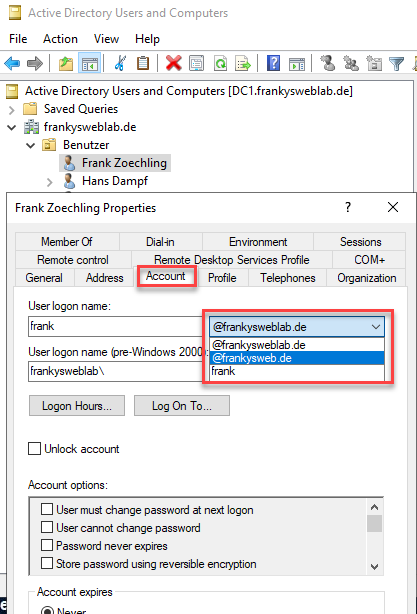
As soon as all users have been provided with the new suffix, you can continue with the next step.
Detect and fix problems with IdFix
Now that the tenant has been set up and the next step is to install Azure Active Directory Connect, you should check in advance whether there are any problematic users or groups for which synchronization using AAD Connect will fail. The small Microsoft tool IdFix helps to identify such accounts and fix the problems. IdFix can be downloaded here:
IdFix recognizes the most common problems with users and groups and also suggests a practical solution directly. Mass processing is also possible. So there is no harm in using the tool and fixing problems in advance if necessary.
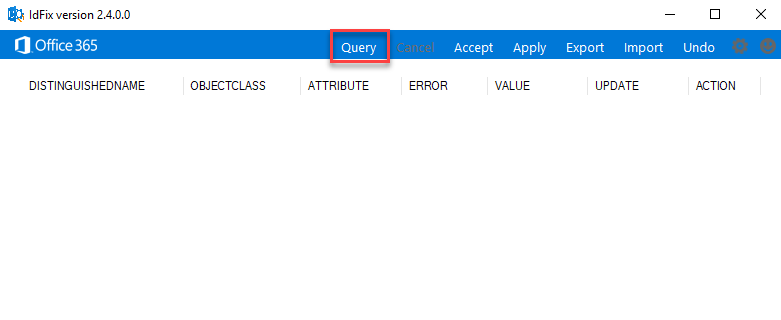
If no more problems are displayed, you can continue with the installation of Azure Active Directory Connect.
Azure Active Directory Connect
Once the Microsoft 365 tenant has been set up, "Azure Active Directory Connect (AADConnect)" can now be installed and configured. AADConnect is used to synchronize the user accounts and groups from the on-prem Active Directory to Azure Active Directory. This allows users to log in to Microsoft 365 with their on-prem Active Directory user name and password. AADConnect is a prerequisite for an Exchange Hybrid environment.
AADConnect can be downloaded here:
In my lab environment I install AADConnect on the domain controller DC1, but in a productive environment I would choose a separate server.
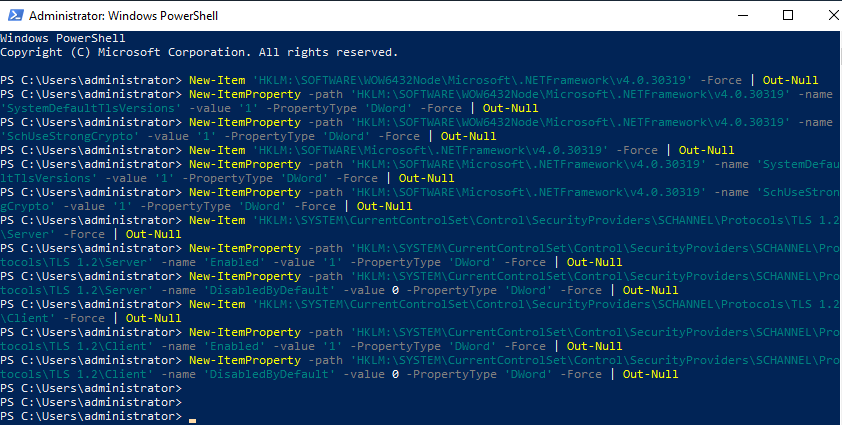
TLS1.2 must be activated for AADConnect to be installed. If TLS1.2 is not already activated, it can be activated with the following PowerShell script:
New-Item 'HKLM:\SOFTWARE\WOW6432Node\Microsoft\.NETFramework\v4.0.30319' -Force | Out-Null
New-ItemProperty -path 'HKLM:\SOFTWARE\WOW6432Node\Microsoft\.NETFramework\v4.0.30319' -name 'SystemDefaultTlsVersions' -value '1' -PropertyType 'DWord' -Force | Out-Null
New-ItemProperty -path 'HKLM:\SOFTWARE\WOW6432Node\Microsoft\.NETFramework\v4.0.30319' -name 'SchUseStrongCrypto' -value '1' -PropertyType 'DWord' -Force | Out-Null
New-Item 'HKLM:\SOFTWARE\Microsoft\.NETFramework\v4.0.30319' -Force | Out-Null
New-ItemProperty -path 'HKLM:\SOFTWARE\Microsoft\.NETFramework\v4.0.30319' -name 'SystemDefaultTlsVersions' -value '1' -PropertyType 'DWord' -Force | Out-Null
New-ItemProperty -path 'HKLM:\SOFTWARE\Microsoft\.NETFramework\v4.0.30319' -name 'SchUseStrongCrypto' -value '1' -PropertyType 'DWord' -Force | Out-Null
New-Item 'HKLM:\SYSTEM\CurrentControlSet\Control\SecurityProviders\SCHANNEL\Protocols\TLS 1.2\Server' -Force | Out-Null
New-ItemProperty -path 'HKLM:\SYSTEM\CurrentControlSet\Control\SecurityProviders\SCHANNEL\Protocols\TLS 1.2\Server' -name 'Enabled' -value '1' -PropertyType 'DWord' -Force | Out-Null
New-ItemProperty -path 'HKLM:\SYSTEM\CurrentControlSet\Control\SecurityProviders\SCHANNEL\Protocols\TLS 1.2\Server' -name 'DisabledByDefault' -value 0 -PropertyType 'DWord' -Force | Out-Null
New-Item 'HKLM:\SYSTEM\CurrentControlSet\Control\SecurityProviders\SCHANNEL\Protocols\TLS 1.2\Client' -Force | Out-Null
New-ItemProperty -path 'HKLM:\SYSTEM\CurrentControlSet\Control\SecurityProviders\SCHANNEL\Protocols\TLS 1.2\Client' -name 'Enabled' -value '1' -PropertyType 'DWord' -Force | Out-Null
New-ItemProperty -path 'HKLM:\SYSTEM\CurrentControlSet\Control\SecurityProviders\SCHANNEL\Protocols\TLS 1.2\Client' -name 'DisabledByDefault' -value 0 -PropertyType 'DWord' -Force | Out-Null
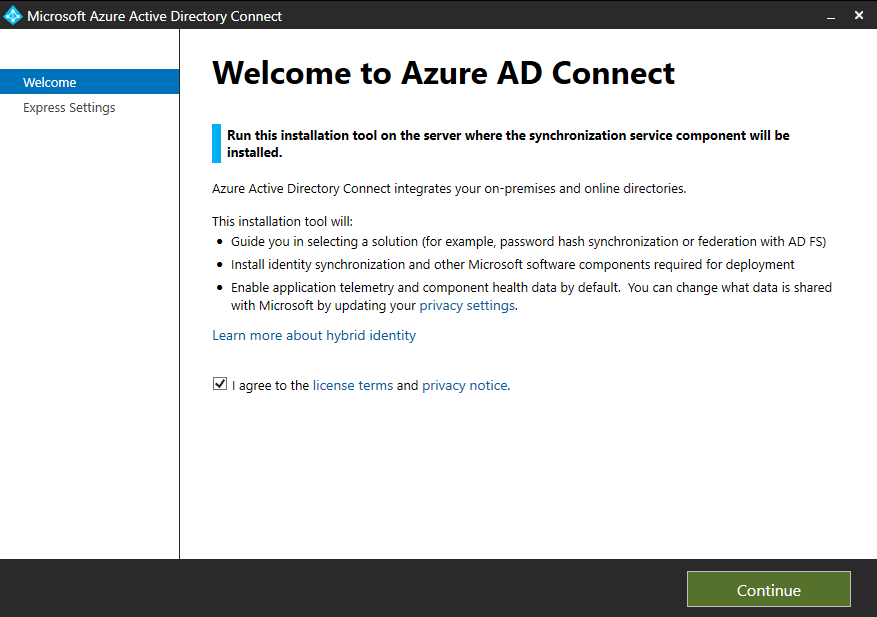
The installation of Azure AD Connect is done quickly:
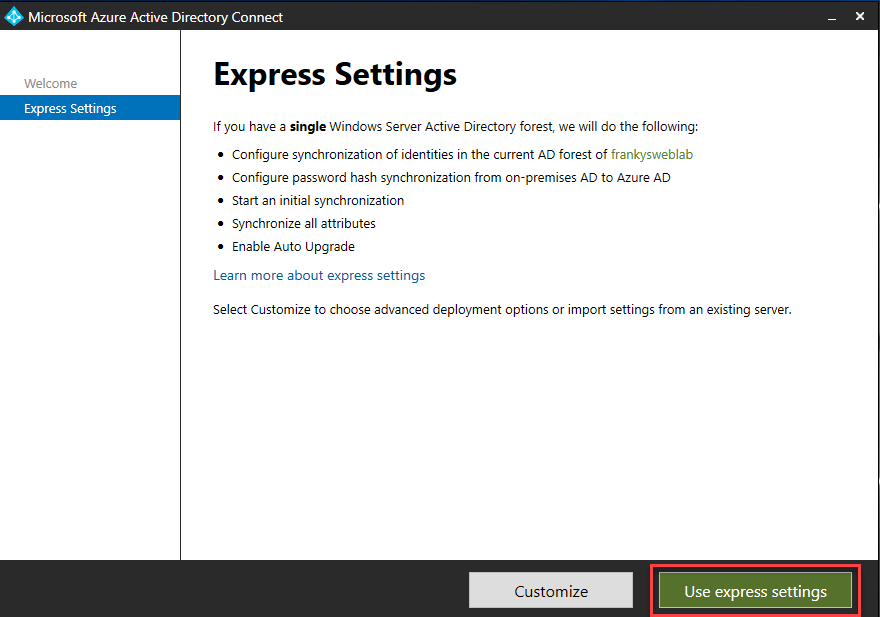
The "Express Settings" synchronize all local AD accounts and activate "Password Hash Synchronization". Specifically, this means that all local accounts and the password hashes (not the plain text passwords) are synchronized to Azure Active Directory. If required, the user accounts to be synchronized can be filtered based on groups or OUs ("Customize" button). It is also possible to replace Password Hash Synchronization with Pass-Through Authentication. For most people, however, Password Hash Sync is probably the simplest option:
In the next step, the connection to Azure Active Directory must be established. The global admin that was used during the installation of the M365 tenant can be used here:

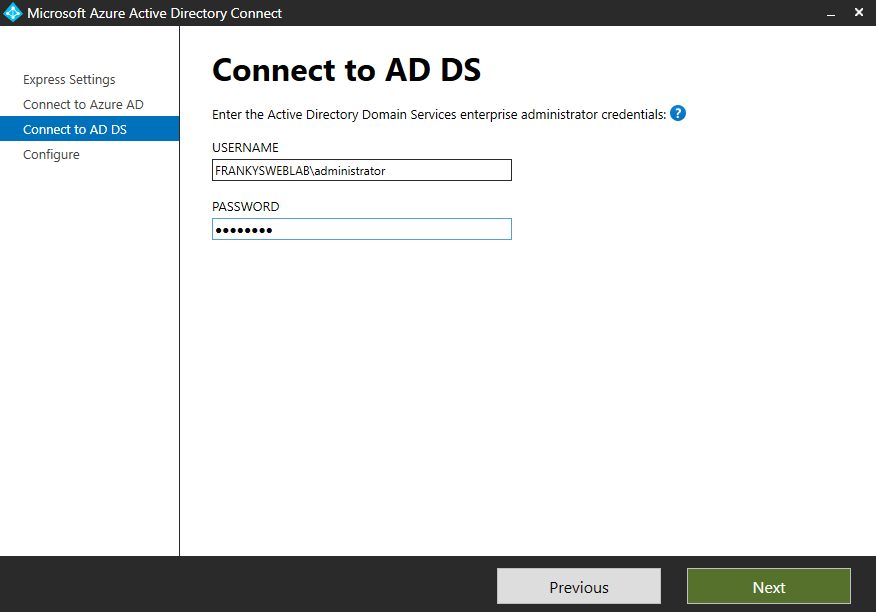
The credentials of an administrator who is a member of the "Enterprise Admins" group are also required to connect to the local AD. There is no need to set up a service account here, as AADConnect creates a "Managed Service Account" during installation:
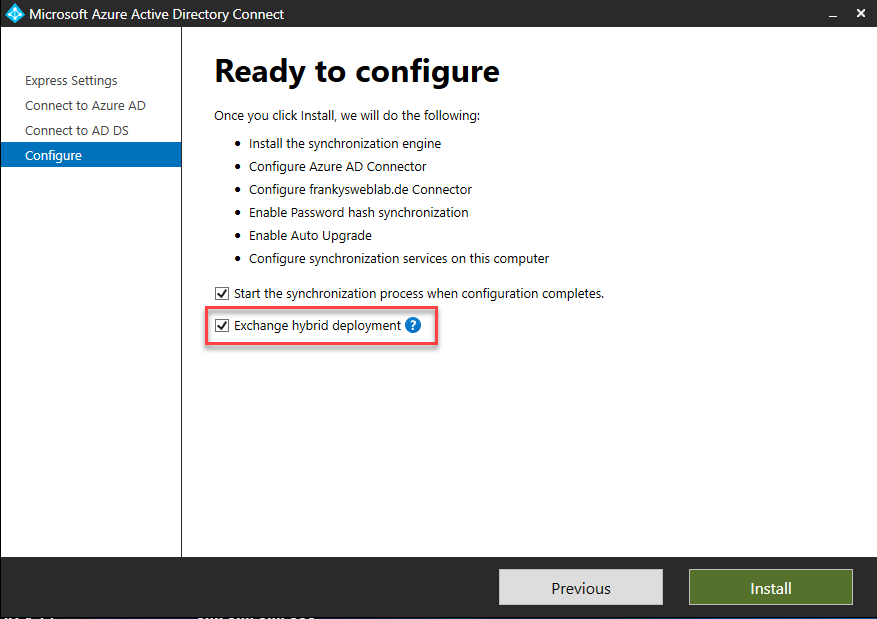
In the last dialog before the installation, it is important that the "Exchange hybrid deployment" checkbox is activated:
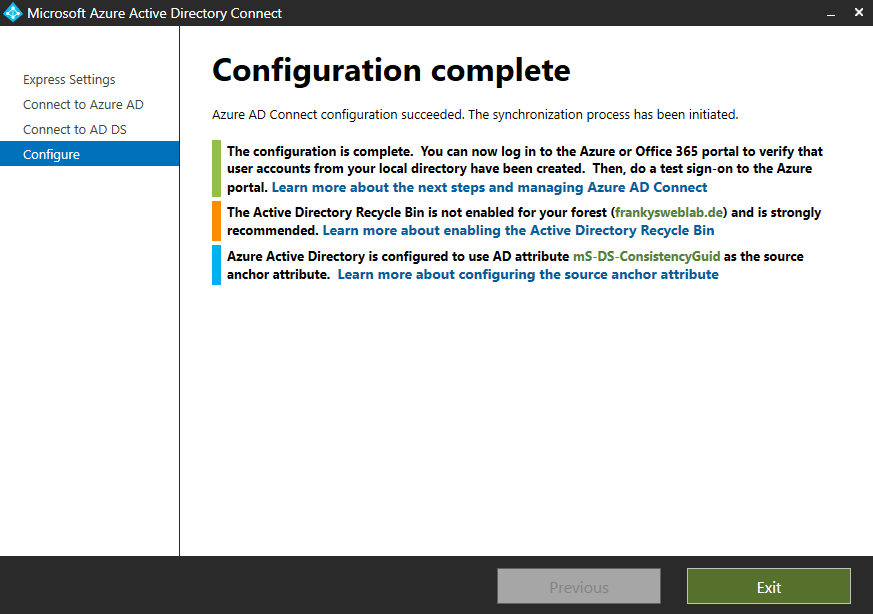
After the installation, a short summary is displayed. If, like me, the "AD recycle bin" has not yet been activated, this should be done now:
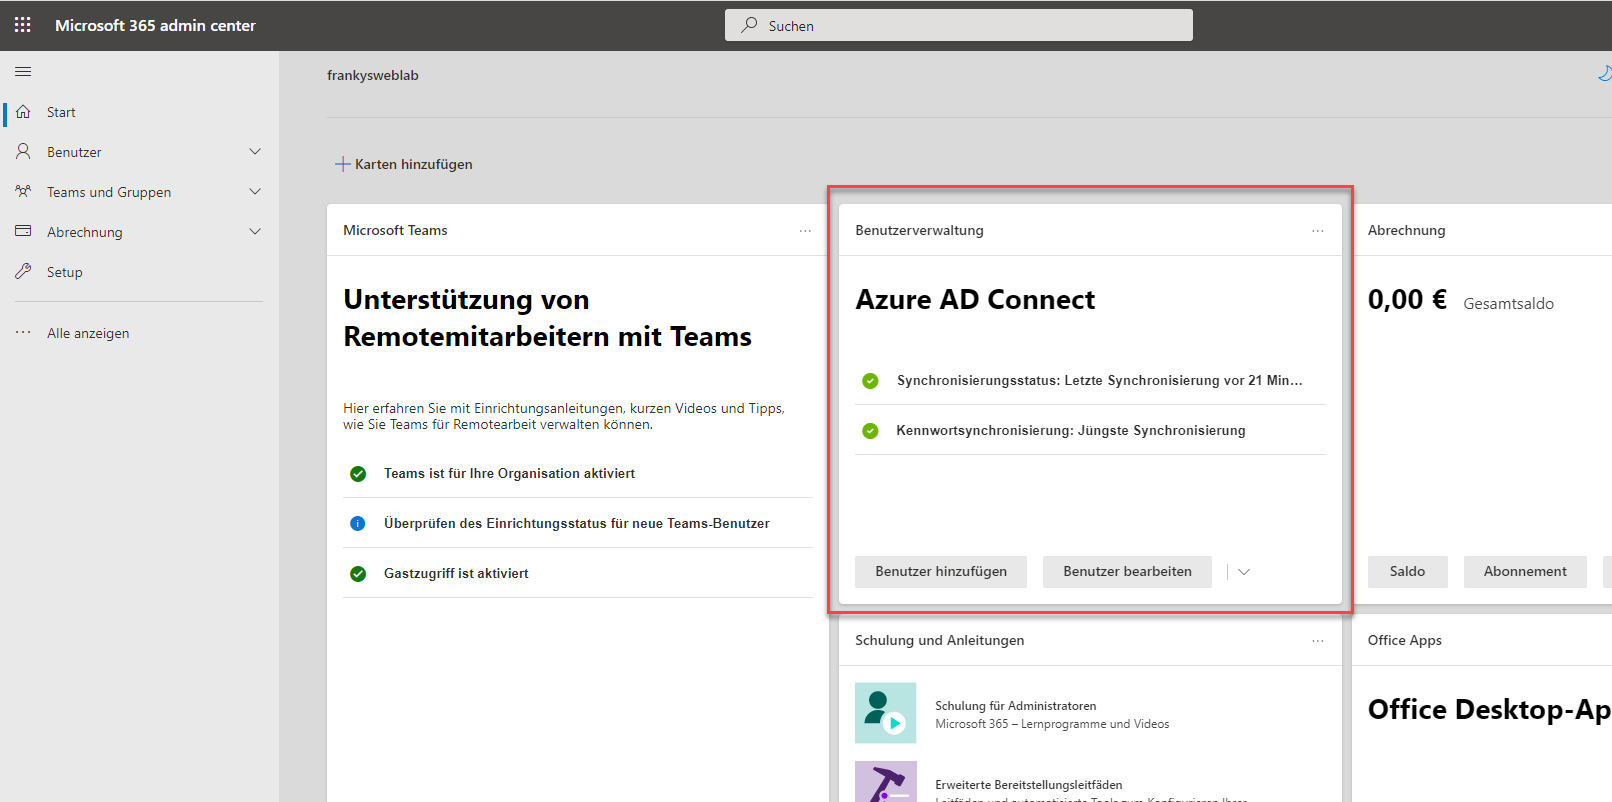
The initial synchronization takes a few minutes, but then the status should be visible in the M365 Admin Portal:
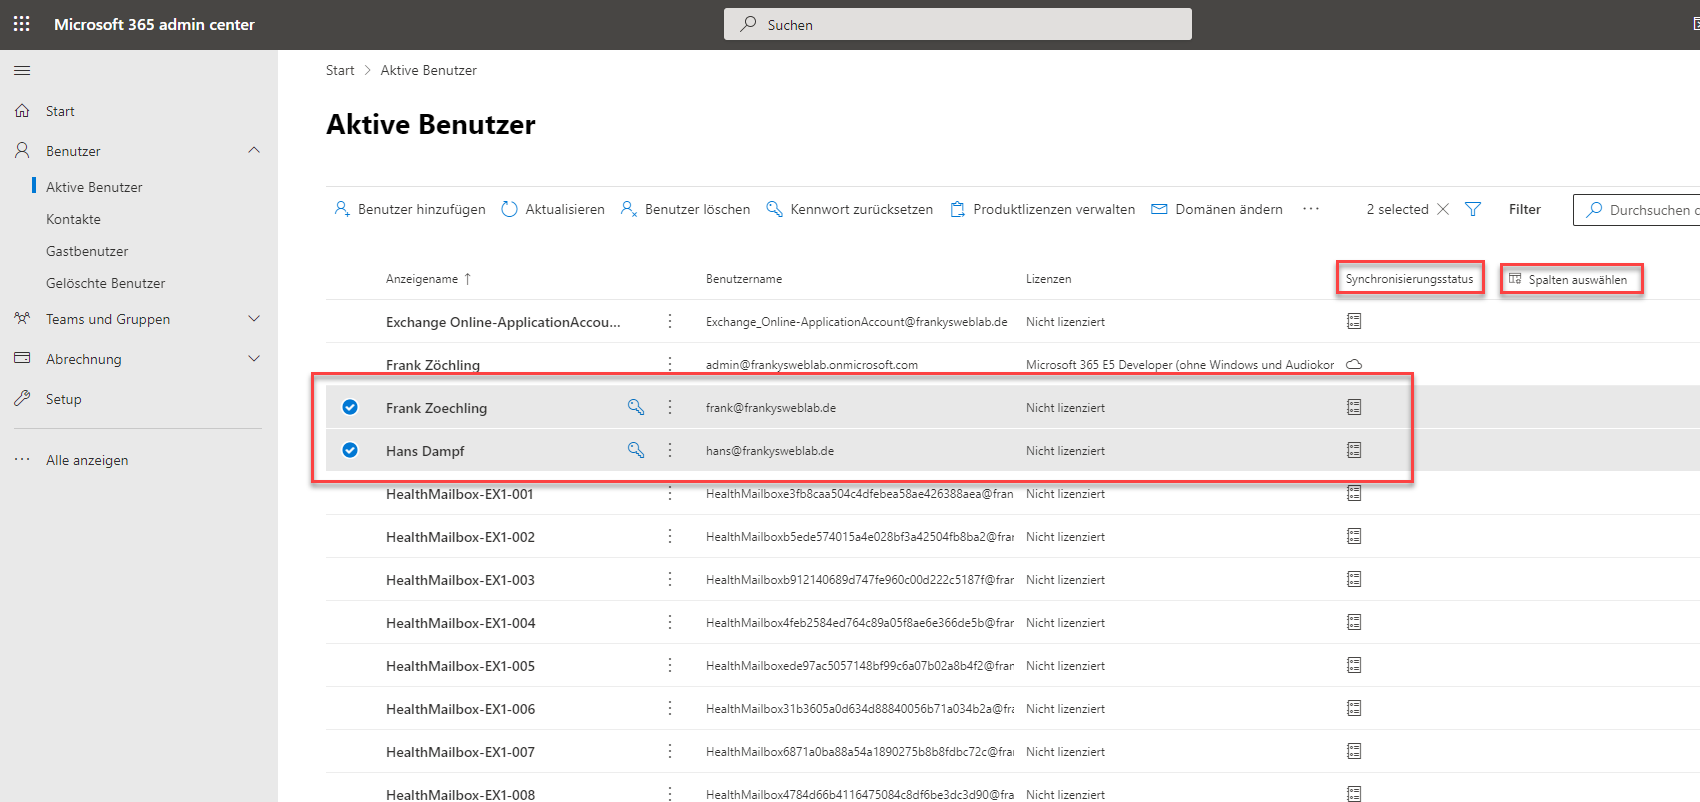
I am already assigning a corresponding license to my two test users here:

What happens next?
The next article deals with the installation and configuration of the Exchange Hybrid Configuration Wizard (HCW). The HCW activates Exchange Hybrid Mode and enables mailboxes to be moved between on-prem and Microsoft 365.
")
")
")

")
")

Kann ich zum Test auch nur mal einzelne User auf den „neuen“ Domainname umstellen? ODer macht das Probleme?