The fourth part of this article series deals with the necessary adjustments to the DNS and the first tests. In part 3, the Exchange Hybrid configuration was completed to such an extent that only a small amount of configuration is now required. Essentially, once the SPF entry has been adjusted, testing can begin.
Customize DNS settings (SPF)
To ensure that emails can also be sent from Microsoft 365 accounts later on, it is necessary to adjust the SPF entry for your own domain. In a hybrid environment, it is usually necessary that emails can be sent from Microsoft 365 accounts to external email addresses as well as from the on-prem Exchange server to external addresses. To do this, the own SPF entry must not be changed as recommended by the Microsoft 365 Assistant, but extended.
The necessary settings for the SPF entry can be found in the Microsoft 365 Admin Center:
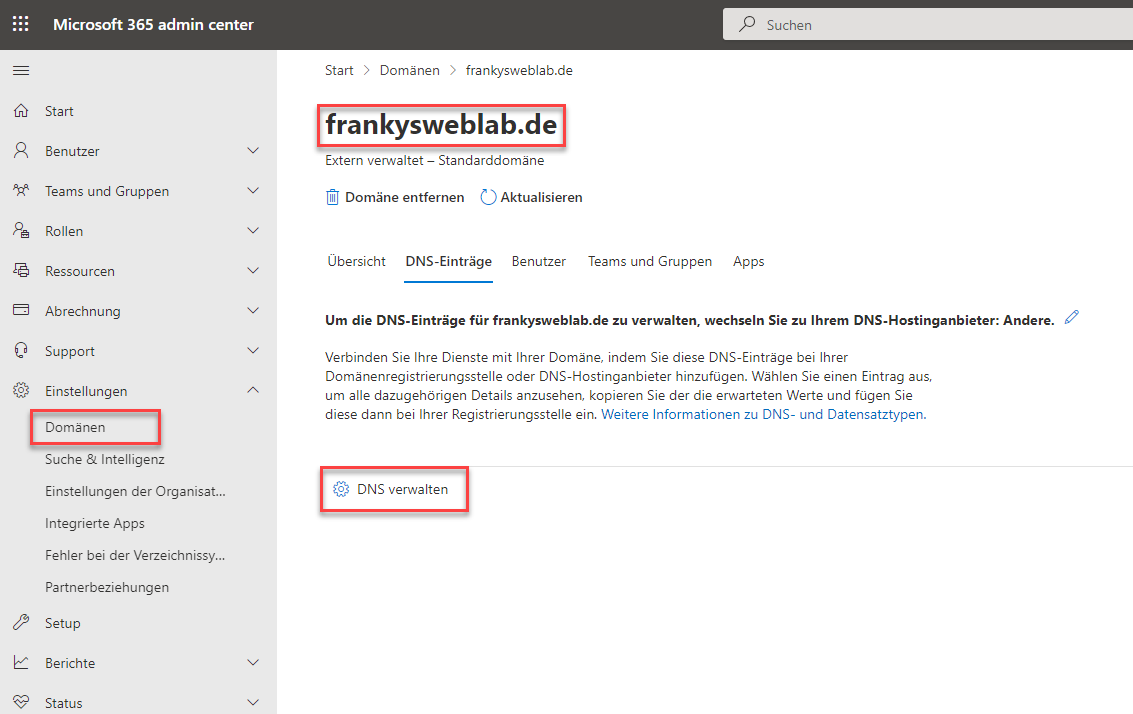
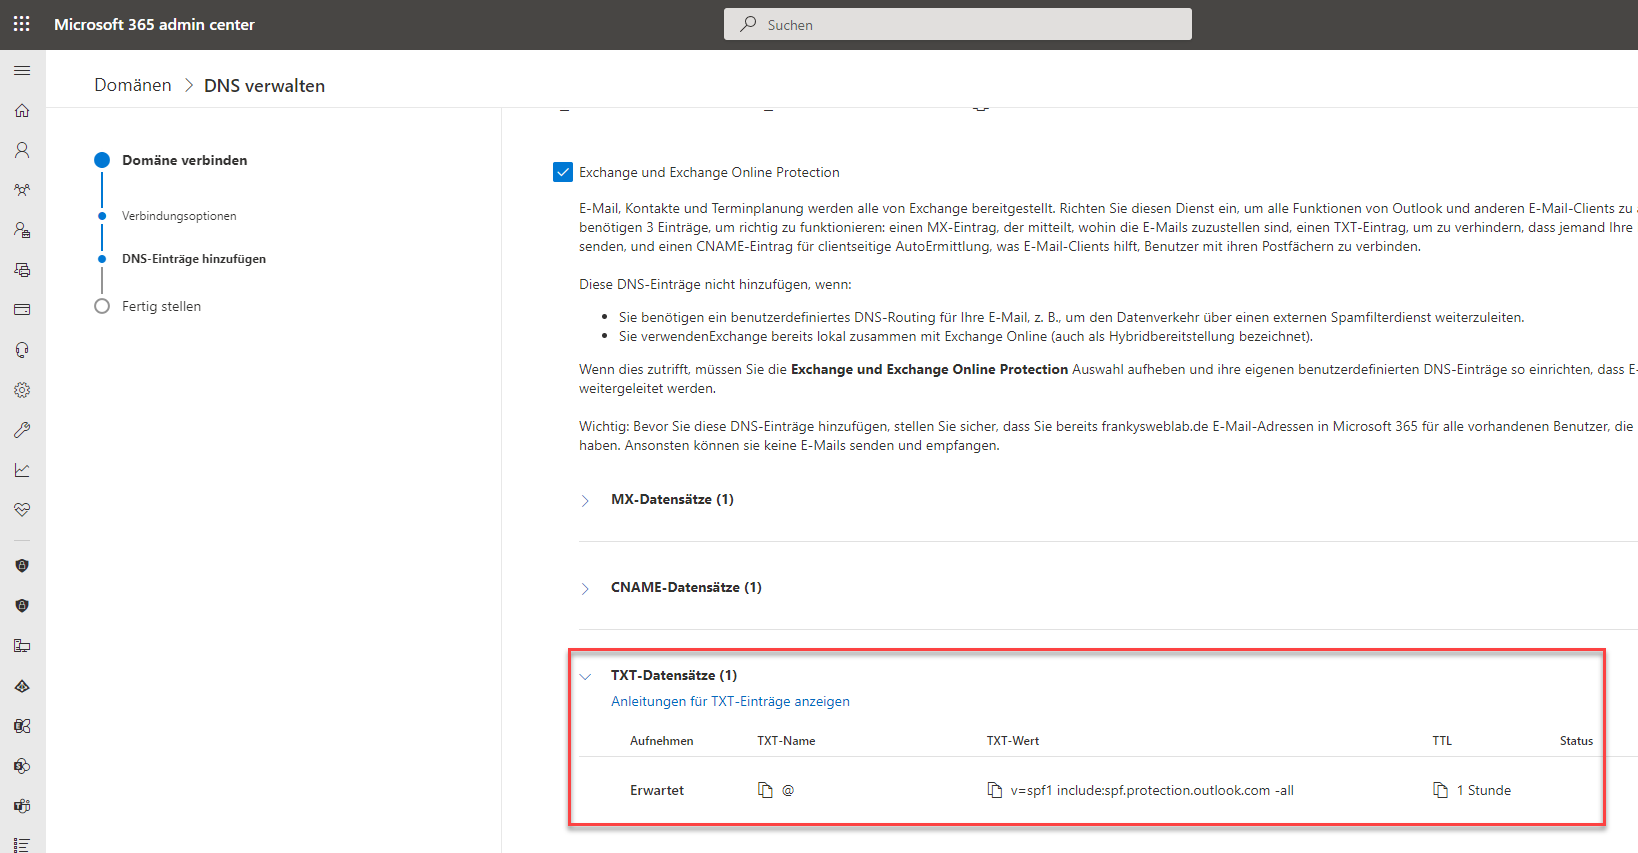
The proposed SPF entry can be found under "TXT data records":
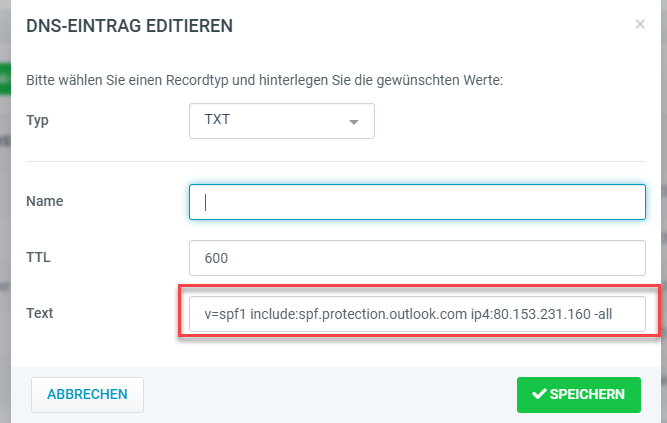
The SPF entry for the hoster of the domain is now not changed to the value suggested by Microsoft, but is extended to include the Microsoft servers. The SPF entry therefore contains your own on-prem Exchange server and the Microsoft 365 server:
The other DNS entries that are suggested by the wizard at this point must not yet be changed. Both the MX entry and the entry for Autodiscover remain unchanged for a hybrid environment and are not changed to Microsoft 365.
Create test user
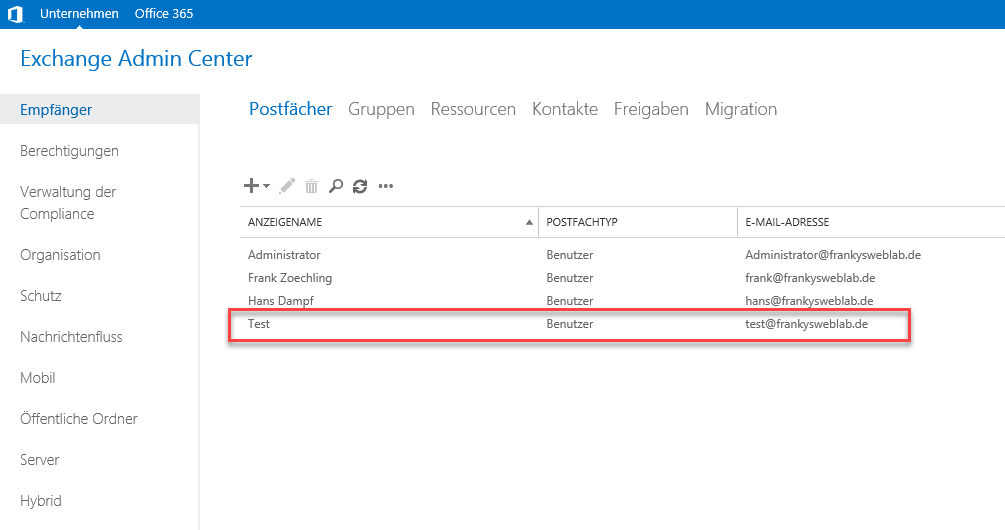
It is not absolutely necessary to create separate test accounts, as you could also use existing test users. However, I always set up one or two new test users to carry out the tests. I have therefore created a user with the name "Test" and created a local Exchange mailbox for the user:
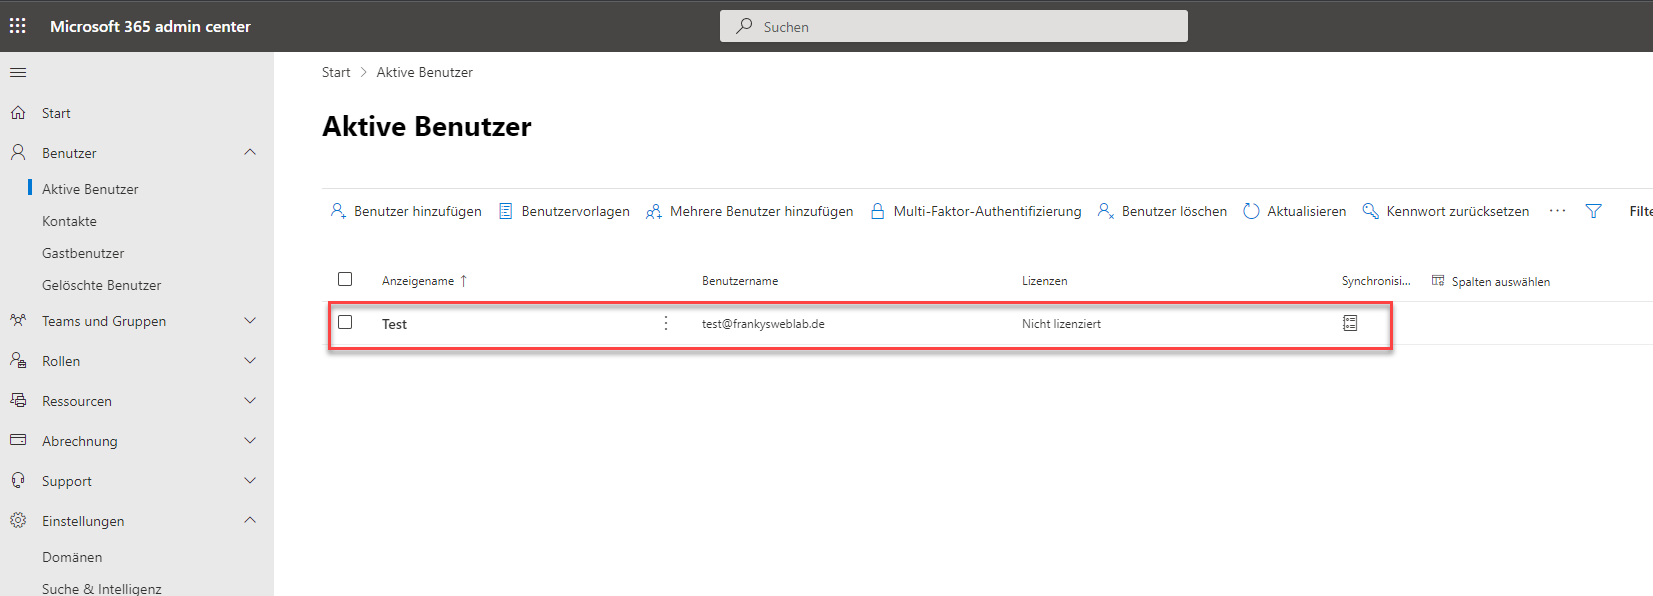
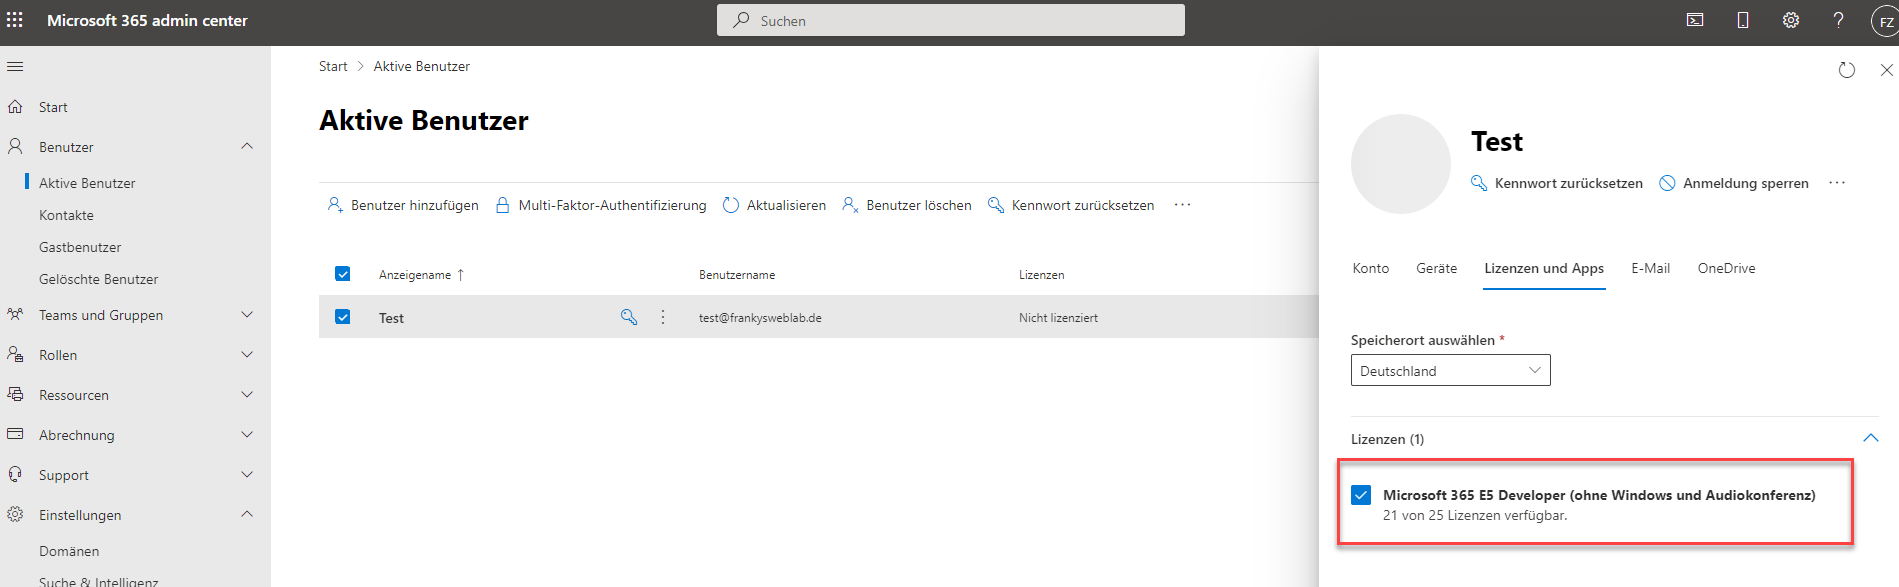
The test user is now assigned a license:
I have now sent a few mails to the new test user and replied so that there are also some mails in the mailbox:
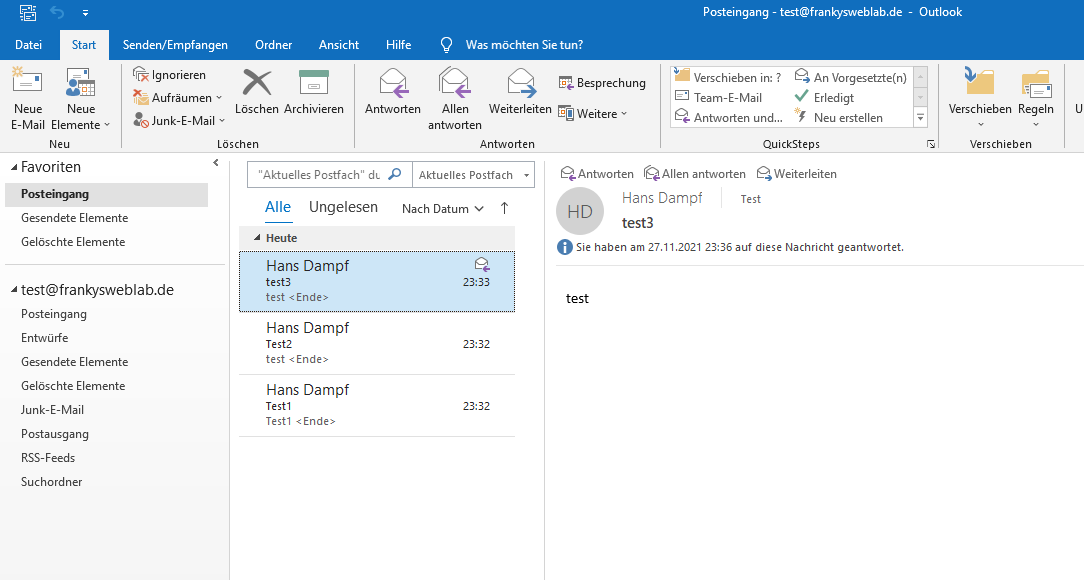
This test mailbox is now ready for migration to Microsoft 365.
Migrate test mailbox
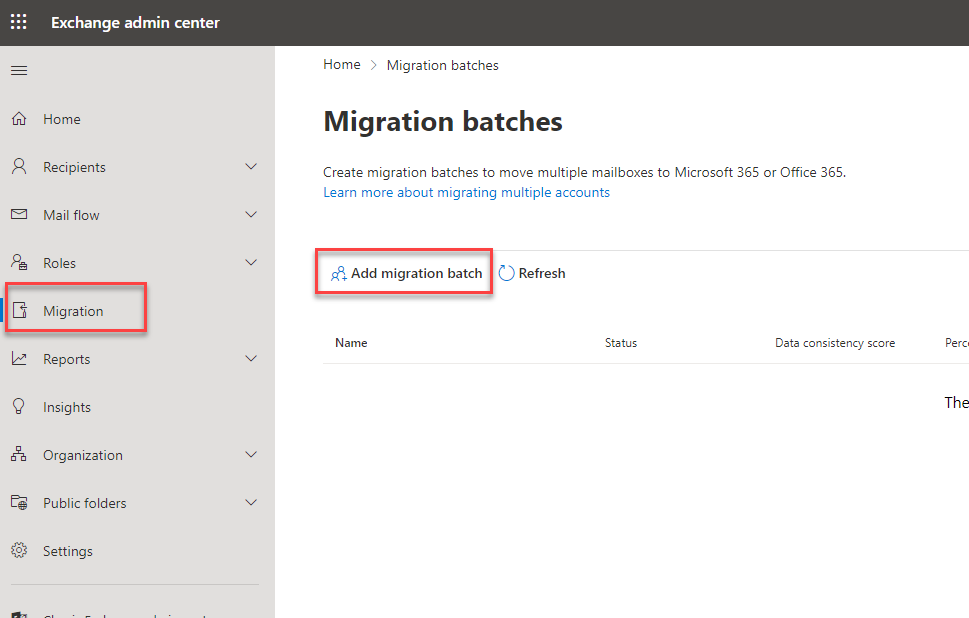
The test mailbox can now be moved from Exchange on-prem to Microsoft 365 via the Exchange Online Admin Center. To do this, you can log in to the Exchange Online Admin Center at the following URL:
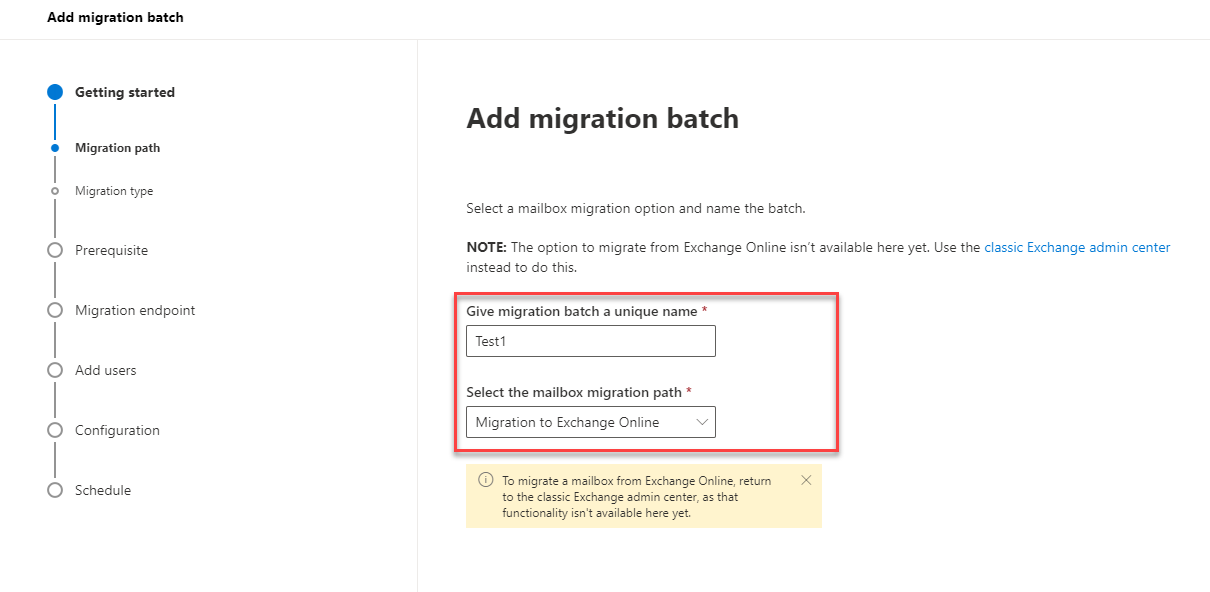
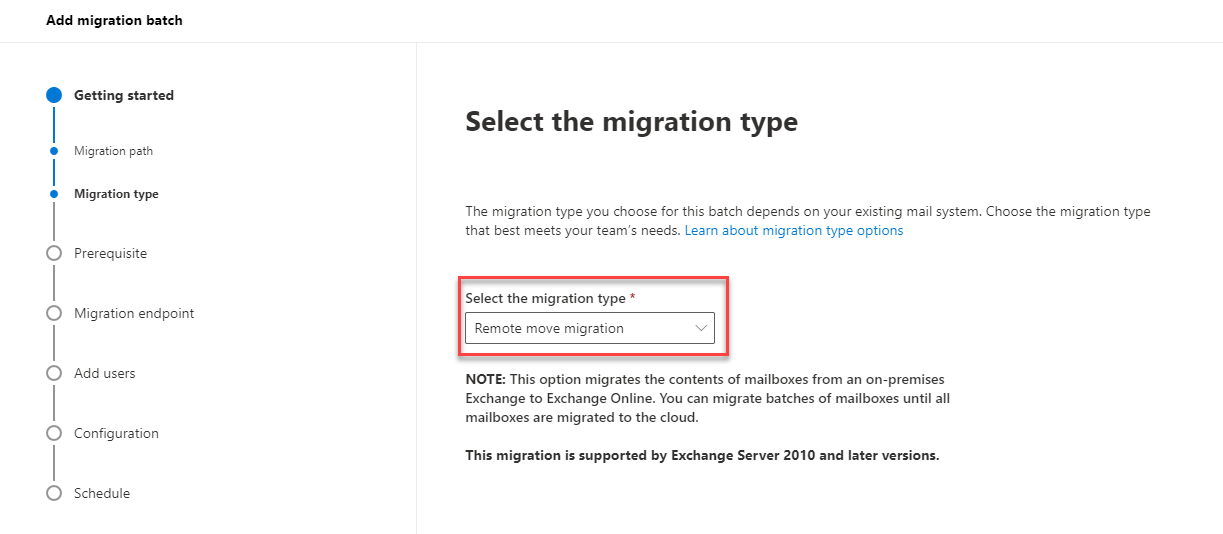
A new migration batch can now be created under "Migration". The migration batch is used to migrate mailboxes from Exchange on-prem to Exchange Online:
The migration must first be given a name:
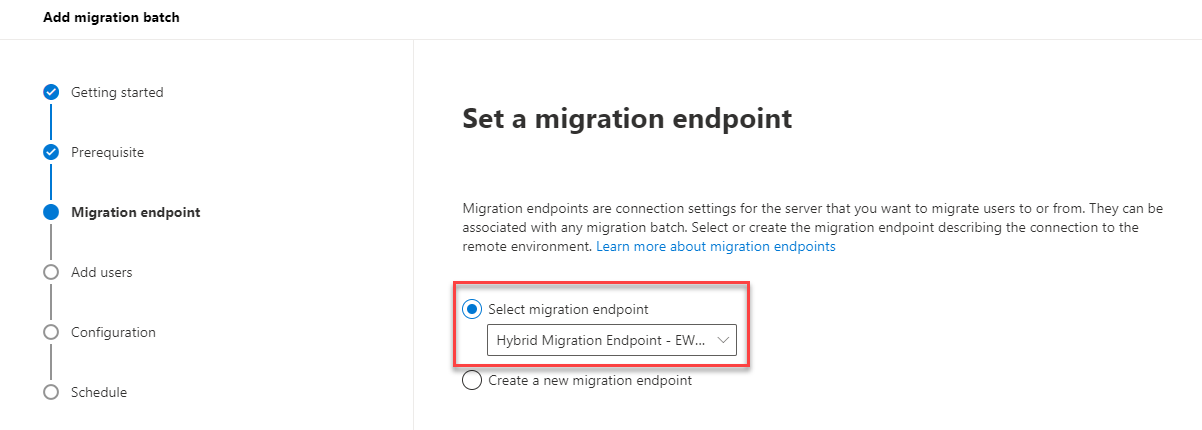
In the next step, the migration endpoint is selected. The HCW has already created an endpoint, which can be selected here:
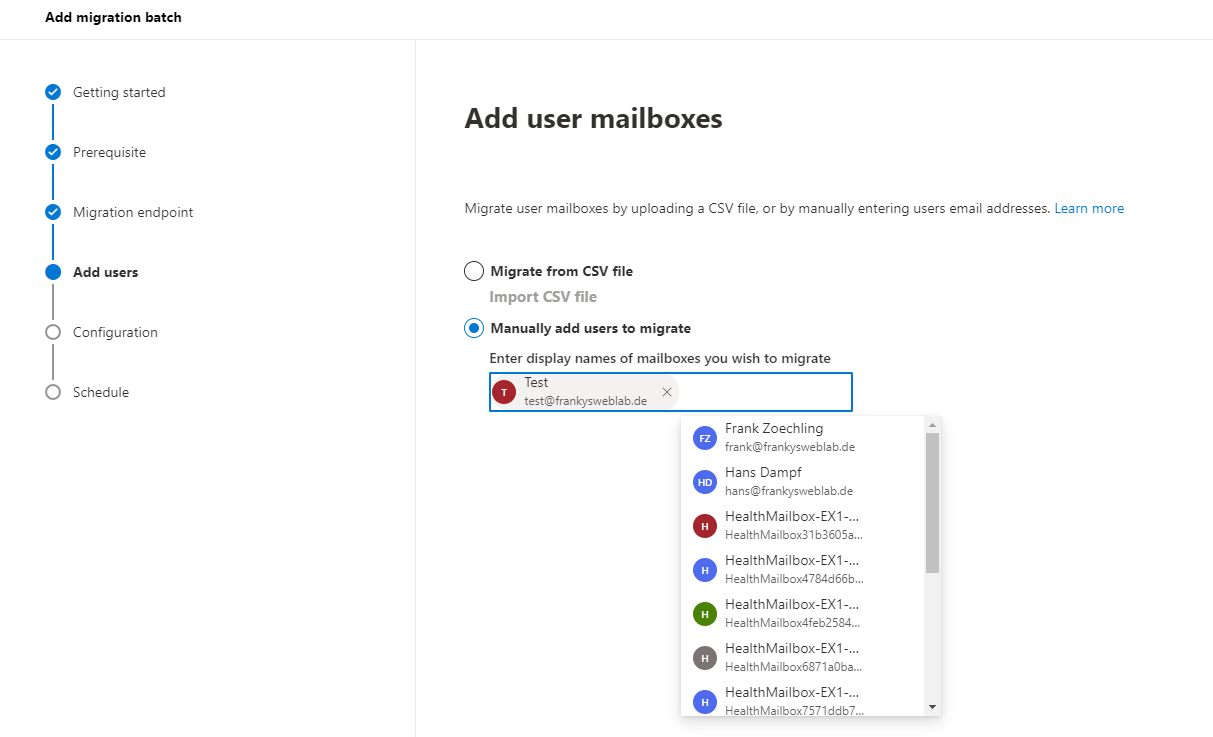
You can now select the mailboxes that are to be migrated to Exchange Online. For the first test, this is only the single test mailbox:
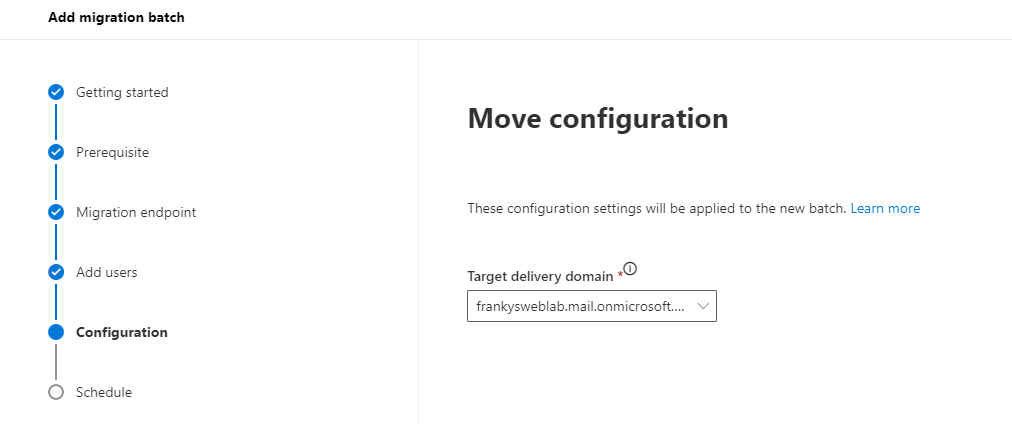
In the next step, the "Target delivery domain" is selected. The target delivery domain is used to route mails between on-prem and Exchange Online. After the migration of the mailbox, the on-prem Exchange will redirect mails to the test mailbox "test@frankysweblab.de" to the address "test@frankysweblab.mail.onmicrosoft.com" (target delivery domain). This is important for mail routing between Exchange on-prem and Microsoft 365:
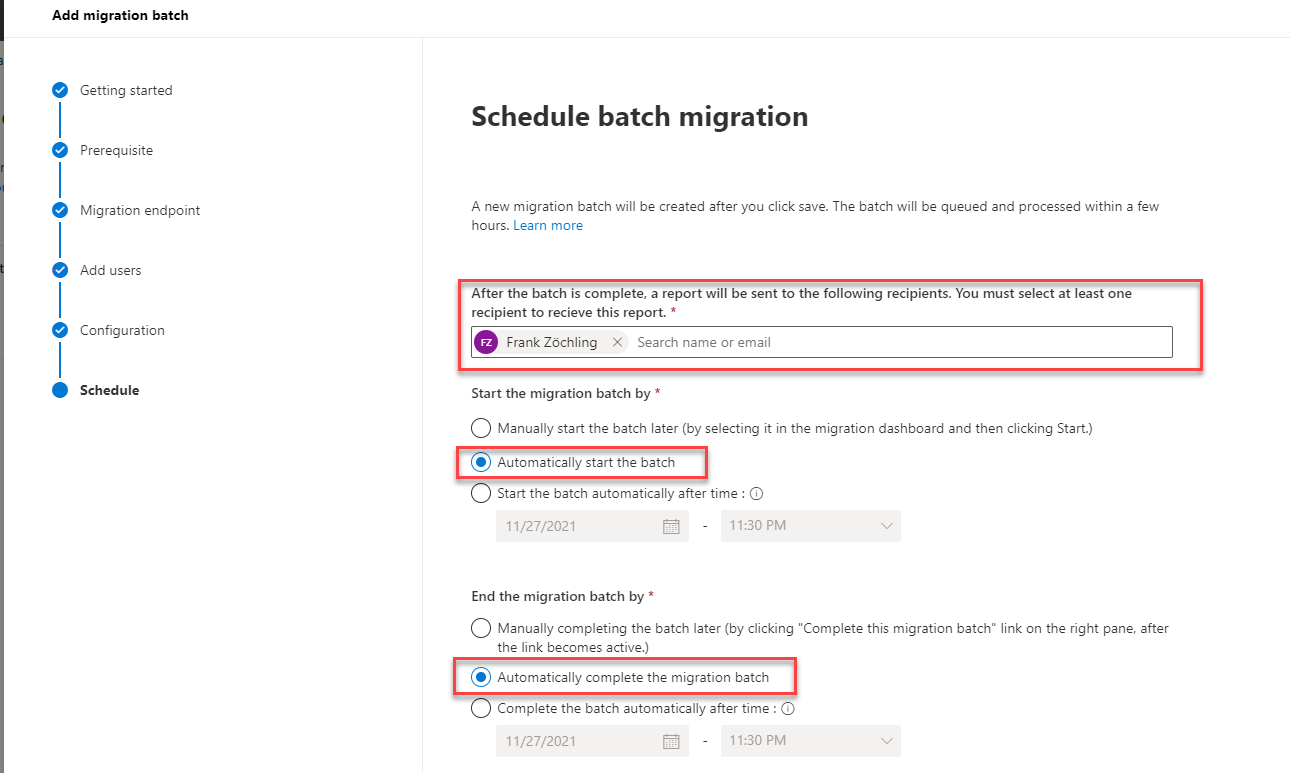
In the last step of the wizard, you can specify who should receive a notification on completion and whether the job should be started and completed automatically. The job can be started and completed automatically for the test mailbox:
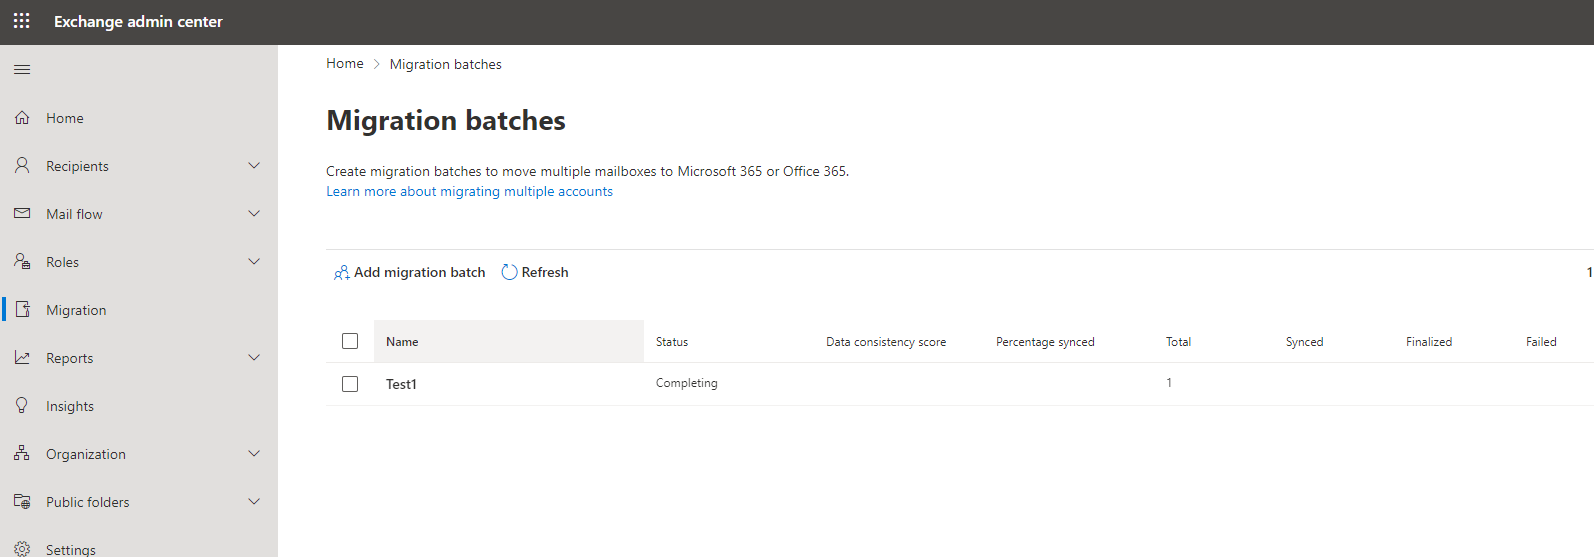
The status can now be tracked in the overview under "Migration":
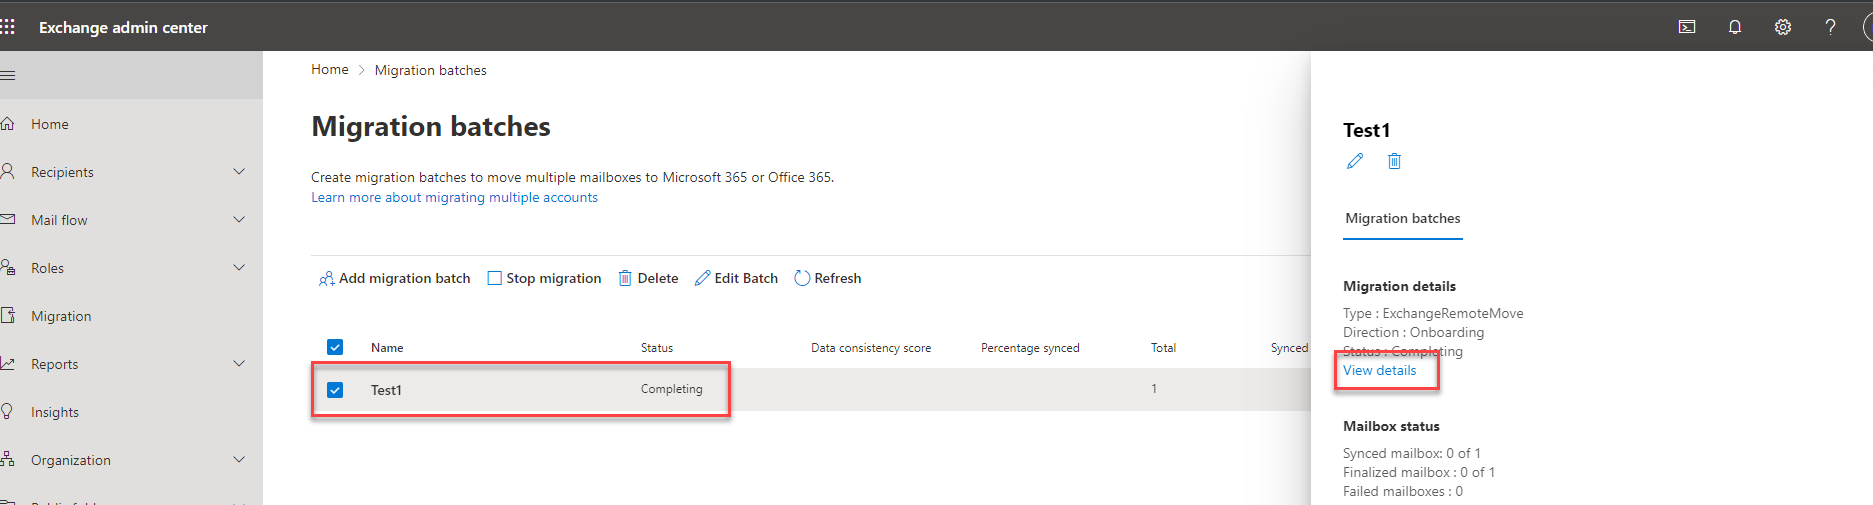
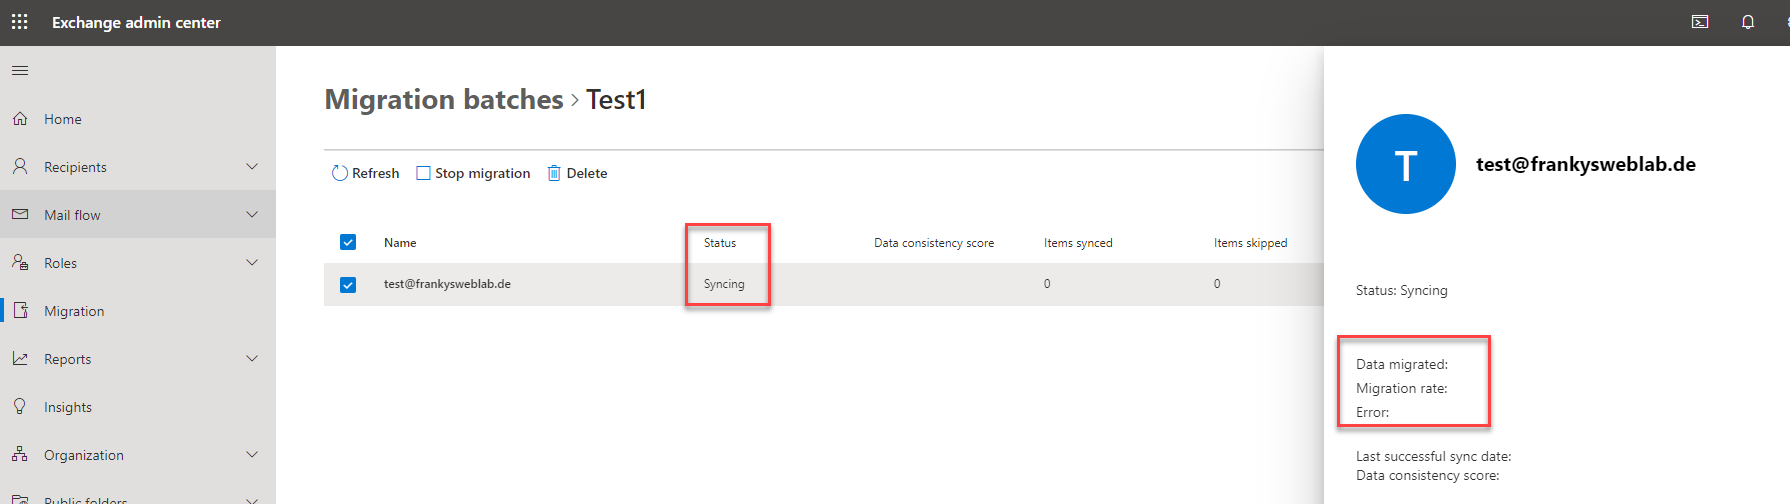
A more detailed status can also be viewed in the details of the migration batch:
Even if the test mailbox only contains a few emails, patience is now required. Depending on the utilization of Exchange Online, Exchange on-Prem, Internet connection, etc., it may take some time until the migration batch is executed and completed. As long as the job does not fail, just wait and be patient:
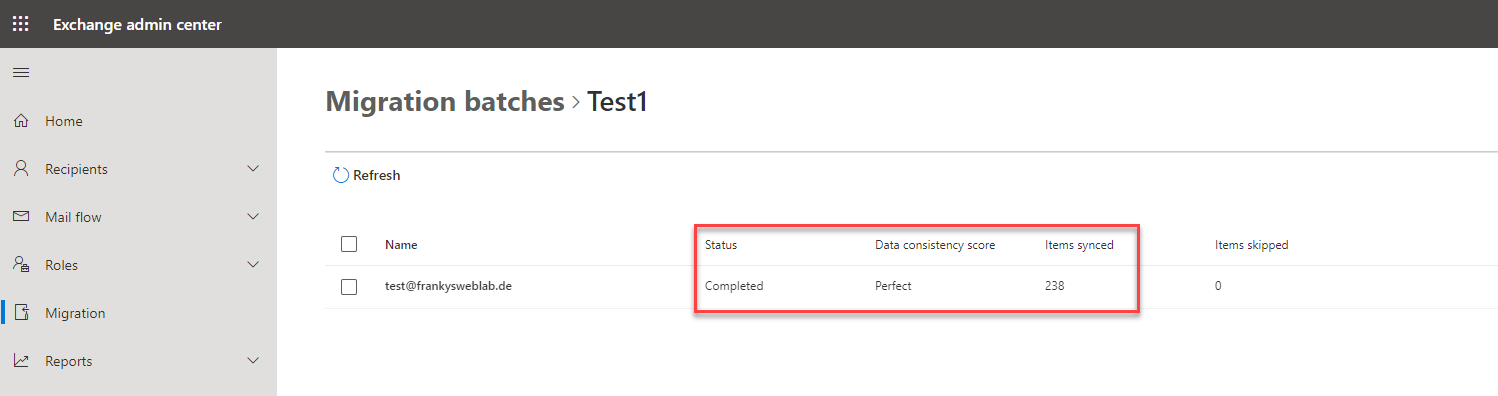
As soon as the migration batch has been completed, the status is changed to "Completed":
The mailbox is now displayed in the Exchange on-Prem Admin Center as an "Office 365" mailbox:
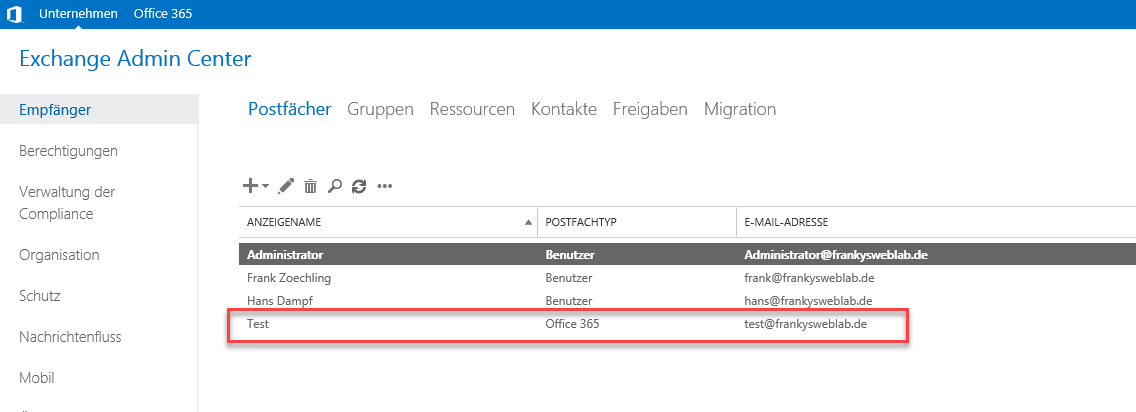
The Exchange Online mailbox can now be managed like an Exchange On-Prem mailbox. Settings for permissions or email addresses in a hybrid environment can only be managed in the Exchange On-Prem Admin Center; it is not possible to change the settings in the Microsoft 365 Admin Center.
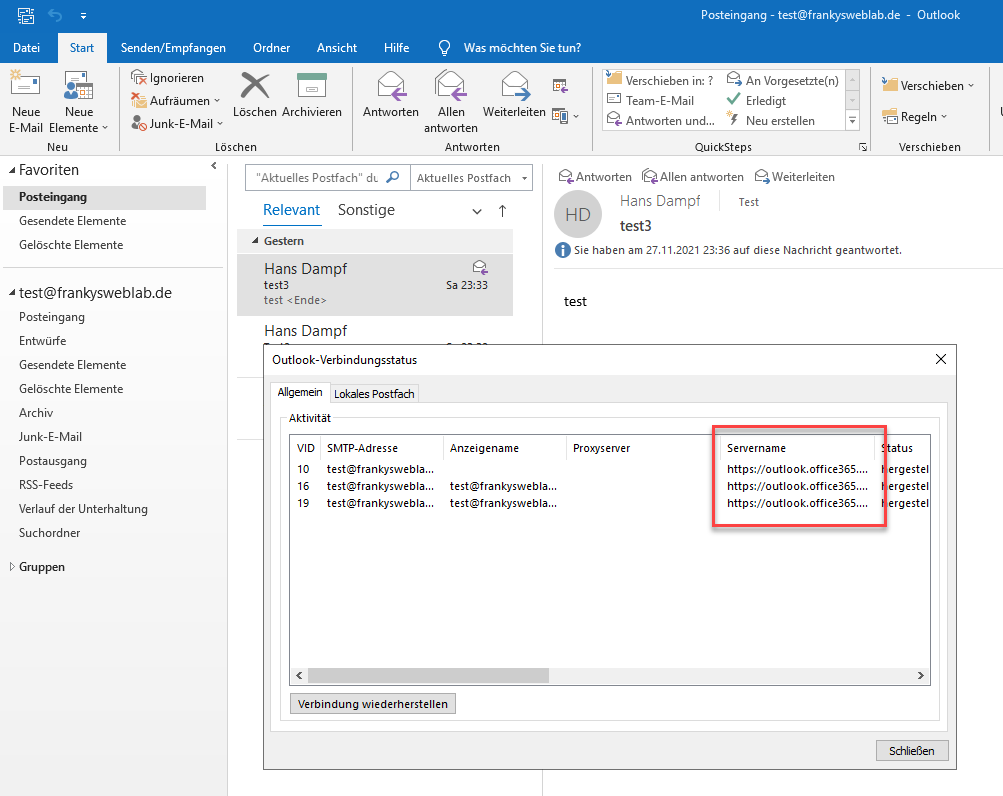
After a mailbox has been migrated to Exchange Online, the user must restart Outlook:
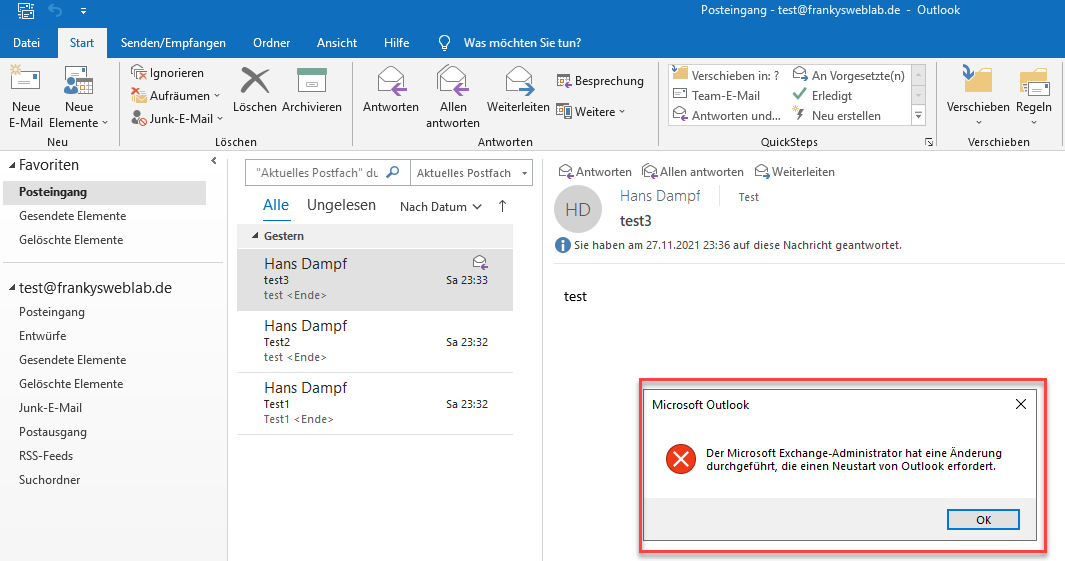
After Outlook has been restarted, the connection to Exchange Online is established:
The first test mailbox has now been successfully migrated, so the tests can now be carried out.
Test mail routing
In a hybrid environment, it is important that the mail routing between Exchange on-prem and Exchange Online works smoothly. It is therefore important to test the mail routing after moving the test mailbox. Here is a graphical representation of the mail routing for Exchange On-Prem and Exchange Online mailboxes:
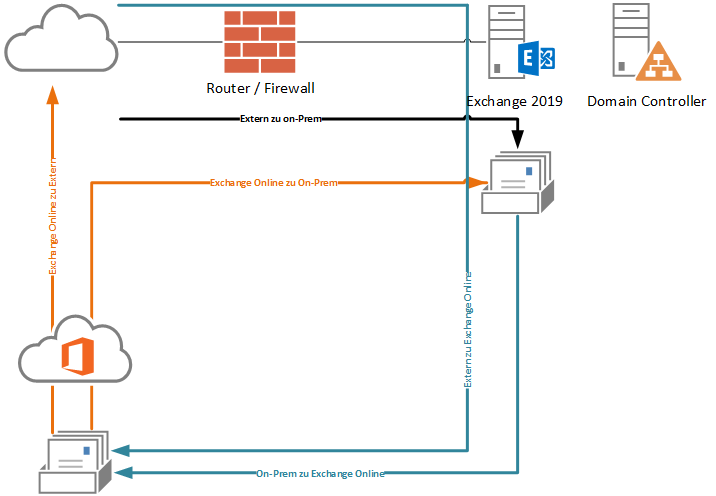
As the MX Records still points to the on-prem Exchange server, the mails for Microsoft 365 mailboxes are also routed via the on-prem Exchange. It is therefore important to test at least the following points:
- Mail from Exchange Online user to Exchange on-prem user
- Mail from Exchange on-prem user to Exchange Online user
- Mail from Exchange Online user to external mail address
- Mail from external mail address to Exchange Online user
- Calendar invitation (freely booked) from Exchange Online to Exchange on-Prem
- Calendar invitation (freely booked) from Exchange on-prem to Exchange Online
If the mail routing works, the hybrid mode is set up and further mailboxes can be migrated.
In the next article
The next article will go into detail about the migration batches and the necessity of the on-prem Exchange Server.

Hallo,
ich erhalte bei der ersten Move Migration den Fehler:
Error: TargetDeliveryDomainMismatchPermanentException: The target mailbox doesn’t have an SMTP proxy matching ‚domainabc.mail.onmicrosoft.com‘.
Im Azure Portal sehe ich zwar bei den proxyadresses den smtp:domainabc.mail.onmicrosoft.com aber es wird nicht zum OnPrem AD gesynct…
Eine Idee?
Hallo, gibt es irgendwo eine Anleitung zur Migration von öffentlichen Ordnern, oder habe ich das in der Serie übersehen?
Hallo,
ändern sich für den Benutzer die Anmeldedaten für Outlook bei einem Wechsel in die Cloud?
Also aktuell meldet sich ein Benutzer mit name@domain.loc an. Die Mailadresse ist name@domain2.de
Was ist dann der Login nach dem Migration?
Danke für eure Hilfe vorab.
Einfach nur großartig! DANKE FÜR DEINE ARBEIT!
Eine Frage habe ich, was machen wir … ;-)
Aktuell ist unser EX2019 (on-prem) nicht per SMTP erreichbar, davor ist ein Postfix E-Mail-Gateway in der DMZ welches die Mails entgegennimmt und dann dem EX übergibt.
DNS MX: mail.hobelbobel.de = Postfix Gateway
Wenn wir nun das Full-Hybrid mit Modern-Topologie fahren, hätte ich einen weiteren A-Record (noch kein MX) angelegt und den „outlook.hobelbobel.de“ genannt, SMTP und ggf. HTTPS direkt auf den EX2019 freigegeben – damit der Hybrid-Agent und EXO direkt, ohne Postfix, kommunizieren können.
Beim Mail Routing testen wird es dann interessant:
– Mail von Exchange Online User zu Exchange on-Prem User
>> Vermutlich direkt auf neuen A-Record (nicht MX), da Hybrid-Agent, per SMTP vom EXO auf outlook.hobelbobel.de – ohne Postfix.
– Mail von Exchange on-Prem User zu Exchange Online User
>> Vermutlich direkt per SMTP vom EX2019 auf EXO – ohne Postfix.
– Mail von Exchange Online User zu externer Mail Adresse
>> Vermutlich direkt von EXO zum MX der anderen Domain – ohne Postfix oder lokalem EX.
– Mail von externer Mail Adresse zu Exchange Online User
>> Hoffentlich, so lange der MX noch auf Postfix zeigt, zum MX-Record (Postfix), der zum EX2019 und der zum EXO?
Sollte so laufen! Oder habe ich einen Denkfehler?
Gruß Nico
Hallo Frank,
bin sehr gespannt auf die weiteren Teile und dir sehr dankbar für deine Arbeit, mit der du sicherlich manch Admin schon gerettet oder zumindest die richtige Richtung vorgegeben hast. Daher habe ich auch schon öfter mal was gespendet und würde den anderen Lesern auch dazu raten. Nicht um dich zu kaufen, aber wenigstens als Anerkennung für deine Arbeit und Hilfe.
Danke Frank für den ausführlichen Artikel. Interessant wäre auch ein abschließender Artikel zur Dekommissionierung vom Exchange. Gerade auch in Bezug was die Verwaltung der Postfächer angeht.