In Part 2 of this article series I described the installation of the ELK stack on Debian 9.8. This part now deals with the configuration of the individual components and the Exchange Server Message Tracking Logs data.
Introduction
In this article, the ElasticStack components and the Exchange servers are configured. This article refers directly to the installation of the environment from part 2 (linked above).
The sample configurations for the individual components can be downloaded and only need to be adjusted in a few places. If an adjustment to the configuration is necessary, this is highlighted in the screenshots.
Logstash configuration
In order for Logstash to receive the Exchange Message Tracking Logs, a corresponding configuration must first be created. Essentially, the Logstash configuration consists of 3 parts: Input, Filter and Output.
Here you can see my shortened example configuration:
The input area defines the port and protocol via which the data is to be received. In this case, this is port 5141 UDP. The filter area is responsible for the preparation of the logs. For example, the format in which the logs are received (in this case CSV) and which columns are available are defined here.
Finally, the destination to which the processed logs are forwarded is specified in the output area. In this case, this is Elasticsearch.
As already mentioned, the screenshot above is a shortened version. It is not necessary to adapt the configuration. This sample configuration can be downloaded here:
The sample configuration can first be transferred to the ELK server. I have initially saved this via SCP in the /tmp directory and am now copying the configuration to the target directory:
1 | |
The Logstash configuration can be tested with the following command:
1 | |
If the output contains the message "Configuration OK", this step has been successful:
To activate the new configuration, Logstash must be restarted once:
1 | |
Logstash has now been prepared so far, we will continue with the Exchange servers.
NXLog configuration
The NXLog program can be used to forward the Exchange message tracking logs to the ELK server. The NXLog Community Edition can be downloaded here:
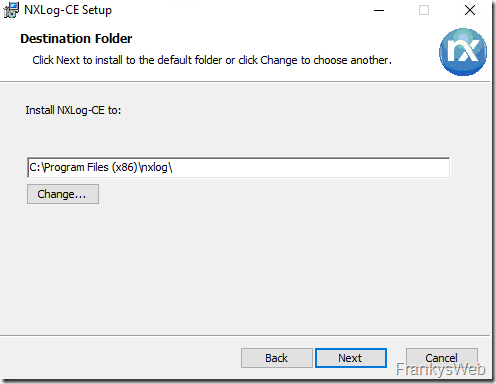
NXLog must now be installed on the Exchange servers, the installation is done with just a few clicks:
There is also a configuration file for NXLog. The configuration file is located in the folder "C:\Program Files (x86)\nxlog\conf" and is called nxlog.conf:
NXLog is now configured so that it forwards the Exchange message tracking logs to Logstash. The location of the message tracking logs and the destination to which the logs are forwarded are specified in nxlog.conf:
The sample configuration can also be downloaded here:
The sample configuration must then be saved in the directory "C:\Program Files (x86)\nxlog\conf" as nxlog.conf (IP and directory may need to be adjusted).
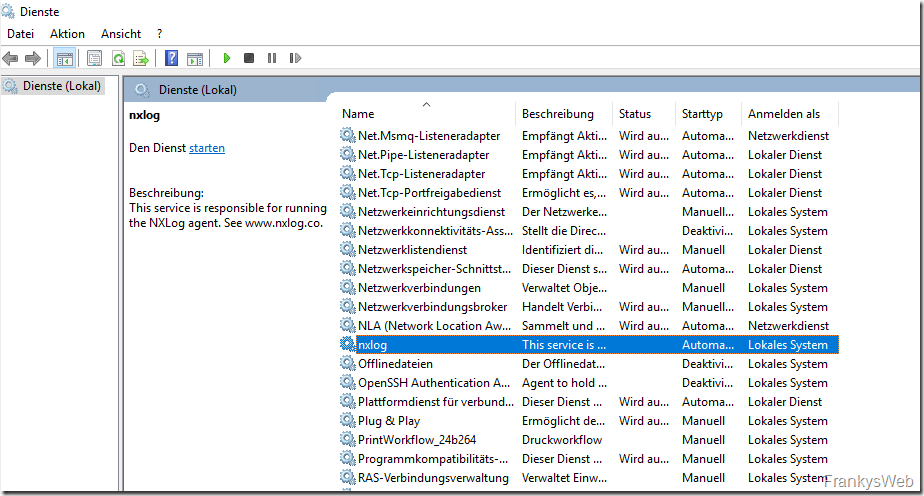
After NXLog has been installed and the configuration has been adjusted accordingly, the NXLog service can be started:
The Exchange Message Tracking Logs, which are generated from now on, are forwarded from NXLog to Logstash. It is therefore necessary to generate a few logs first. I have therefore sent a few test mails using PowerShell. The following command can be used for this:
1 | |
Some data should now have been forwarded to Logstash and therefore also to Elasticsearch. ElasticSearch and Kibana can now be configured.
Elasticsearch and Kibana configuration
In the Kibana web interface, "Index Management" can now be called up under "Management":
If data has already been forwarded from NXLog to Logstash and from Logstash to ElasticSearch, a new index with the name "exchange" and the current date is displayed here:
If no index is found here, you should first check the configuration of Logstash and NXLog. The index is only created once data has been sent from NXLog to Elasticsearch via Logstash.
The "Health Status" of the index is indicated here with the status "yellow (warning)", as there is no replica to other Elasticsearch nodes. In this case, this is normal, as my test environment does not contain any other Elasticsearch nodes.
An "index pattern" must be created so that the data from the index can be used:
The value "exchange*" is used in the "Index pattern" field, so this pattern applies to all indices with the name "exchange":
In the next dialog, the field for the timestamp is now selected via dropdown and the index pattern is created:
The summary should now look something like this:
The initial configuration is now complete. The Exchange message tracking logs are now sent from the Exchange server to Logstash via NXLog. Logstash prepares the data and transfers it to Elasticsearch.
Test the configuration
As soon as the configuration has been completed, the message tracking logs of the Exchange servers can be displayed in Kibana under "Discover".
In this screenshot, for example, the message tracking logs of the last 15 minutes from the index pattern "exchange*" are displayed:
If you now click on the "small triangle" in front of the entry, you can also see that the assignment of the columns from the Exchange Message Tracking Logs works quite well:
Here is an example:
This data can now also be used to create visualizations and dashboards, which will be the subject of the next article.


Hey Franky,
der Donwload Link ist leider tot :-(
Hallo Markus,
der Link ist korrigiert. Danke für den Hinweis.
Gruß,
Frank
Hallo Frank,
die .conf Dateien lassen sich nicht runterladen. Können Sie das bitte korrigieren oder die Dateien über alternativen Weg bereitstellen ?
danke
Mfg,
Jaroslav
Hi,
der Download funktioniert wieder. Danke für den Hinweis.
Gruß,
Frank
Leider erscheint bei mir kein Index im Elasticsearch management. Was koennte hier falsch sein? Habe alle configs nochmal durchgesehen aber es stimmt soweit alles.
Es handelt sich hier um ein Veranschaulichungsbeispiel, dennoch stelle mir regelmässig die Frage wozu ich dies benötige. Dasselbe gilt auch für Splunk. Ich kann in den meisten Fällen meine Daten auch anders überwachen. Im Falle von Nagios wäre es durchaus auch möglich diese Zahlen hier über PowerShell-Script zu liefern und diese dann dort zu visualisieren.
Hallo Frank,
sehr schöne Artikel Serie! Ich bin schon auf den 4. Teil gespannt!
LG
Jan
Das Thema Sicherheit ist bei ElasticSearch auch wieder eine Sache des Geldes denn nur mit mindestens der Gold Lizenz sind die Daten ansatzweise gesichert. Mit der Basis Lizenz kann jeder die Webseite aufrufen und alles aufrufen/verändern und der Datenverkehr zwischen den Quell- und ES Systemen mitlesen ;-)
Gold Edition – https://www.elastic.co/de/subscriptions
1. Native Authentifizierung, LDAP-, PKI *-, Active Directory-Authentifizierung
2. Verschlüsselte Kommunikationen (zwischen den Quellservern [hier sensible Exchangedaten] und dem ElasticStack)
3. Rollenbasierte Zugangssteuerung
Wer bereits OP5 als Monitoringlösung nutzt kann hier das Modul „OP5 Log Analytics“ dazubuchen welches auch auf den ElasticStack setzt.
https://www.op5.com/op5-log-analytics/
Hallo,
für Nginx auf die Schnelle http auth: https://www.digitalocean.com/community/tutorials/how-to-set-up-password-authentication-with-nginx-on-ubuntu-14-04
Die einzige Schnittelle zum abrufen der Daten ist der Browser, der Rest ist auf localhost.
Daten kommen über UDP vom Exchangeserver rein – da weiß ich noch nicht wie und ob die absicherbar sind bei der Übertragung.
Man könnte aber z.B. dafür zwischen Logstash Listener und dem Exchange ein VPN aufbauen, das ist dann sicher. (Wahrscheinlich Kanonen auf Spatzen, aber machbar)
LG
Bisher funktioniert alles einwandfrei.
Bin gespannt wie es weitergeht.
Vielen Dank ! Die Vorfreude auf den Teil 4 steigt ungemein !
Warte begeistert auf den Teil 4 und die grafische Darstellung/Aufbereitung ;-)
Betrachtest Du auch die Absicherung der Webseite bezüglich Loginmöglichkeit?