

I own a UniFi Cloud Gateway Ultra where the SSL error message in the browser bothered me.
Unfortunately, the self-signed certificate of the cloud gateway cannot simply be imported into the browser. As the original certificate contains neither the IP nor the DNS name of the cloud gateway, the browsers continue to complain.
However, the certificate can be replaced, but unfortunately not so easily. Here is the way that worked for me with Unifi OS version 4.0.6. Maybe UniFi will build an easier way into UniFi OS.
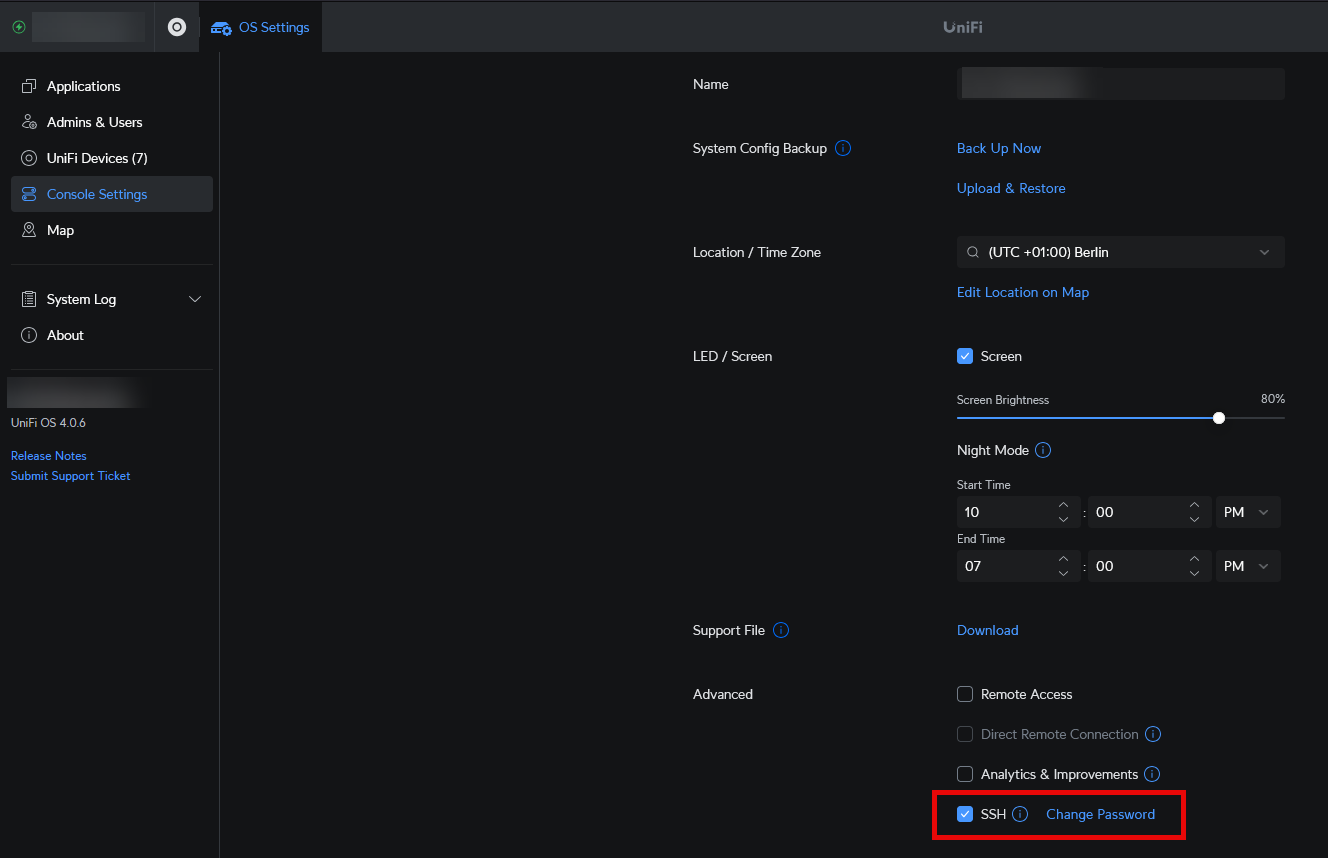
In the UniFi OS settings, SSH must first be activated and a password assigned:
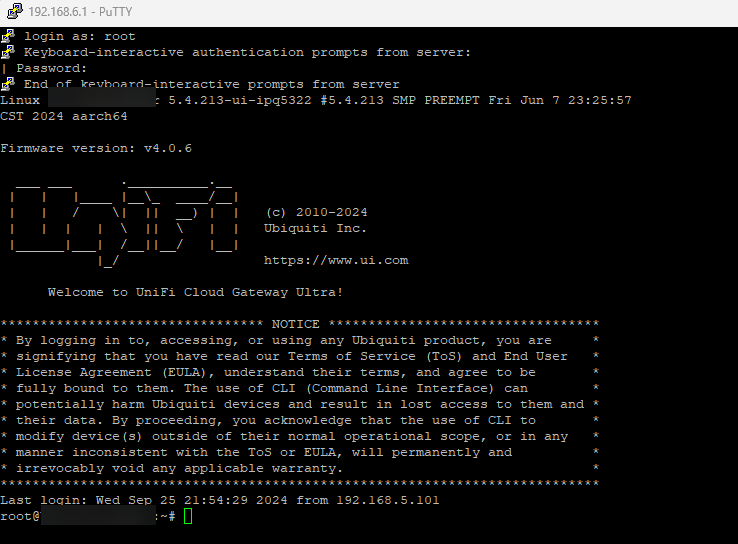
Now you can log in to the Cloud Gateway via SSH with the root user and the selected password:
The following small script can now be adapted and executed here:
#Request data
cat < /data/unifi-core/config/req.conf
[req]
default_bits = 2048
distinguished_name = req_distinguished_name
req_extensions = req_ext
x509_extensions = v3_req
prompt = no
[req_distinguished_name]
countryName = DE
stateOrProvinceName = NRW
localityName = Liemke
organizationName = FrankysWeb
commonName = ucg.frankysweb.de
[req_ext]
subjectAltName = @alt_names
[v3_req]
subjectAltName = @alt_names
[alt_names]
IP.1 = 192.168.1.1
IP.2 = 192.168.6.1
DNS.1 = ucg.frankysweb.de
EOF

#Backup private and public key
cp /data/unifi-core/config/unifi-core.crt /data/unifi-core/config/unifi-core.crt.bak
cp /data/unifi-core/config/unifi-core.key /data/unifi-core/config/unifi-core.key.bak

#New self signed certificate with existing private key
openssl req -x509 -new -key /data/unifi-core/config/unifi-core.key -days 365 -out /data/unifi-core/config/new.crt -config /data/unifi-core/config/req.conf

#Replace old certificate with new certificate
rm /data/unifi-core/config/unifi-core.crt
cp /data/unifi-core/config/new.crt /data/unifi-core/config/unifi-core.crt
rm /data/unifi-core/config/new.crt

#Restart nginx
systemctl restart nginx
In the script, you must adapt lines 10 - 14 and 19 - 22 to your environment. For example, you can include several IPs (IP.1, IP2, etc.) and several DNS names (DNS.1, DNS.2, etc.). The script then creates a backup of the certificate and the corresponding private key. A new self-signed certificate is then generated and the old certificate is replaced by the new one. NGINX is then restarted. It then takes a short moment until the website loads again and is delivered with the new certificate:
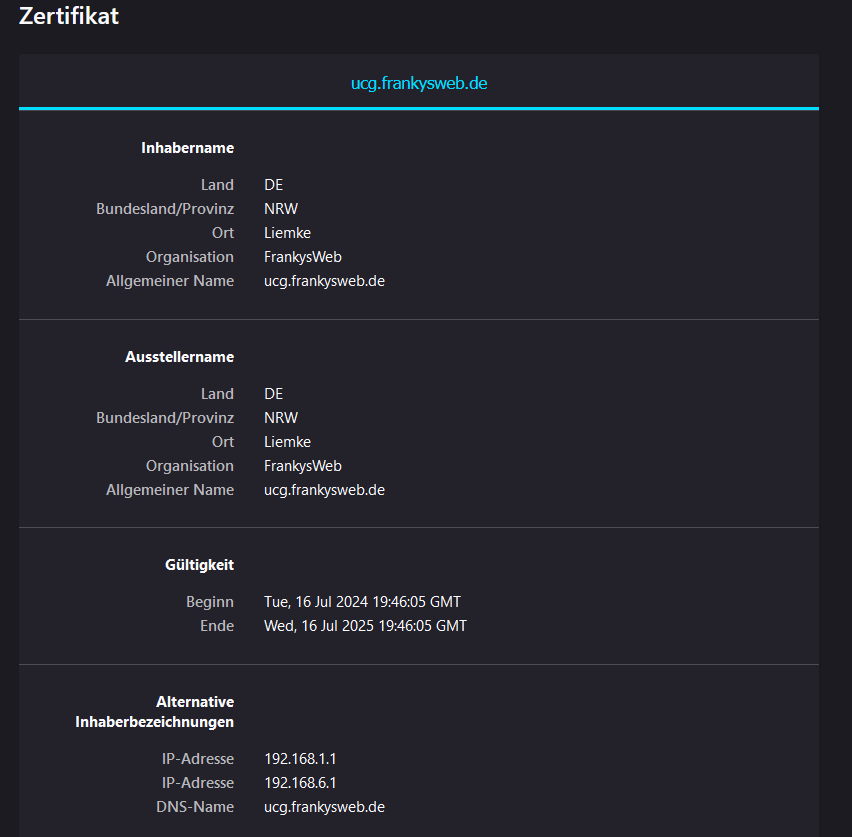
The new self-signed certificate can now be imported into the browser so that a warning is no longer displayed when the website is accessed via IP or DNS name.
SSH can be switched off again at the end.
Optional: Create CSR for CA
If a CSR is to be created instead of a self-signed certificate, the openssl command can be adapted:
openssl req -new -key /data/unifi-core/config/unifi-core.key -config /data/unifi-core/config/req.conf -out /data/unifi-core/config/request.pem
The CSR can then be found in the file /data/unifi-core/config/request.pem and can be signed by a CA. The certificate must then be copied to the fileu /data/unifi-core/config/unifi-core.crt.
Optional: reactivate original certificate
If there are problems, the original certificate can be reactivated. The following commands can be used to do this:
#Restore original Certificate
cp /data/unifi-core/config/unifi-core.crt.bak /data/unifi-core/config/unifi-core.crt
cp /data/unifi-core/config/unifi-core.key.bak /data/unifi-core/config/unifi-core.key

#Restart nginx
systemctl restart nginx
It will now take a moment for the original certificate to be displayed again.