This article describes the basic configuration of Exchange Online Protection with Exchange Server 2013.
These instructions are also valid for Exchange 2016.
Once you have an account, you will be taken to the Office 365 dashboard. The basic configuration can be carried out under "Setup":
Step 1: Add domain.
I use "frankysweb.com" for testing:
My domain is hosted by Strato, as Strato is not listed in the step instructions, I select "General instructions". The domain needs to be validated, so a TXT entry and alternatively an MX entry is displayed to validate the domain. I use the TXT entry:
To confirm the domain, only the TXT record is created. This works very simply with Strato:
Save settings and you're done
The domain is successfully validated using the TXT record:
The domain you have just added is now displayed under "Domains":
The next step is to configure the message flow between the local Exchange Server and Exchange Online Protection (EOP). To do this, click on "Online Protection for Exchange" in the Office 365 dashboard
A new window will open with the Exchange Admin Center, here you should also see the domain you just added, you can double-click on the domain to open the settings:
As the e-mails are to be forwarded from EOP to Exchange, the domain type is changed to "Internal Relay":
Now 2 connectors are required, which are added under Connectors.
The first connector is responsible for receiving messages from the local Exchange server. The "From" setting is therefore "Email server of your organization" and the "To" setting is "Office 365":
The connector requires a descriptive name, such as Exchange-to-EOP
The next step is to enter the external IP address of the Exchange server. In small environments, this is likely to be the WAN IP. In my test environment, it is my public WAN IP:
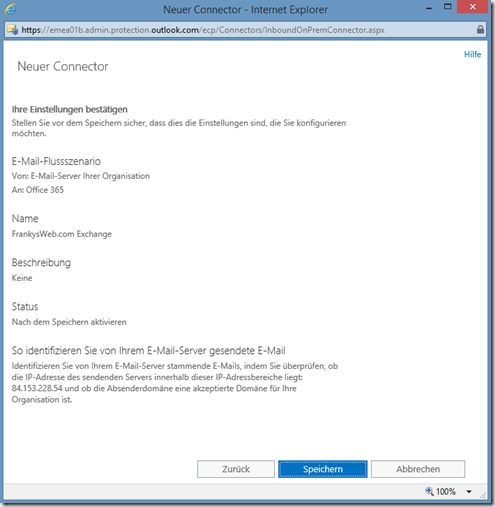
Finally, a summary is displayed and the first connector is created
The second connector is for forwarding the messages to the local Exchange server. Therefore, the setting "Office 365" is made for "From" and the setting "Email server of your organization" is made for "To":
Again, enter a descriptive name, for example "EOP-to-Exchange"
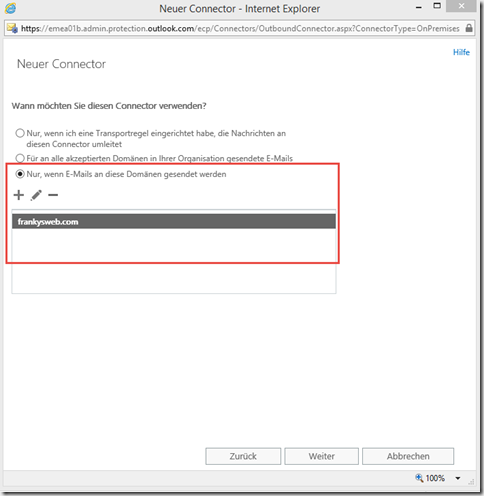
In the next dialog, the corresponding domains for which the local Exchange server is responsible are added. If there are several domains with several Exchange servers, several connectors are created accordingly. In my case, however, it is only "frankysweb.com":
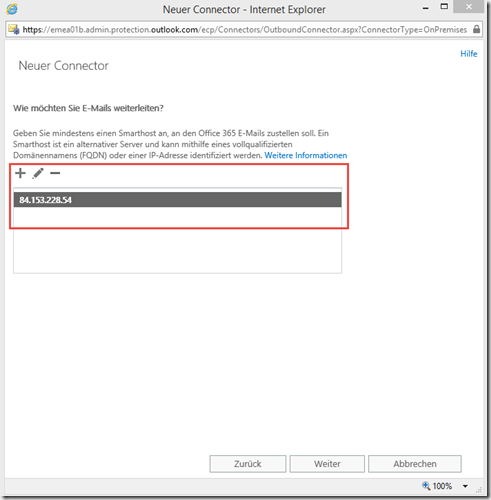
Now the external IP address of the Exchange server must be entered again so that the mails can be sent from EOP to the local Exchange server:
As I use a self-signed certificate, which is not trustworthy for EOP, I select the TLS setting with all certificates:
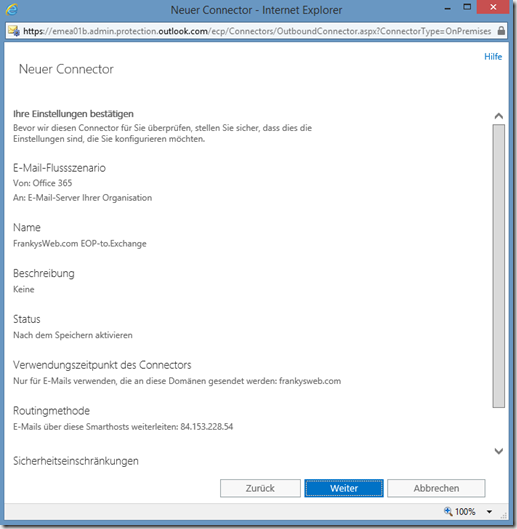
A summary is also displayed here, but it goes one step further:
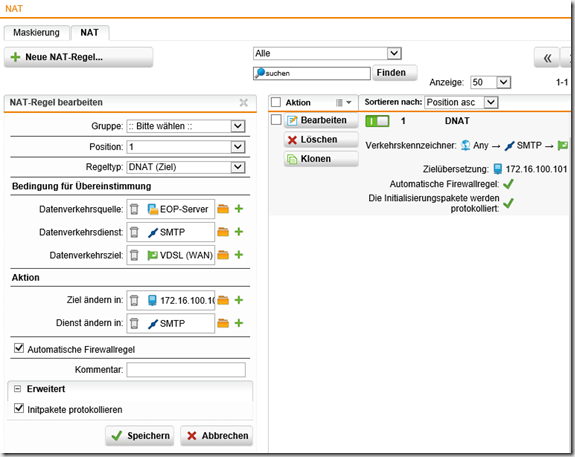
In the last step, the connector checks whether EOP is able to send mails to the local Exchange server. At this point, a connection on port 25 (SMTP) to the local Exchange server must be possible. Simple DNAT is normally sufficient here, which is restricted so that only EOP is allowed to deliver mails. With my Sophos UTM, I have created a DNAT entry (also known as SNAT) and restricted it accordingly:
The group under "Data traffic source" then contains all EOP IPs or the EOP networks. The IPs currently used by Microsoft are documented here:
https://technet.microsoft.com/library/dn163583(v=exchg.150).aspx
In order for the connector to be created, an e-mail address must be entered for the test, in my case this is administrator@frankysweb.com:
Click on "Check" to start the test:
The test should be successful:
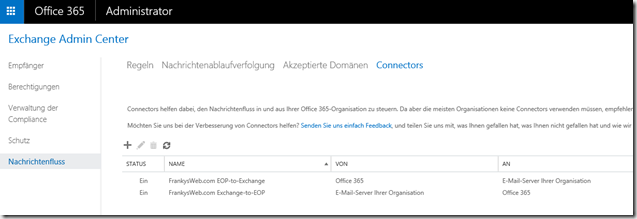
In Exchange Admin Center, 2 connectors "should" now be displayed:
Strangely enough, the EOP-to-Exchange connector disappeared from the EOP portal after a short time. However, the connector is still there. You can check whether the connectors are present using PowerShell:
Get-InboundConnector | ft -AutoSize
Get-OutboundConnector | ft -AutoSize
A connection to EOP via Powershell is established as follows:
$UserCredential = Get-Credential
$Session = New-PSSession -ConfigurationName Microsoft.Exchange -ConnectionUri https://ps.protection.outlook.com/powershell-liveid/ -Credential $UserCredential -Authentication Basic -AllowRedirection
Import-PSSession $Session
A list of available CMDLets can be found here:
https://technet.microsoft.com/de-de/library/dn621038(v=exchg.150).aspx
Once the message flow has been configured, the users can be created. In most cases, it is advisable to have the synchronization done automatically. To synchronize the local ActiveDirectory with EOP (or Azure AD), it must be set up:
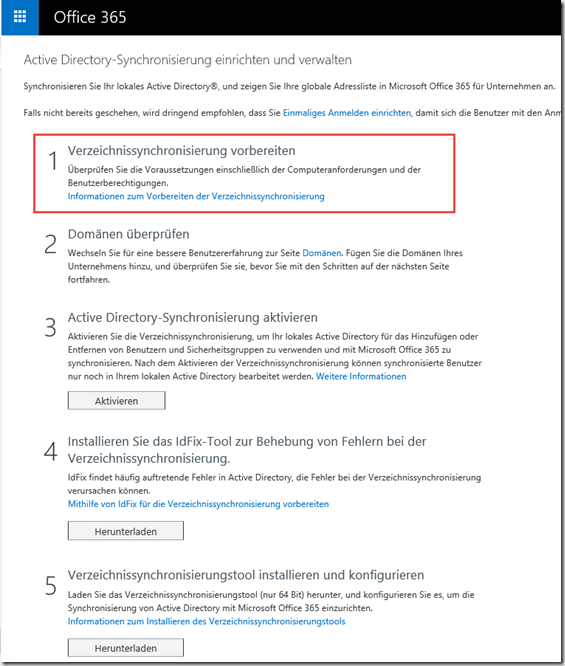
Step 1: Prepare directory synchronization
In the first step there is an important point: If the local ActiveDirectory uses a name that is not the same as the e-mail domain, then the e-mail domain must be added as an alternative UPN suffix. Example:
- Internal AD name: frankysweb.local
- E-mail domain: frankysweb.com
The UPN for user Frank is therefore frank@frankysweb.local, so the alternative UPN suffix frankysweb.com must be assigned to user Frank so that the mapping of local user to EOP user works.
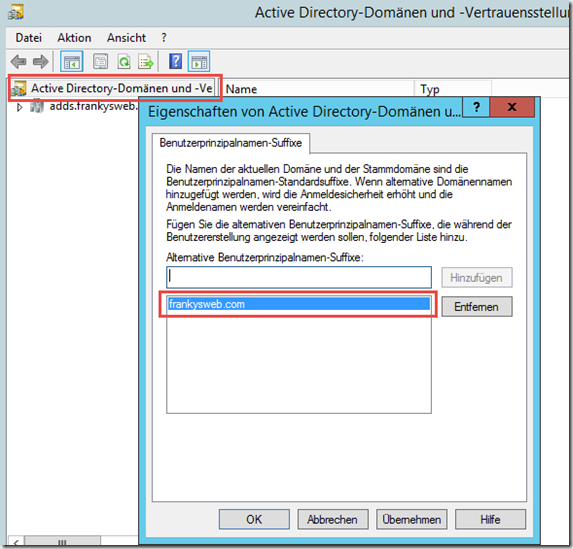
The alternate UPN is added in the "Active Directory Domains and Trusts" console:
In order for the users to be assigned, the UPN must be changed for each user, the easiest way to do this is via the PowerShell (see note!!!). There is a corresponding script here:
But be careful: Changing the UPN for users should be planned carefully. Otherwise it could end in chaos if no user can log in...
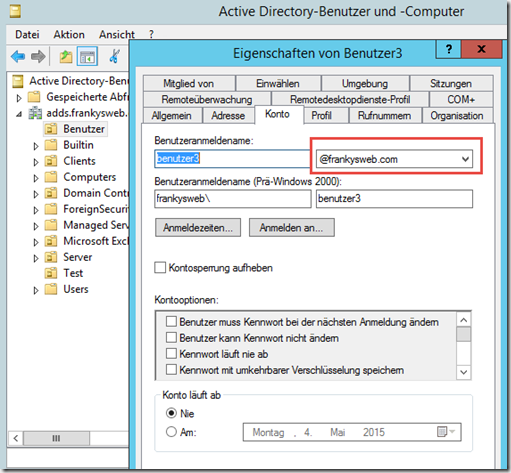
It can be changed manually for individual users:
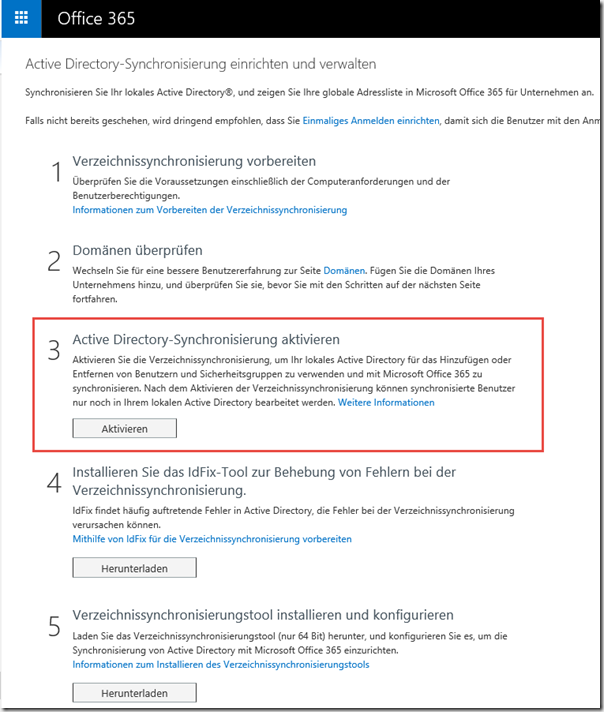
If you do not want to or cannot change the UPN, you can also import the users using a CSV file or Powershell. Step 2 can normally be skipped. So you can continue with step 3:
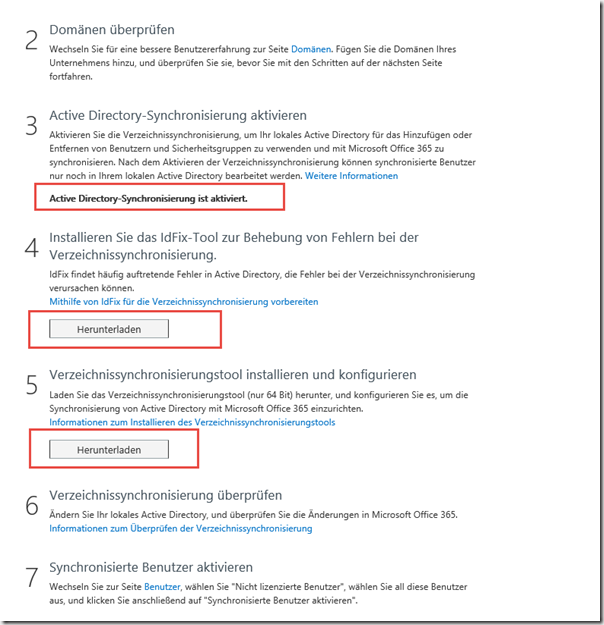
After clicking on Activate, the status should be displayed and the two tools can be downloaded:
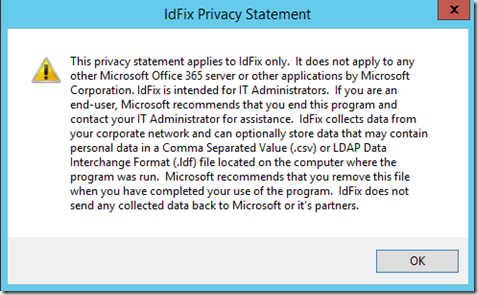
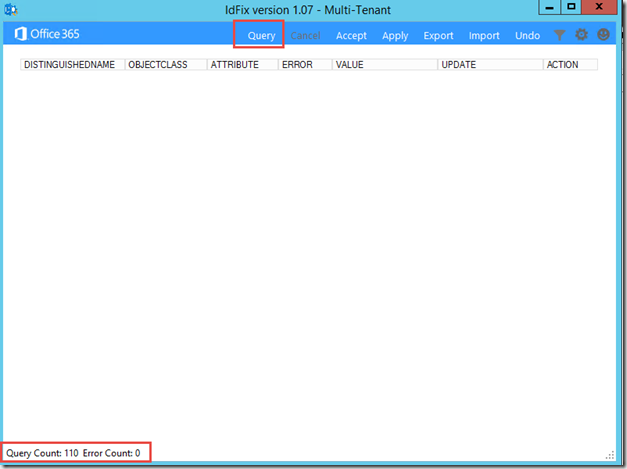
Both tools are required on a domain controller. The ldfix tool can be used to fix synchronization problems in advance:
There have been no problems in my area:
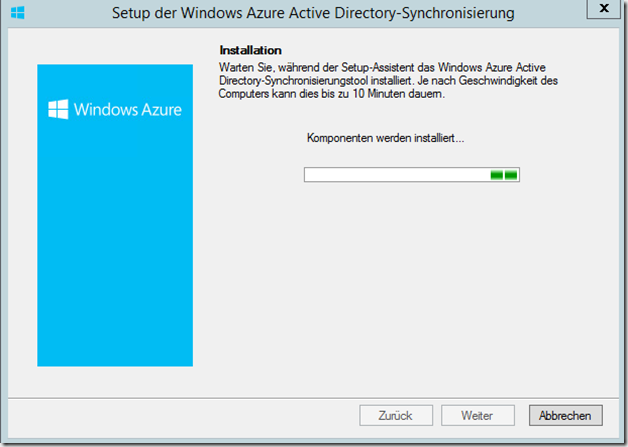
The dirsync tool can therefore be installed
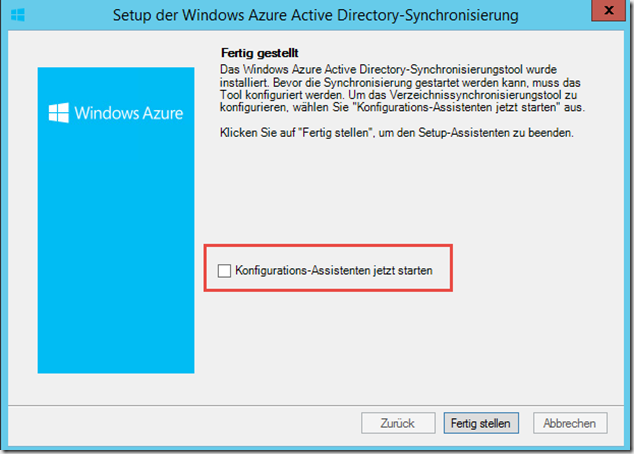
After the tool has been installed, it is best to uncheck the "Start configuration wizard now" box and log the user out and back in before starting the configuration:
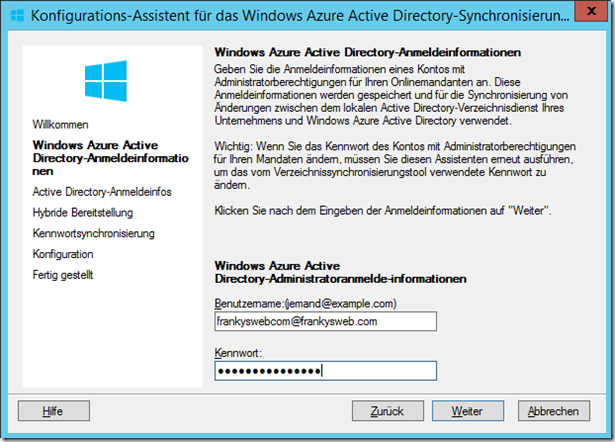
The wizard can be started after logging in via the start menu or via the desktop shortcut. The EOP user must be specified in the first dialog:
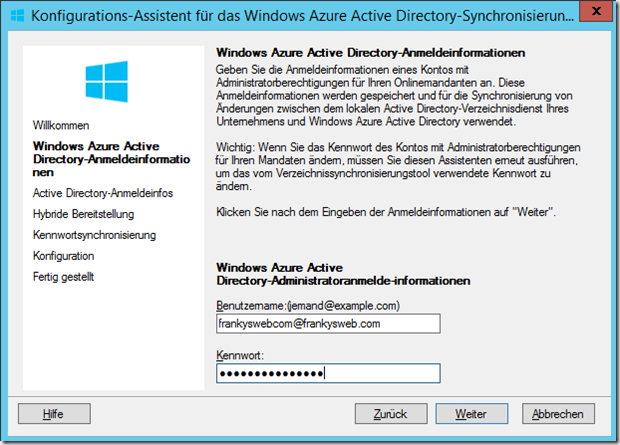
In the next dialog, a user with domain administrator rights must be specified and the user must also be a member of the "FIMSyncAdmins" group that was created during installation:
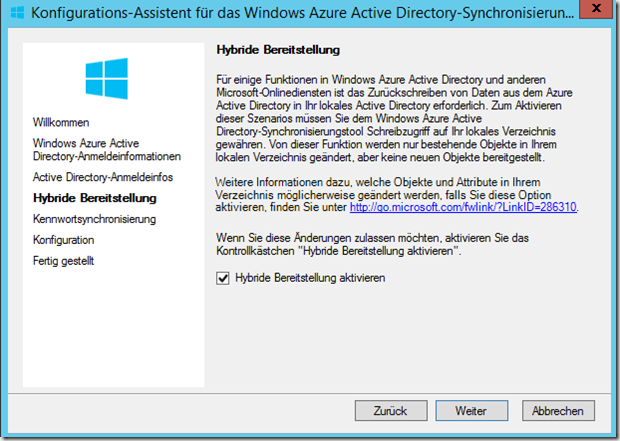
The "Hybrid provisioning" mode allows changes to be synchronized from EOP to the local AD, but the mode is not mandatory:
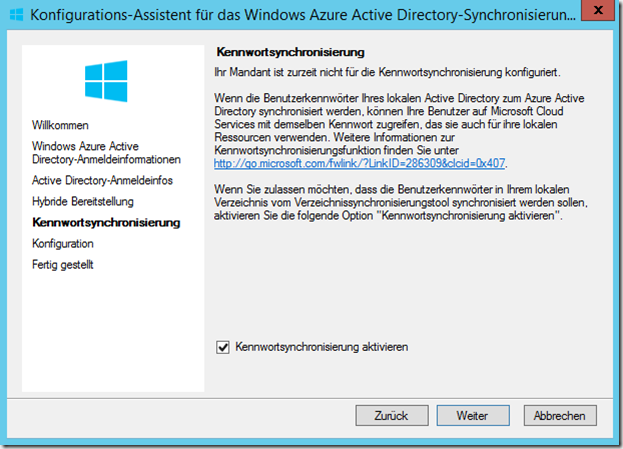
Password synchronization with Azure AD is also not absolutely necessary:
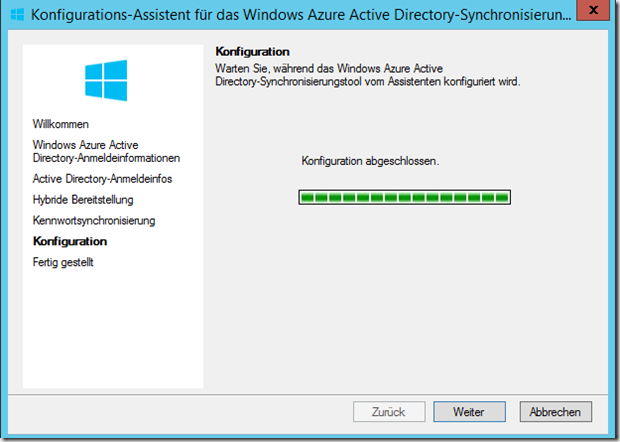
The configuration should be completed without errors:
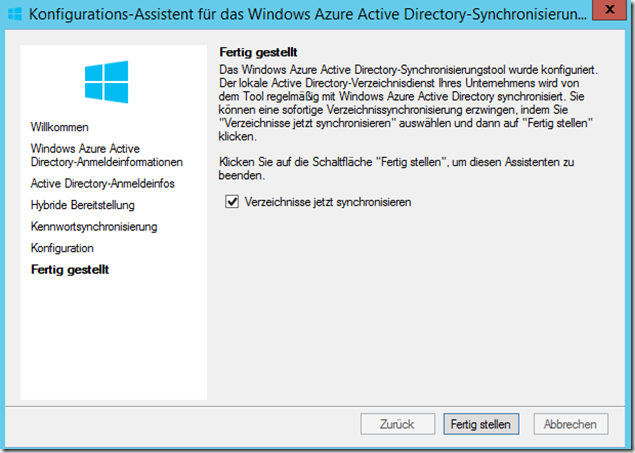
Finally, the local AD can be synchronized with Azure:
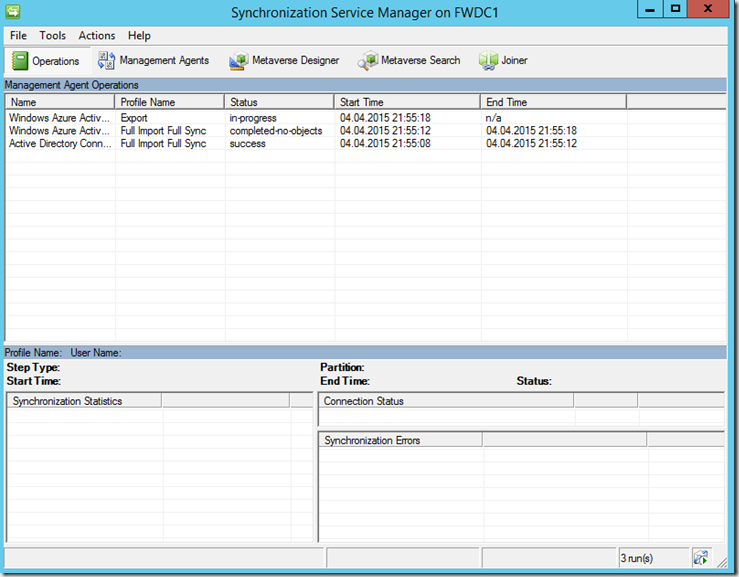
The synchronization process can be monitored with the Synchronization Service Manager. The tool can be found under the following path:
C:\Program Files\Windows Azure Active Directory Sync\SYNCBUS\Synchronization Service\UIShell\miisclient.exe
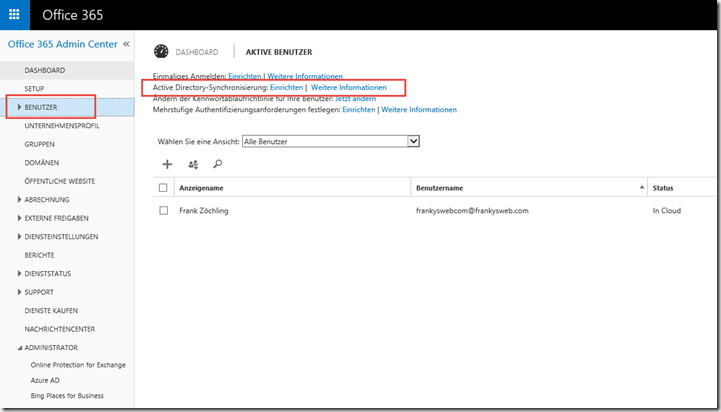
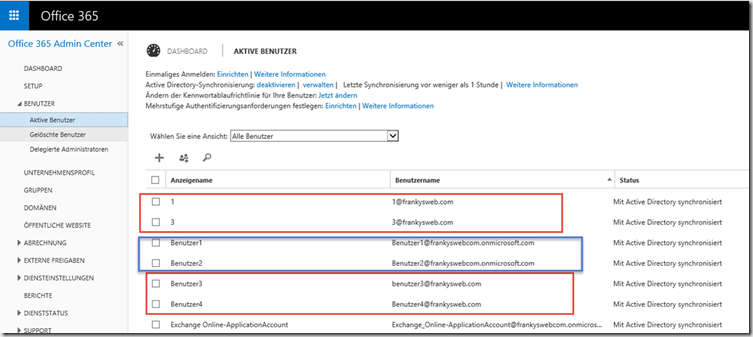
After synchronization has been completed, the users are displayed in the Office 365 portal under "Active users". The assignment works for users with a changed UPN (red), but not for users without a changed UPN (blue)
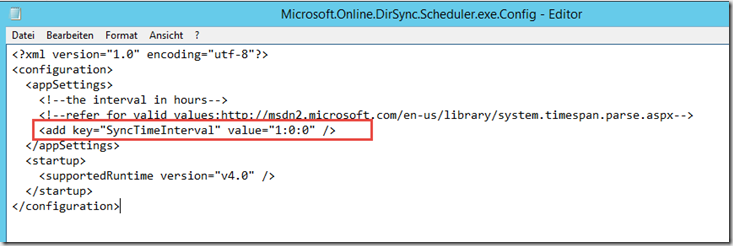
Note: The local AD is synchronized with Azure AD every 3 hours. The interval can be adjusted via the following file:
C:\Program Files\Windows Azure Active Directory Sync\Microsoft.Online.DirSync.Scheduler.exe.Config
Here is the example for 1 hour:
After customizing the file, the "Windows Azure Active Directory Sync Service" must be restarted. Synchronization can also be initiated manually by loading a PowerShell SnapIn from the following directory:
C:\Program Files\Windows Azure Active Directory Sync\DirSync
Import modules .\DirSync.psd1
Start-OnlineCoexistenceSync
The EOP configuration is now complete, a small Exchange configuration and the conversion of the MX records are still missing.
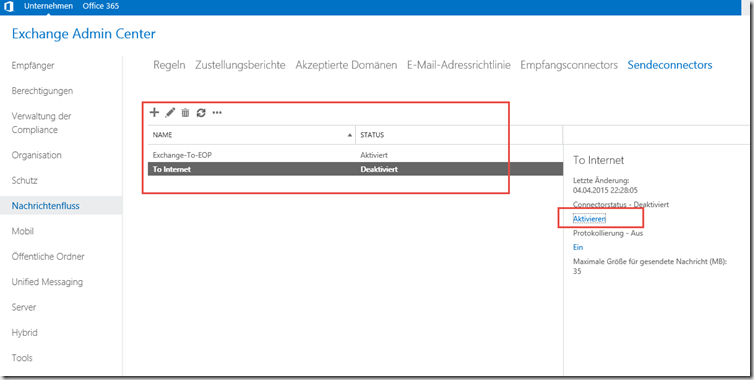
First create the local Exchange send connector so that outgoing mails are routed via EOP:
New-SendConnector -Name "Exchange-To-EOP" -AddressSpaces * -CloudServicesMailEnabled $true -Fqdn "outlook.frankysweb.de" -RequireTLS $true -SmartHosts frankysweb-com.mail.protection.outlook.com -TlsAuthLevel CertificateValidation
The command must be adapted slightly:
-fqdn: specifies the external name of the Exchange server, normally this is the HELO entry that is also on the certificate
-smarthostsDomain TLD.mail.protection.outlook.com. Domain and TLD are separated by a hyphen
The old Send Connector can initially be deactivated or deleted directly
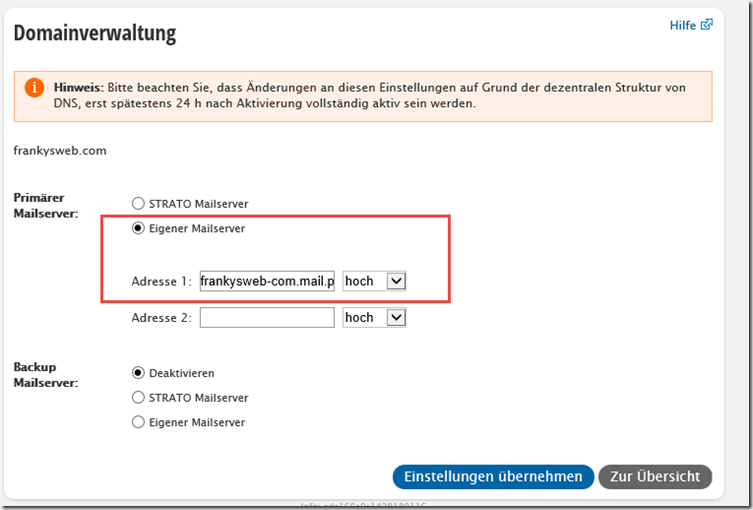
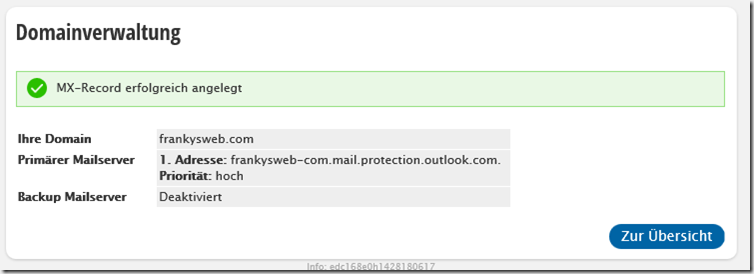
Finally, change the MX record at the provider (in my case Strato again):
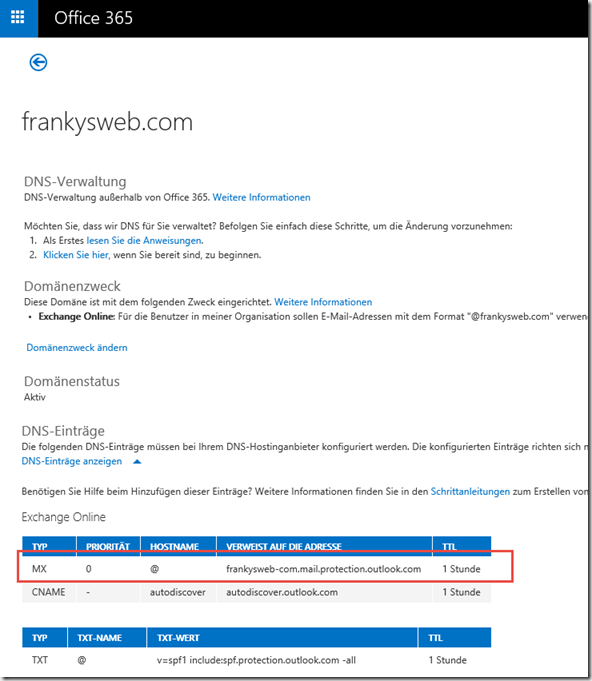
Normally, the MX Reocrd is also domain-tld.mail.protection.outlook.com. However, the MX can also be displayed under "Domains" by clicking on "Manage DNS":
The SPF entries that should be configured if the provider supports this are displayed here next to the MX:
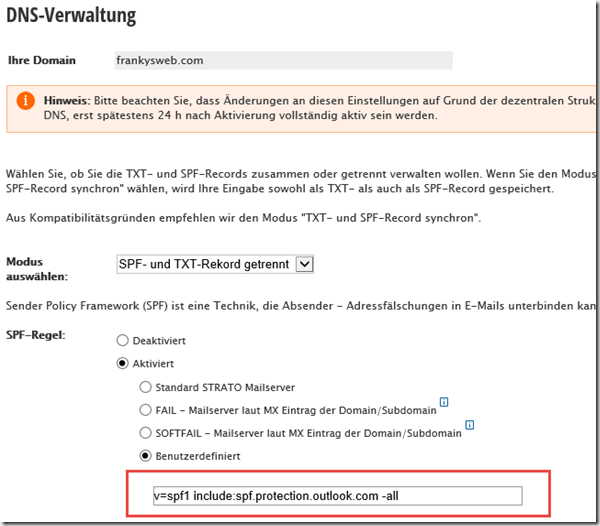
Strato configuration for SPF:
Done, at least with the basic configuration... ![]()










Hi Franky,
Kannst Du was zu der Zuverlässigkeit und Wirksamkeit von EOP sagen?
Verwendet EOP die „normalen“ Filter, wie sie auch in Exchange 2013 enthalten sind?
Grüße,
Uli
Hi Ulrich,
EOP kannst du nicht mit den Exchange 2016 Filtern vergleichen. Die Technik hinter EOP ist eine komplett andere. Hier gibt es eine nette PowerPoint zu EOP (ist allerdings aus 2015):
http://video.ch9.ms/sessions/ignite/2015/decks/BRK3106_Banerjee.pptx
Gruß, Frank
Hallo,
Die Frage kam auf, da ich in der EAC keine andere Einstellungen für das EOP gefunden habe.
Danke für die Info und den Link.
Ulrich
Hi Ulrich,
EOP ist ein Cloud Service und kann nicht via EAC verwaltet werden.
Gruß, Frank
Im O365 Admin Center gibt’s aber keine gesonderte Konfiguration, oder? Ich muss den Filter doch irgendwie konfigurieren können, sprich whitelist/Blacklist. In meinem Exchange hinterher ist es dann ja schon zu spät, der MX hat die Mail ja entweder verworfen oder schon angenommen.
Hi,
hier ist es beschrieben:
https://support.office.com/de-de/article/Verhindern-dass-E-Mails-in-EOP-und-Office-365-als-Spam-gekennzeichnet-werden-74aaade0-efc0-46ac-b949-f2d1d59256fa?ui=de-DE&rs=de-DE&ad=DE