

This howto describes the installation of Exchange 2016 on Windows Server 2016.
Note: This article is a bit older. There is an updated version here:
Create Active Directory account
Windows Server 2016 setzt auf einer striktere Benutzertrennung. Es ist daher nicht ratsam den Exchange Server mit dem Benutzer „Administrator“ zu installieren, sondern es sollte ein administrativer Benutzer angelegt werden, der die Exchange Installation durchführt. Es handelt sich dabei nicht um ein Dienstkonto, mit dem die Exchange Dienst gestartet werden.
The following rights are required for the account that performs the Exchange installation:
- Domain Admins
- Organization Admins
- Scheme admins

Note: Die Gruppe „Schema-Admins“ ist nur erforderlich, wenn das Schema während der Exchange Installation erweitert wird. Das Schema lässt sich auch separat vor der Exchange Installation mit einem anderen Benutzer erweitern.
Install prerequisites
The easiest way to install the required Windows features and roles is via PowerShell:
Install-WindowsFeature NET-WCF-HTTP-Activation45, RPC-over-HTTP-proxy, RSAT-Clustering, RSAT-Clustering-CmdInterface, RSAT-Clustering-Mgmt, RSAT-Clustering-PowerShell, Web-Mgmt-Console, WAS-Process-Model, Web-Asp-Net45, Web-Basic-Auth, Web-Client-Auth, Web-Digest-Auth, Web-Dir-Browsing, Web-Dyn-Compression, Web-Http-Errors, Web-Http-Logging, Web-Http-Redirect, Web-Http-Tracing, Web-ISAPI-Ext, Web-ISAPI-Filter, Web-Lgcy-Mgmt-Console, Web-Metabase, Web-Mgmt-Console, Web-Mgmt-Service, Web-Net-Ext45, Web-Request-Monitor, Web-Server, Web-Stat-Compression, Web-Static-Content, Web-Windows-Auth, Web-WMI, Windows-Identity-Foundation, RSAT-ADDS

Note: The PowerShell must be executed with administrative rights:

After installing the Windows features, UCMA Runtime 4 must be installed:
Unified Communications Managed API 4.0 Runtime

Configure Windows Server
Windows Defender should be temporarily deactivated before the Exchange Server installation. Otherwise the installation may take longer and cause other problems:

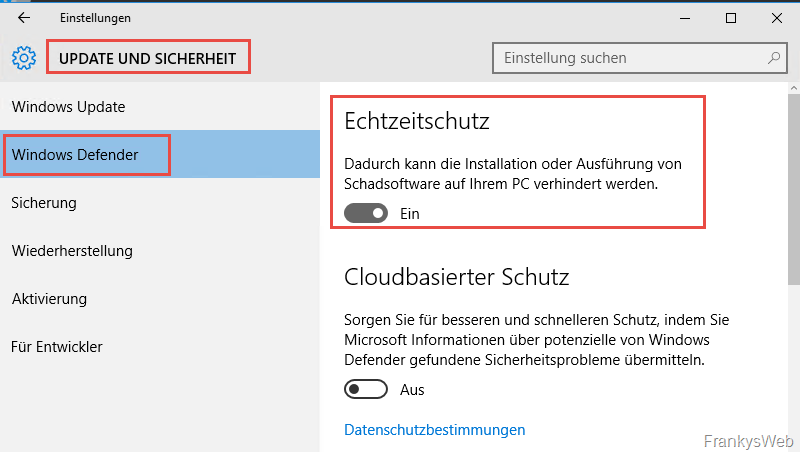
After the Exchange installation, Windows Defender is configured accordingly and switched on again.
General recommendation for Exchange Server: The size of the swap file should be set to the size of the RAM plus 10 MB. With 10 GB RAM (10240 MB + 10 MB), this results in a fixed swap file size of 10250 MB:

If the Exchange Server has 32 GB or more RAM, the maximum size for the swap file is 32778 MB. With 64 GB RAM, this remains at 32778 MB.
Furthermore, for performance reasons, the following assignment of drives is advisable:
- Laufwerk C:\ für die Windows Installation
- Laufwerk D:\ Auslagerungsdatei
- Laufwerk E:\ Exchange Installation
- Laufwerk F:\ Datenbank
- Laufwerk G:\ Logfiles der Datenbank
If you have several databases, it is advisable to mount the database and log files in folders so that you do not run out of drive letters.
Several SCSI controllers can also be used in virtual environments:
- SCSI Controller 1 for C:, D: and E:
- SCSI Controller 2 for F:
- SCSI Controller 3 for G:
Exchange Server Installation
Once the operating system has been prepared, Exchange Server 2016 can be installed. Windows Server 2016 is supported from Exchange 2016 CU3. The CU3 is also suitable for installation and can be downloaded here:
Cumulative Update 3 for Exchange Server 2016 (KB3152589)
The Exchange installation is then unspectacular, so I will only comment in the relevant places:


Im Anschluss an die Lizenzbedingungen empfiehlt es sich „Empfohlene Einstellungen nicht verwenden“ zu wählen, da sonst im weiteren Verlauf Einstellungen nicht verfügbar sind:

Exchange 2016 only has one role (mailbox role), apart from the Edge Transport role:

After selecting the mailbox role, the installation directory can be customized. As described above, the installation directory should be located on a separate partition or hard disk:

You can now enter the name of the Exchange organization:


If all requirements are met, only the warning appears that the Active Directory schema will be extended if it has not been done before.

Once the installation is complete, Windows Defender can be configured.
Configure Windows Defender
Windows Defender is activated by default on Windows Server 2016. As Exchange Server requires some exclusions from the virus scanner, these must also be stored accordingly in Windows Defender. The same applies to virus scanners from other manufacturers.
The following information can be found on the Exchange Team Blog:
Windows Defender is on by default in Windows Server 2016. Attention to malware settings is particularly important with Exchange to avoid long processing times during installation and upgrade, as well as unexpected performance issues. The Exchange team recommends the Exchange installation and setup log folders be excluded from scanning in Windows Defender and other Anti-Virus software. Exchange noderunner processes should also be excluded from Windows Defender.
Source: Exchange Team Blog
The exclusions for Exchange 2016 are documented here in Technet:
However, the list is long, so Exchange MVP Paul Cunningham has published a script that clearly sorts the folders, processes and file types into 3 files. You can download the script here:
Generate Antivirus Exclusions for Exchange 2013 and 2016 Servers
To avoid having to enter all exclusions manually in Windows Defender, I have created a script that uses the files from Paul's script and adds the exclusions to Windows Defender via PowerShell:
Exchange 2016: Virus scanner exclusions (script for Windows Defender)
Once the exceptions have been entered, Windows Defender can be reactivated.

Note: This article is a bit older. There is an updated version here: