After I have already explained the installation of Exchange 2019 on Server 2019 with graphical user interface now follows the recommended installation on Windows Server 2019 Core. The installation of Exchange 2019 on Server Core is quicker than on a server with a graphical user interface; once Exchange has been installed, there is virtually no need to get used to it. The Exchange Management Shell is also available on a Server Core. The Exchange Admin Center can be accessed from any computer. If you want to install Exchange on Server Core but do not want to do without a GUI, you should download the Windows Admin Center view.
Surroundings
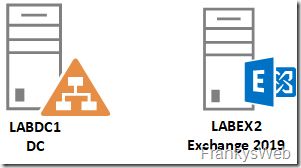
The environment is again very simple. There is only one domain controller and one VM with Windows Server 2019 Core:
Both servers were installed as VMs. The configuration of LABEX2 (Windows Server 2019 Core) is described below.
Preparation Server 2019 Core
Server 2019 Core does not have a GUI and most of the administration tools (MMC, Server Manager, Explorer, etc.) are not included. In short: Almost everything that is operated with the mouse is missing. However, there is a small text-based tool called "sconfig" for basic settings such as host name, network and updates. Instead of the GUI, this is a TUI (Text User Interface ![]() ):
):
I find it a bit old-fashioned that Server 2019 Core also starts the old CMD after logging in and does not switch directly to PowerShell. However, Sconfig fulfills its purpose: computer name, RDP, Windows Updates, network, domain, etc. can be configured in just a few steps:
I have only made the settings at this point:
- Computer name
- Joining the Active Directory
- Remote Desktop activated
- Assign static IP
- Windows Updates
- Telemetry... (no comment...)
All these settings can of course also be made via PowerShell and thus automated.
After the basic settings have been made, a few prerequisites must be created.
Install Exchange prerequisites
Like every other Exchange version, Exchange 2019 on Server Core also requires a few prerequisites. The quickest way to install these is via PowerShell. PowerShell can be called directly from the CMD:
Only two Windows features are initially required so that the UCMA can be installed later and the ActiveDirectory schema can be updated manually if necessary. These can be installed with the following command:
Install-WindowsFeature Server-Media-Foundation, RSAT-ADDS
Another Exchange requirement is Visual C++ 2013 Runtime. Anyone who has previously downloaded and installed this directly via browser on the server must now do without the browser. However, you can also use Powershell to quickly create a directory for the download and download the file using the following small script, for example:
New-Item c:\install -Type directory
$webClient = New-Object -TypeName System.Net.WebClient
$webClient.DownloadFile('https://download.microsoft.com/download/2/E/6/2E61CFA4-993B-4DD4-91DA-3737CD5CD6E3/vcredist_x64.exe','c:\Install\vcredist_x64.exe')
Get-ChildItem C:\install\vcredist_x64.exe
C:\install\vcredist_x64.exe
The script only serves as an example, the installation can also be wonderfully automated here.
The next step is to install UCMA 4.0. When installing Exchange on Server Core, it is essential to install UCMA 4, which is supplied with the Exchange ISO. Since I have mounted the ISO directly as a virtual drive of the VM in my environment, I can switch directly to the drive and install UCMA:
d:
cd .\UCMARedist\
.\Setup.exe
Note: Once the Exchange ISO has been copied to the server, the ISO can be mounted on the server. The ISO is mounted with the following command:
Mount-DiskImage c:\Install\ExchangeServer2019-x64_RTM.iso
These were already all the requirements for the Exchange installation. The rest of the required Windows features can be installed directly with the Exchange setup, which is now absolutely stable.
At this point, the server should be restarted again before starting the Exchange setup.
Install Exchange 2019
After the restart Exchange can be installed, for this test environment I used the following command:
.\Setup.exe /m:install /roles:mb /IAcceptExchangeServerLicenseTerms /InstallWindowsComponents /OrganizationName:FrankysWebLab
Note: If the ISO was mounted on the server, it must also be mounted again after the server is restarted.
The parameter /OrganizationName is optional and only specifies the Exchange organization name; if the parameter is omitted, the first Exchange organization is called "First Exchange Organization". The parameter should only be specified for new Exchange installations in which there are no previous versions of Exchange Server.
There are a few more parameters that can be transferred directly during setup. For example, the installation directory or the name and path of the database can be specified. A list of the parameters can be output with the following command:
.\Setup.exe /help:Install
After Exchange has been installed, EMS can be used to set the Basic configuration perform. The Exchange Management Shell can be started with the following command (from CMD and PowerShell):
The Exchange Admin Center can be accessed from another computer via the following link:
- https://ExchangeServerIP/ecp


Schade das das nicht auf Windows Server 2016 Core / Standard ohne GUI läuft.
Ja ich habe den Titel gelesen, Ja ich weis das es sich um 2019 Core handelt.
Laut Microsofts Artikel soll es in einer Ähnlichen weise aber auch auf 2016 funktionieren : https://techcommunity.microsoft.com/t5/exchange-team-blog/deploy-exchange-server-2019-on-windows-server-core/ba-p/608269 , vielleicht gab es ein update o.ä. was das verhindert.
Zwar etwas spät, aber besser als nie.
.Net-Installationen auf einem Server Core brechen so gut wie immer ab oder produzieren Fehlermeldungen.
Warum? Weil der Installer gern eine UI hätte, die ein Core nicht hat. Soweit alles richtig erkannt.
Bevor man jedoch anfängt einen nicht unterstützten Weg einzuschlagen, einfach mal den Installer gescheit starten ;-)
c:\temp\ndp48-x86-x64-allos-enu.exe /q
Der wichtige Teil ist „/q“ für quite mode. Es gibt gar kein Fenster, nichtmal eine Rückmeldung ob es erfolgreich war. Im Taskmgr sieht man jedoch den Installer laufen. Mit ein bisschen Powershell lässt sich danach auch die Version abfragen (ein vorheriger reboot ist nicht verkehrt):
PS C:\> gci ‚HKLM:\SOFTWARE\Microsoft\NET Framework Setup\NDP‘ -recurse | gp -name Version -EA 0 | where { $_.PSChildName -match ‚^(?!S)\p{L}‘} | select PSChildName, Version
Das Exchange-2019-Setup benötigt seit CU4 auf einem Core-Server das .NET Framework 4.8. Der übliche (Offline-)Installer von Net4.8 bricht jedoch, vermutlich mangels GUI, die Installation ab. Da ich anderen Frankysweb-Lesern die Zeit für Fehlversuche sparen möchte: die Lösung ist das MSU-Paket aus dem Microsoft-Catalog.
Ich habe außerdem Franks Script ein wenig verwurstet:
######
$dest = „C:\install\“ #Zielpfad festlegen
New-Item $dest -Type Directory
Install-WindowsFeature Server-Media-Foundation, RSAT-ADDS
$urls = @(
‚https://download.microsoft.com/download/2/E/6/2E61CFA4-993B-4DD4-91DA-3737CD5CD6E3/vcredist_x64.exe‘ #Visual C++ Redistributable Packages für Visual Studio 2013
‚http://download.windowsupdate.com/d/msdownload/update/software/ftpk/2020/01/windows10.0-kb4486153-x64_43ee33b302bfdba470542a128a9ee0b58faa5412.msu‘ #Microsoft .NET Framework 4.8 for Windows 10 Version 1809 and Windows Server 2019 for x64 (KB4486153)
‚https://download.microsoft.com/download/D/F/F/DFFB3570-3264-4E01-BB9B-0EFDA4F9354F/UcmaRuntimeSetup.exe‘ #Unified Communications Managed API 4.0 Runtime
)
ipmo BitsTransfer #importiere BITS-Transfer-Modul
foreach ($url in $urls) {
Start-BitsTransfer -Priority High -Source $url -Destination ‚C:\install‘ #starte Download
$i = $dest+(Split-Path $url -Leaf) #starte Setup
Write-Host Starte: $i… -ForegroundColor cyan
Start-Process -FilePath $i
}
######
Danke Jörg ! You made my day ;)
Hi …
müssen Suchdienste separat installiert werden ? Habe EX2019 auf einem Core-Server installiert, bei
Get-MailboxDatabaseCopyStatus | ft Name,contentindexstate
bekomme ich als Ausgabe ein NotApplicable ?
Volltextsuchen im OWA enden ohne Ergebniss.
Fehlerbehung zum Probelm (Exchange 2019 unter Windows Server 2016):
Problem:
Der folgende Fehler wurde generiert, als „$error.Clear();
if (Get-Service MpsSvc* | ?{$_.Name -eq ‚MpsSvc‘})
{
Set-Service MpsSvc -StartupType Automatic
Start-SetupService -ServiceName MpsSvc
}
“ ausgeführt wurde: „Microsoft.PowerShell.Commands.ServiceCommandException: Der Dienst „Windows Defender Firewall (MpsSvc)“ kann aufgrund des folgenden Fehlers nicht konfiguriert werden: Zugriff verweigert —> System.ComponentModel.Win32Exception: Zugriff verweigert
— Ende der internen Ausnahmestapelüberwachung —„.
Lösung:
1. Use Regedit to rename key \HKLM\System\CurrentControlSet\Services\mpssvc\Security to Security.old
2. Restart
3. Run Exchange installation
4. Restart
5. Use Regedit to rename key \HKLM\System\CurrentControlSet\Services\mpssvc\Security.old back to Security
6. Restart
Nachtrag:
Habe es geschafft. Der Security Reg Key der Windows Firewall muss geändert werden. Schon übel…
HAallo Peter,
ich stehe aktuell vor dem gleichen Problem, und hatte auch bereits die Reg-Keys manipuliert, allerdings ohne Erfolg.
Wärst du so nett und würdest mir sagen welchen key du mit welchem user/recht versehen hast ?
Viele Grüße und schöne Feiertage
Martin
Hallo,
ich stehe aktuell vor demselben Problem und würde auch gerne erfahren, was genau Du umgestellt hast.
Danke!
Viele Grüße
Marc
Wie geht das, stehe vor dem gleichen Problem
Hallo,
Ich versuche momentan verzweifelt einen Exchange 2016 CU11 auf einen Windows 2019 Std. Server zu installieren. Habe schon zig Installationen hinter mir, aber zum ersten Mal auf einen 2019er Server. Beim „Installationspunkt“ bekomme ich folgende Fehlermeldung:
Fehler:
Der folgende Fehler wurde generiert, als „$error.Clear();
if (Get-Service MpsSvc* | ?{$_.Name -eq ‚MpsSvc‘})
{
Set-Service MpsSvc -StartupType Automatic
Start-SetupService -ServiceName MpsSvc
}
“ ausgeführt wurde: „Microsoft.PowerShell.Commands.ServiceCommandException: Der Dienst „Windows Defender Firewall (MpsSvc)“ kann aufgrund des folgenden Fehlers nicht konfiguriert werden: Zugriff verweigert —> System.ComponentModel.Win32Exception: Zugriff verweigert
— Ende der internen Ausnahmestapelüberwachung —„.
Kann mir hier jemand weiterhelfen? Weiss nicht mehr weiter…
Hallo Frank,
alles bestens. launchEMS läuft jetzt.
Gruß, Georg
Das war jetzt aber einfach: Mit mehr Arbeitsspeicher und größerer Festplatte funktioniert auch launchEMS.
Hallo Georg,
entschuldige bitte die späte Antwort. Gibt es noch ein Problem mit launchEMS oder läuft es jetzt fehlerfrei?
Gruß,
Frank
Einen Workaround habe ich gefunden. Mit diesem Script kann ich arbeiten, nachdem ich die powershell gestartet habe:
$s = New-PSSession -ConfigurationName Microsoft.Exchange `
-ConnectionUri http://mein-exchange-server.de/PowerShell/ `
-Authentication Kerberos
Import-PSSession $s
Was muss ich ändern, wenn launchEMS diesen Fehler liefert? Eine gute Lösung per Internetrecherche habe bis jetzt nicht gefunden.
C:\Program Files\Microsoft\Exchange Server\V15\bin\RemoteExchange.ps1 : Cannot dot-source this command because it was
defined in a different language mode. To invoke this command without importing its contents, omit the ‚.‘ operator.
At line:1 char:1
+ . „C:\Program Files\Microsoft\Exchange Server\V15\bin\RemoteExchange. …
+ ~~~~~~~~~~~~~~~~~~~~~~~~~~~~~~~~~~~~~~~~~~~~~~~~~~~~~~~~~~~~~~~~~~~~~
+ CategoryInfo : InvalidOperation: (:) [RemoteExchange.ps1], NotSupportedException
+ FullyQualifiedErrorId : DotSourceNotSupported,RemoteExchange.ps1
Sehr übersichtliche Darstellung, vielen Dank! Bei den Voraussetzungen wird auch der Domänen-Funktionslevel geprüft. Den musste ich auf meinem Testsystem von Windows Server 2008 R2 auf (mindestens) Windows Server 2012 R2 heben, sonst wäre es nicht weitergegangen.
Danke vielmals für deine tollen und sehr ausführlichen Anleitungen. Meine Migration auf den Exchange 2019 mit Core Server hat sehr gut funktioniert! Davor auch von 2013 auf 2016.
Ich denke da wird sich bei der bisherigen Empfehlungen nix geändert haben, 200 GB bzw. 2 TB.
Hi, hab mal eine kurze Frage und zwar was ist bei Exchange 2019 eigentlich die Obergrenze für die Postfachdatenbankgröße?
Vielen Dank für die sehr gute Anleitung! Es stellt sich mir die Frage, ob sich ein Wechsel von WinServer/Exch 2016 auf 2019 alleine wegen der Möglichkeit der Core-Installation lohnt?!?