

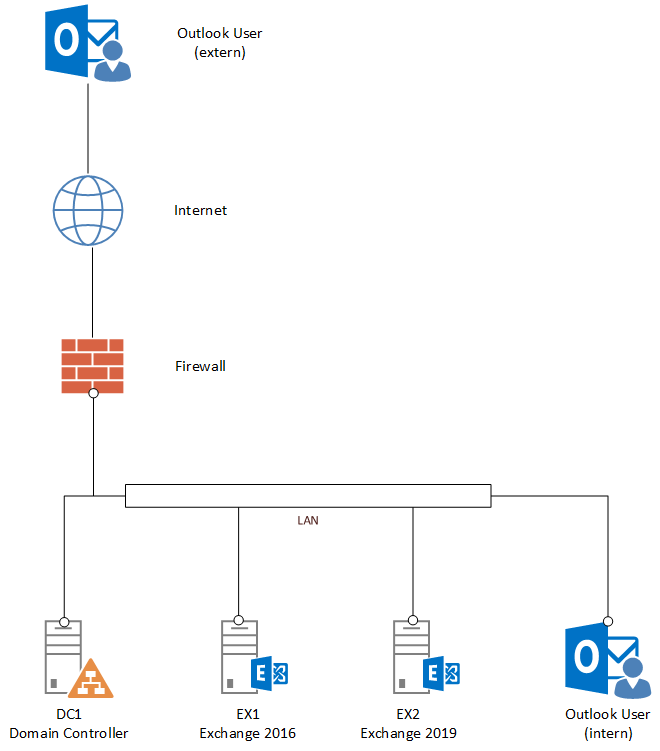
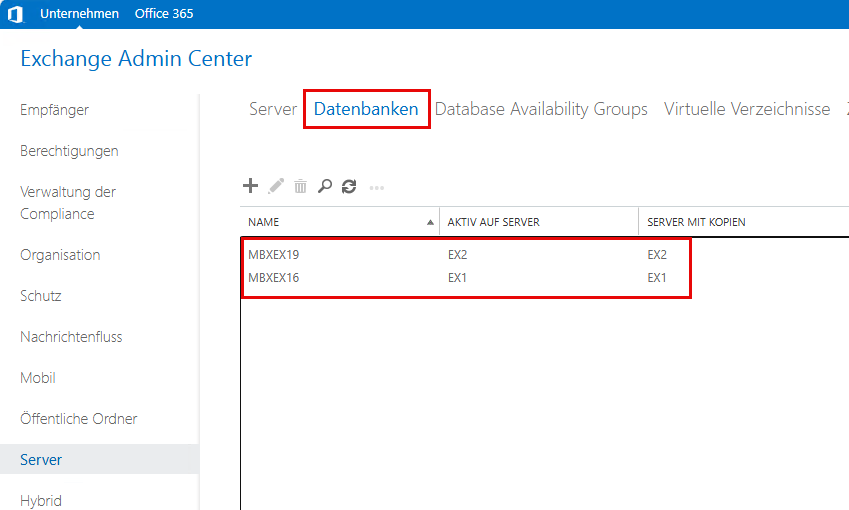
In the first part of this series of articles I briefly introduced the environment, meanwhile the Exchange 2019 Server installed and you can start with the configuration and migration. The second part deals with the configuration of the installed Exchange 2019 server. Here is an overview of the environment:
If it is a larger Exchange organization and an Exchange 2016 DAG is to be migrated to Exchange 2019 CU15, then the Exchange 2019 DAG after this article can be created. If Kerberos was activated for the Exchange 2016 environment, the following can now also be created Kerberos for Exchange 2019 be activated with a new Alternate Service Account.
Exchange 2019 configuration
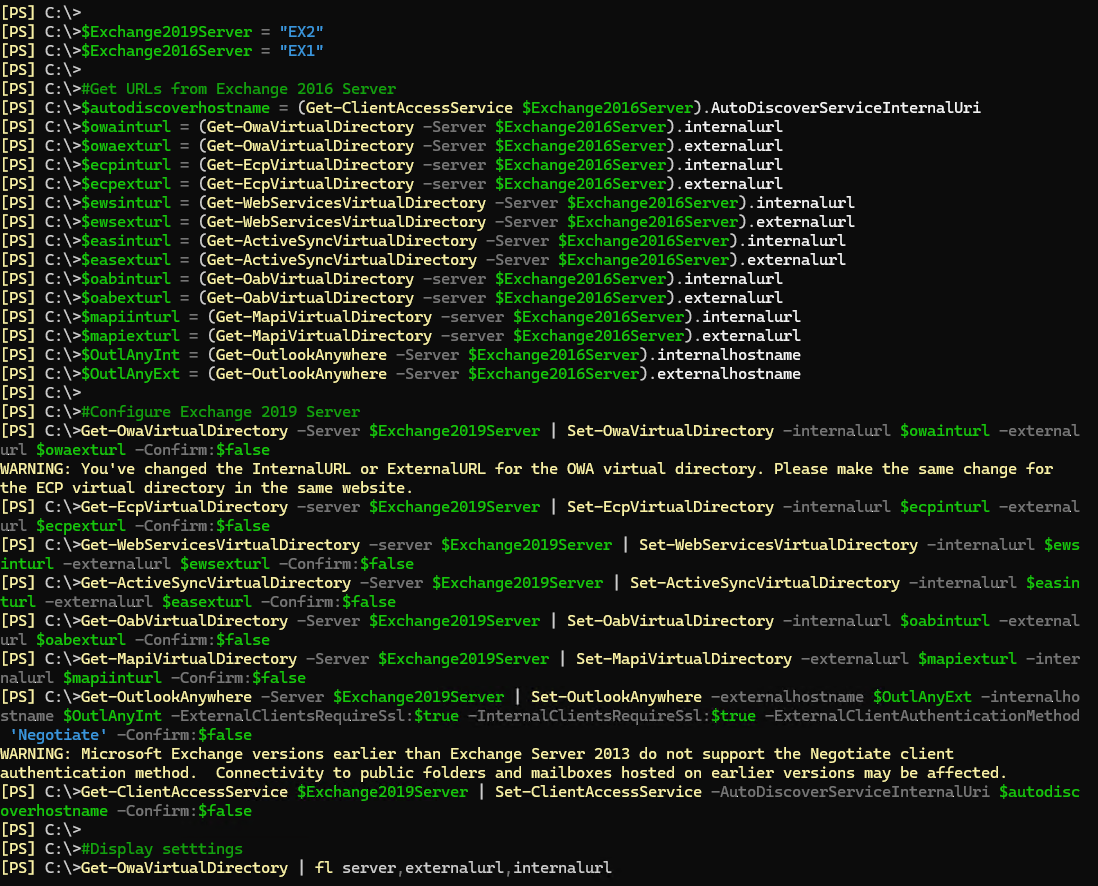
On the new Exchange Server, the URLs for the interfaces can be customized first. As the Exchange 2019 server is already distributed to clients in the Active Directory via autodiscover, it makes sense to configure the URLs and certificate promptly so that there are no certificate warnings for the clients. The Exchange 2019 URLs are configured identically to the Exchange 2016 URLs. A small script can be used so that not all URLs have to be adjusted manually. Only the corresponding host names for the two Exchange servers need to be specified in the script:
$Exchange2019Server = "EX2"
$Exchange2016Server = "EX1"

#Get URLs from Exchange 2016 Server
$autodiscoverhostname = (Get-ClientAccessService $Exchange2016Server).AutoDiscoverServiceInternalUri
$owainturl = (Get-OwaVirtualDirectory -Server $Exchange2016Server).internalurl
$owaexturl = (Get-OwaVirtualDirectory -Server $Exchange2016Server).externalurl
$ecpinturl = (Get-EcpVirtualDirectory -server $Exchange2016Server).internalurl
$ecpexturl = (Get-EcpVirtualDirectory -server $Exchange2016Server).externalurl
$ewsinturl = (Get-WebServicesVirtualDirectory -Server $Exchange2016Server).internalurl
$ewsexturl = (Get-WebServicesVirtualDirectory -Server $Exchange2016Server).externalurl
$easinturl = (Get-ActiveSyncVirtualDirectory -Server $Exchange2016Server).internalurl
$easexturl = (Get-ActiveSyncVirtualDirectory -Server $Exchange2016Server).externalurl
$oabinturl = (Get-OabVirtualDirectory -server $Exchange2016Server).internalurl
$oabexturl = (Get-OabVirtualDirectory -server $Exchange2016Server).externalurl
$mapiinturl = (Get-MapiVirtualDirectory -server $Exchange2016Server).internalurl
$mapiexturl = (Get-MapiVirtualDirectory -server $Exchange2016Server).externalurl
$OutlAnyInt = (Get-OutlookAnywhere -Server $Exchange2016Server).internalhostname
$OutlAnyExt = (Get-OutlookAnywhere -Server $Exchange2016Server).externalhostname

#Configure Exchange 2019 Server
Get-OwaVirtualDirectory -Server $Exchange2019Server | Set-OwaVirtualDirectory -internalurl $owainturl -externalurl $owaexturl -Confirm:$false
Get-EcpVirtualDirectory -server $Exchange2019Server | Set-EcpVirtualDirectory -internalurl $ecpinturl -externalurl $ecpexturl -Confirm:$false
Get-WebServicesVirtualDirectory -server $Exchange2019Server | Set-WebServicesVirtualDirectory -internalurl $ewsinturl -externalurl $ewsexturl -Confirm:$false
Get-ActiveSyncVirtualDirectory -Server $Exchange2019Server | Set-ActiveSyncVirtualDirectory -internalurl $easinturl -externalurl $easexturl -Confirm:$false
Get-OabVirtualDirectory -Server $Exchange2019Server | Set-OabVirtualDirectory -internalurl $oabinturl -externalurl $oabexturl -Confirm:$false
Get-MapiVirtualDirectory -Server $Exchange2019Server | Set-MapiVirtualDirectory -externalurl $mapiexturl -internalurl $mapiinturl -Confirm:$false
Get-OutlookAnywhere -Server $Exchange2019Server | Set-OutlookAnywhere -externalhostname $OutlAnyExt -internalhostname $OutlAnyInt -ExternalClientsRequireSsl:$true -InternalClientsRequireSsl:$true -ExternalClientAuthenticationMethod 'Negotiate' -Confirm:$false
Get-ClientAccessService $Exchange2019Server | Set-ClientAccessService -AutoDiscoverServiceInternalUri $autodiscoverhostname -Confirm:$false

#Display setttings
Get-OwaVirtualDirectory | fl server,externalurl,internalurl
Get-EcpVirtualDirectory | fl server,externalurl,internalurl
Get-WebServicesVirtualDirectory | fl server,externalurl,internalurl
Get-ActiveSyncVirtualDirectory | fl server,externalurl,internalurl
Get-OabVirtualDirectory | fl server,externalurl,internalurl
Get-MapiVirtualDirectory | fl server,externalurl,internalurl
Get-OutlookAnywhere | fl servername,ExternalHostname,InternalHostname
Get-ClientAccessService | fl name,AutoDiscoverServiceInternalUri
The script then configures all Exchange 2019 URLs with the values from the Exchange 2016 configuration:
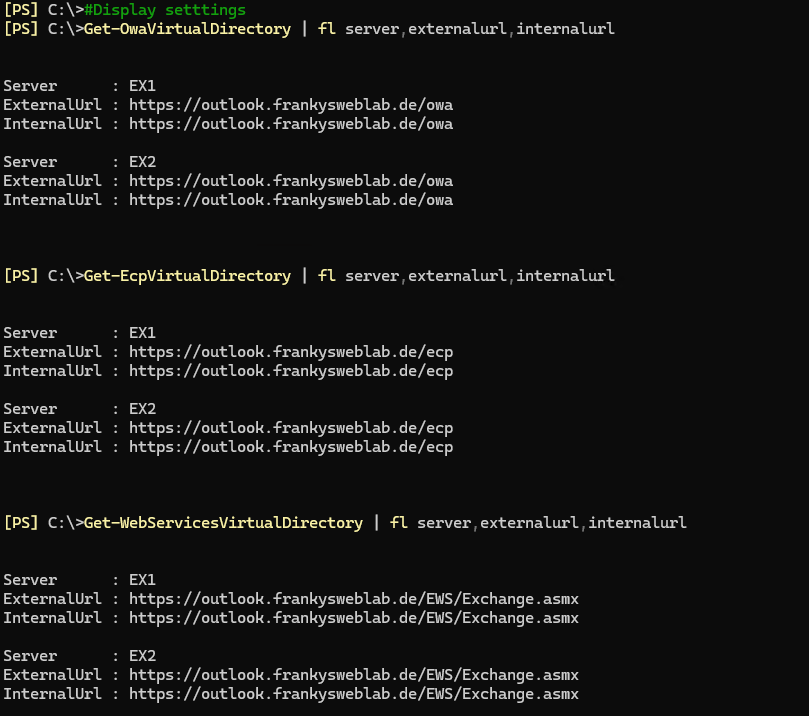
Finally, the current configuration is displayed:
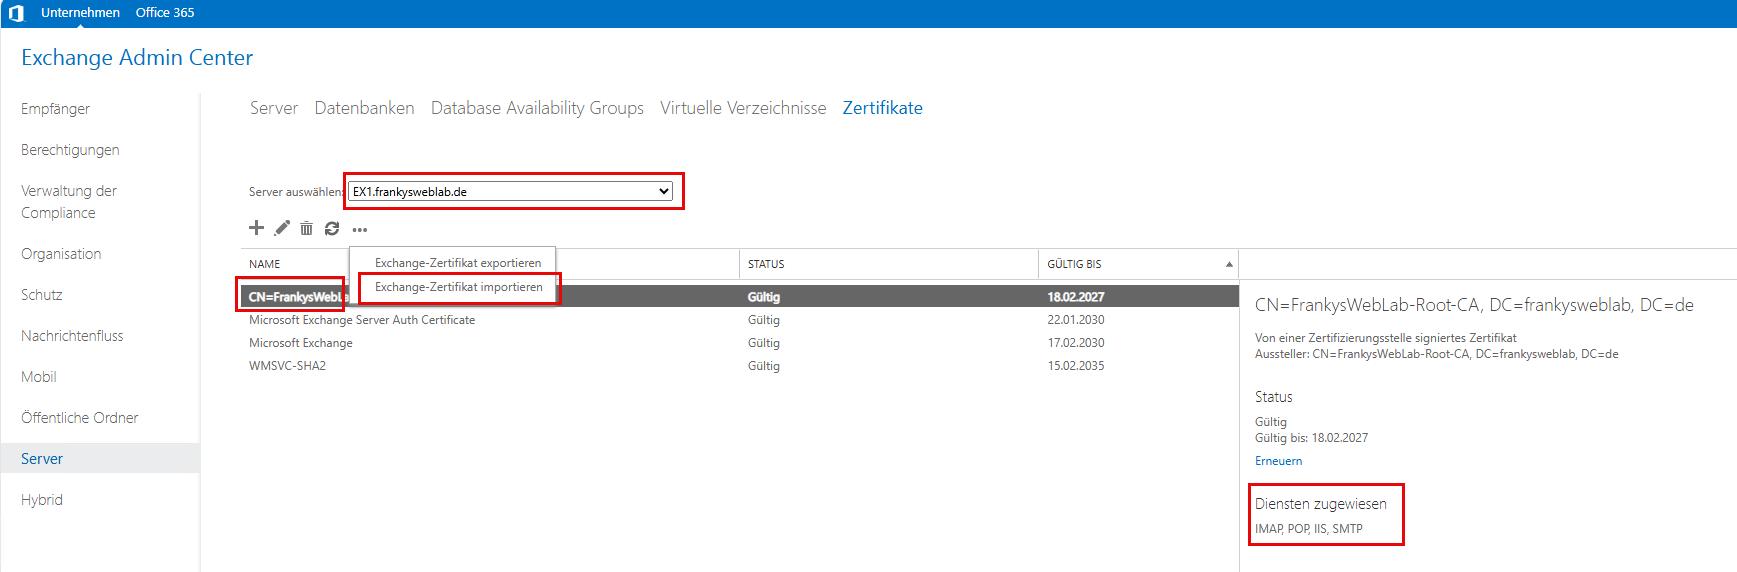
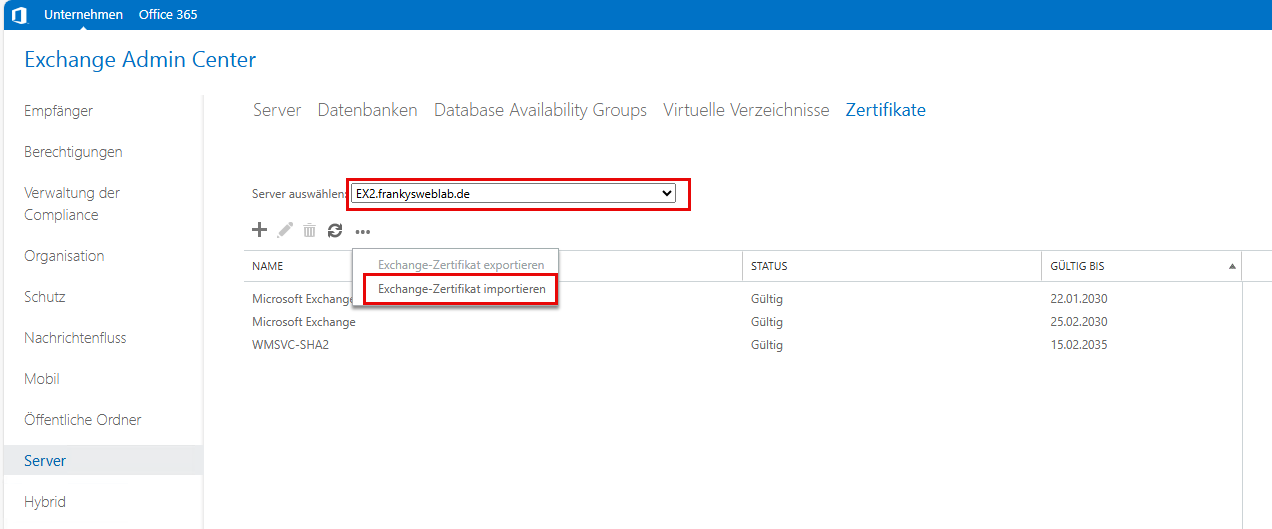
Next, the certificate is exported from the Exchange 2016 server and imported into the new server. It is important at this point that the same certificate is used so that Extended Protection does not cause any problems. The corresponding certificate can be conveniently exported and imported via the Exchange Admin Center (this function has been reinstalled):
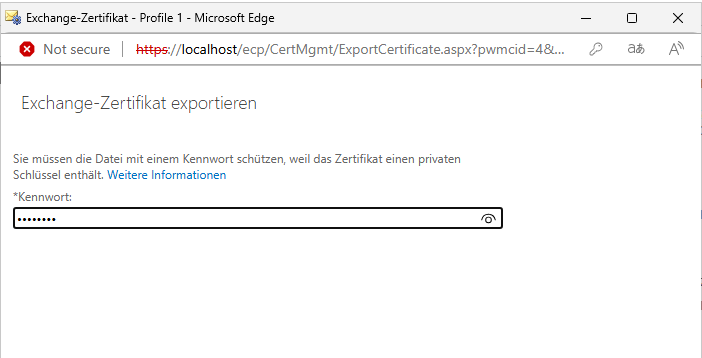
Only a password needs to be entered for the export, after which the certificate is downloaded:
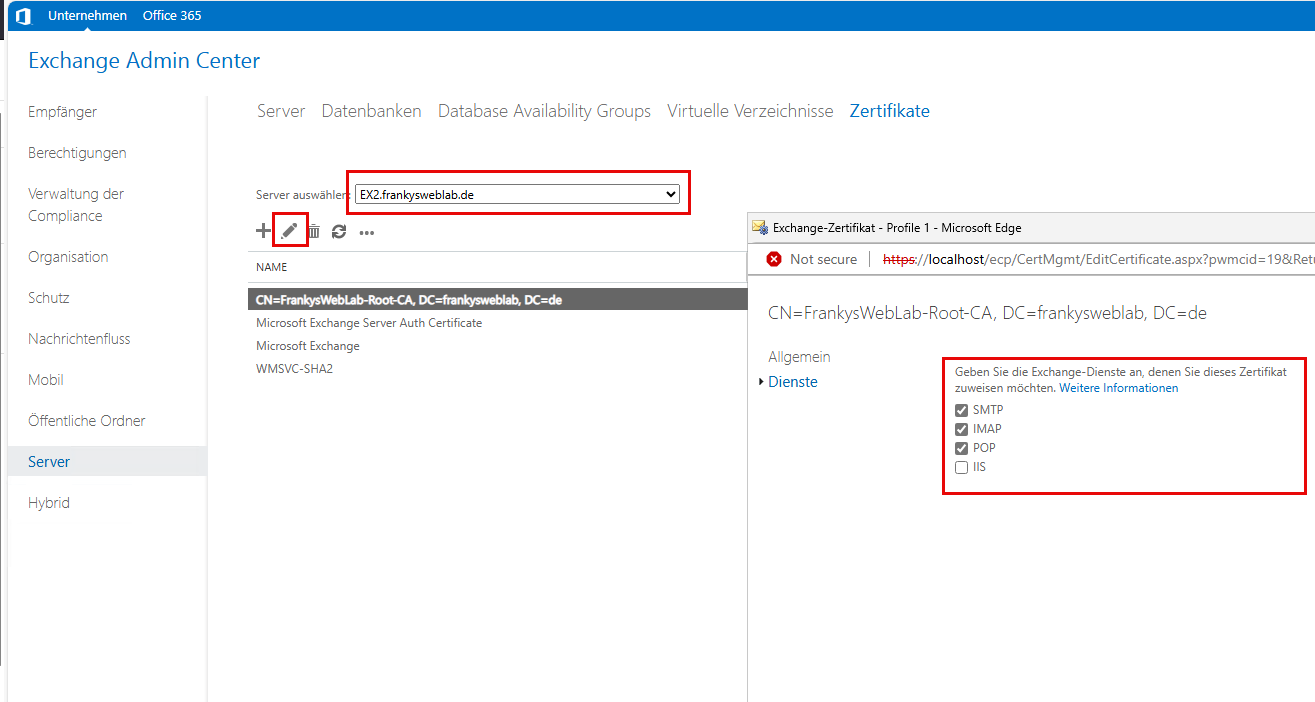
The certificate can then be imported on the Exchange 2019 server:
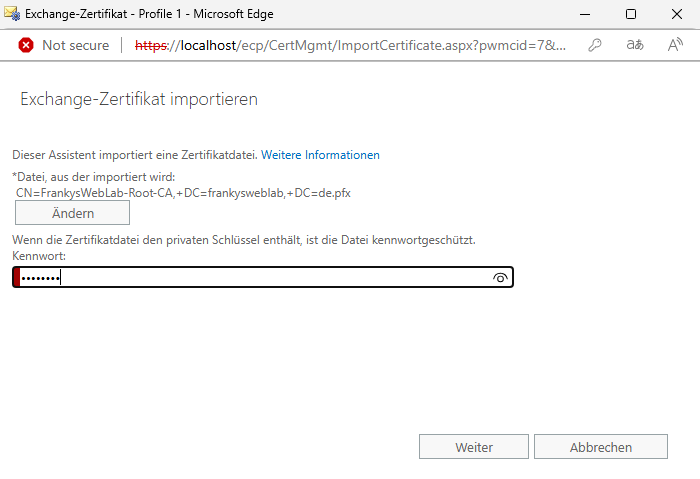
Select file and enter password:
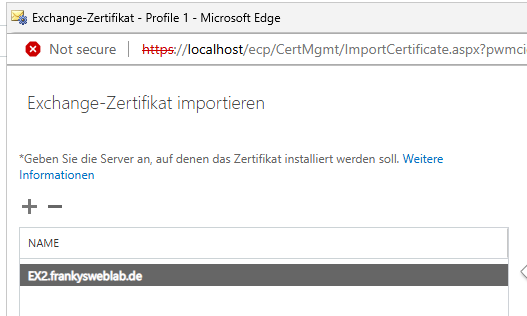
And specify the new server for the import:
Finally, the services are assigned to the certificate:
The connectors can now be configured. The same settings can be used here as for the Exchange 2016 servers. The new Exchange server is first added to the send connectors; no new connector needs to be created here, but the existing send connectors are adapted:
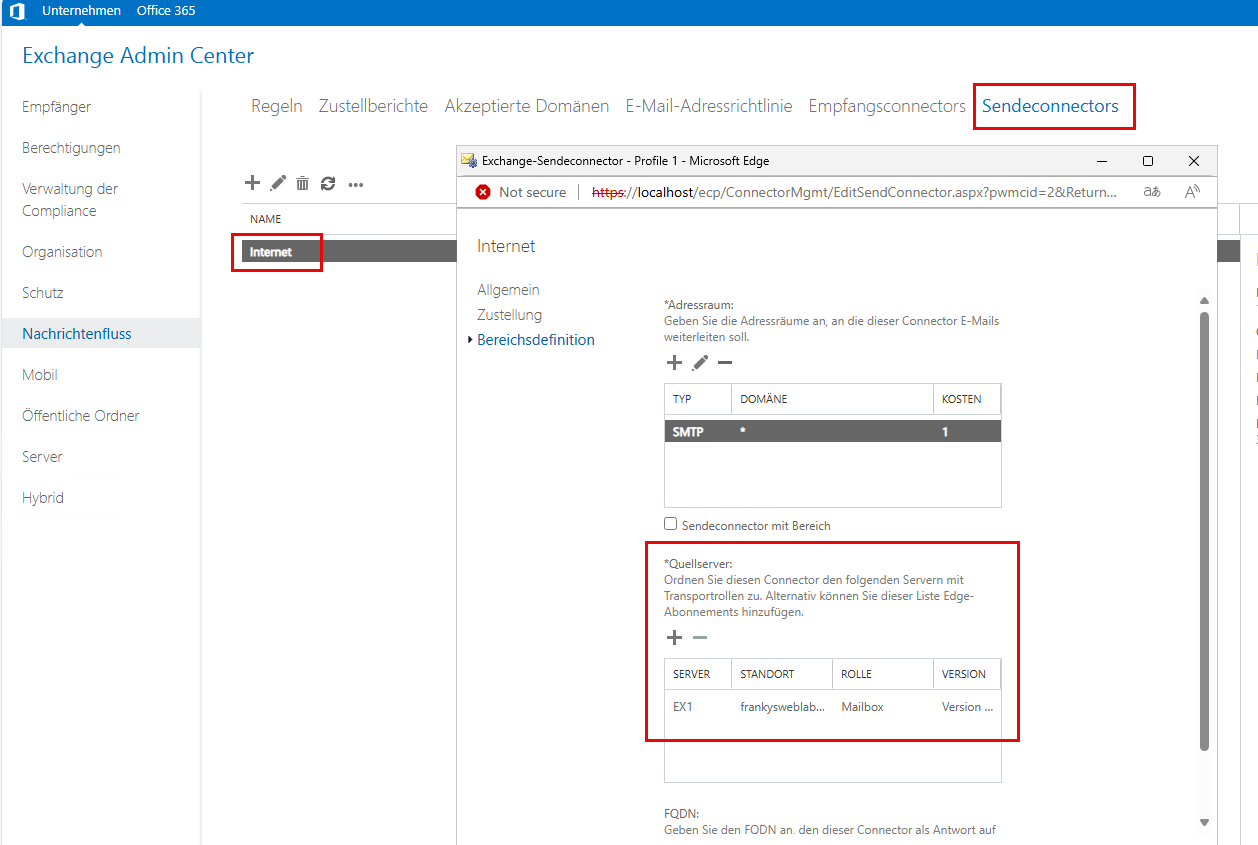
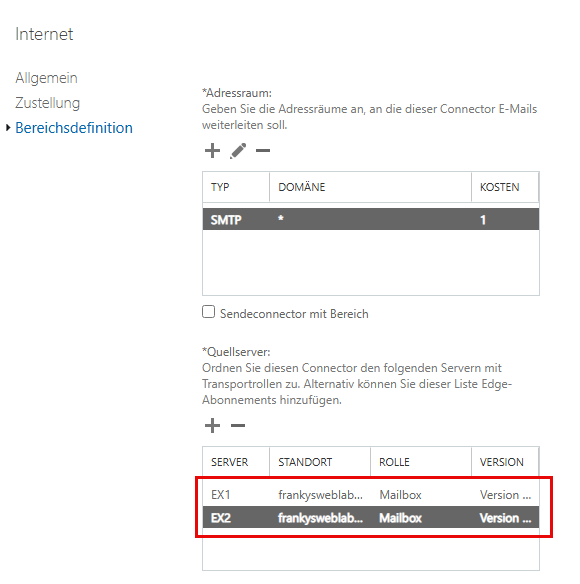
The new server is added here, as are any other send connectors:
This completes the configuration for sending mails. The situation is slightly different for the receive connectors. The receive connectors are created for each server and must therefore be adapted on the new server. Here it makes sense to place both servers next to each other and go through connector by connector:
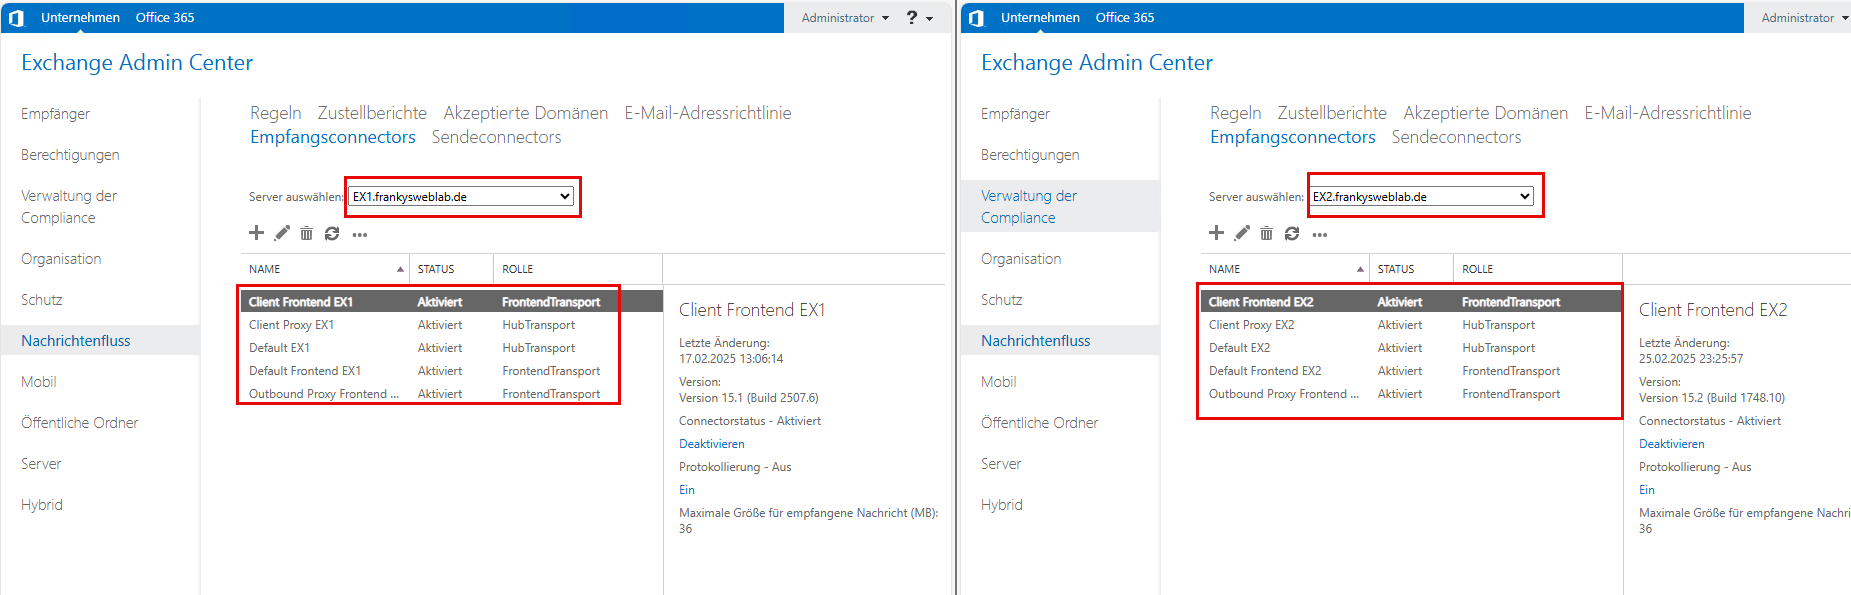
In particular, the size restrictions and security settings should be checked and adjusted if necessary. If there are additional receive connectors on the Exchange 2016 side, these connectors will also be created on the Exchange 2019 side.
The size limits are also important for the new database; here too, the limits must be adopted from the Exchange 2016 databases:
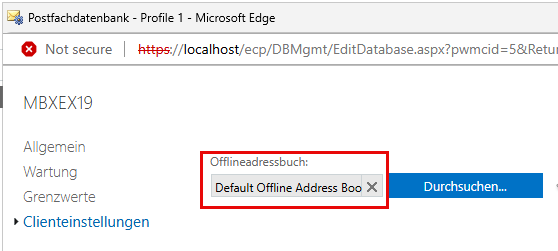
Here you should also not forget to assign the offline address book:
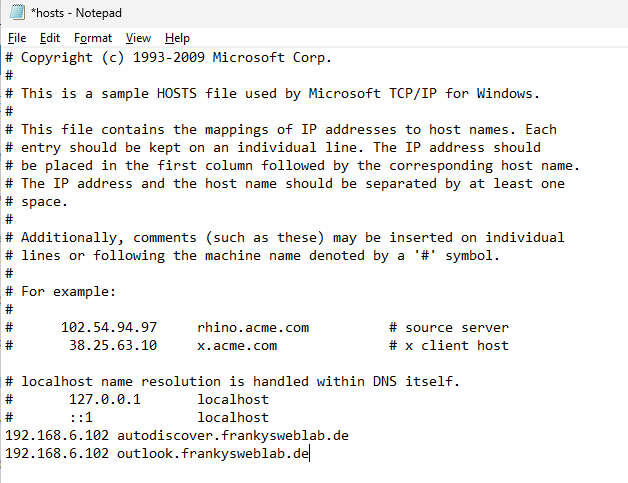
This completes the configuration. The first tests are now possible at this point. On a client, the IP for Autodiscover and web services can be adapted to the IP of the Exchange 2019 server in the hosts file. In my case, it looks like this:
Now the connection can be tested via Outlook and a few mails (internal mailbox to mailbox, external outgoing, external incoming) can be sent.
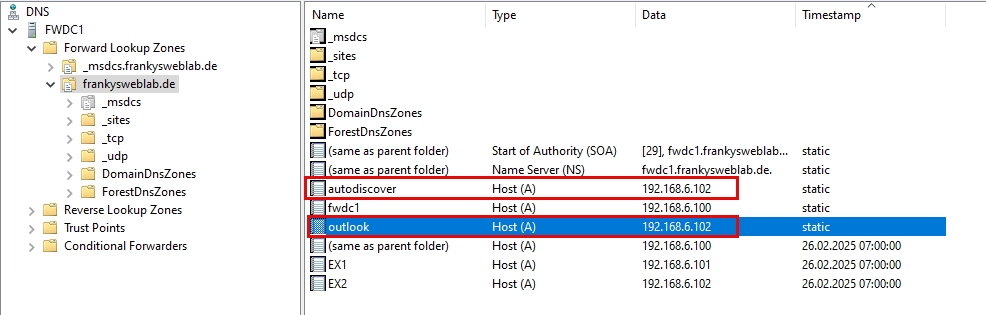
If no problems occur, the DNS and router / firewall settings can be adjusted. In internal DNS, the IPs for autodiscover and web services must be adjusted:
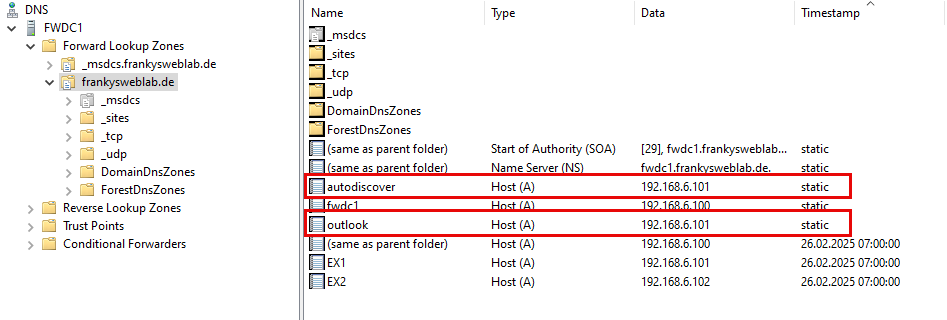
The IP of the Exchange 2019 server is used for both entries so that all clients can already connect to their mailboxes via the new server:
Depending on how the Exchange server is accessible on the Internet, the NAT entries for port 443 (possibly also 80) and 25 can now be adjusted on the Exchange 2019 servers. If there are upstream SPAM filters or similar, these systems can also deliver their mails to the Exchange 2019 server. Access and email routing should now only take place to the Exchange 2019 server.
At this point, you can now allow some time to pass so that all clients are aware of the DNS changes. The time can be used to switch all SMTP clients. Printers, scanners, MFCs, other devices and software may use the Exchange 2016 server to deliver mails, this can now be adapted to the new server.
After the changeover, it is advisable to run the "Outlook Connectivity" tests from the Microsoft Remote Connectivity Analyzer:
Next steps
The next and last article in this series will be about migrating the data and uninstalling the old server. As soon as the article is finished, I will link it here.