

The new Exchange Server version is expected this year. It makes sense to familiarize yourself with the Migration of the existing Exchange 2016 server to Exchange SE, because the time window for migration is short. However, this is not a problem if you prepare in good time.
This article is about the migration from Exchange Server 2016 to Exchange Server 2019 CU15. Exchange 2019 CU15 already has the same code base as Exchange Server SE RTM and can be easily upgraded via Inplace Upgrade when Exchange SE is released.
The surroundings
I have prepared a small test environment consisting of three servers. Here is a small graphic to illustrate this:
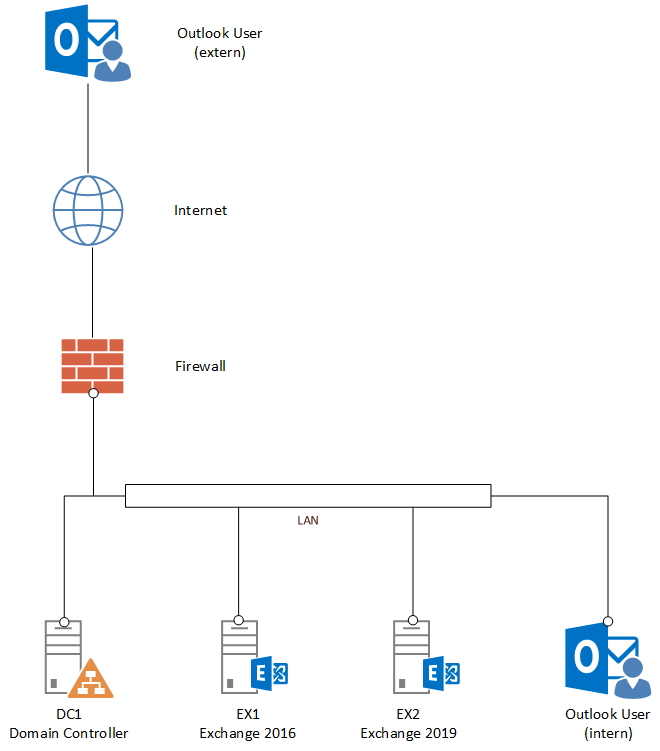
DC1 is the domain controller for the Active Directory domain frankysweblab.de. EX1 is a Windows 2016 server with Exchange Server 2016 CU23 and SU21 installed. The EX2 server was installed with Windows Server 2025 and has so far only been configured as a member of the Active Directory. EX2 will later become the Exchange 2019 server, which can be easily upgraded with the Inplace Upgrade when Exchange Server SE becomes available.
The firewall forwards ports 25 (smtp) and 443 (https) to the EX1 server via port forward. The internal and external Outlook users connect via MAPIoverHTTP. The following URLs are configured as access points for Exchange 2016:
- outlook.frankysweblab.de for all web services, OWA, SMTP, POP3 and IMAP.
- autodiscover.frankysweblab.de for Autodiscover
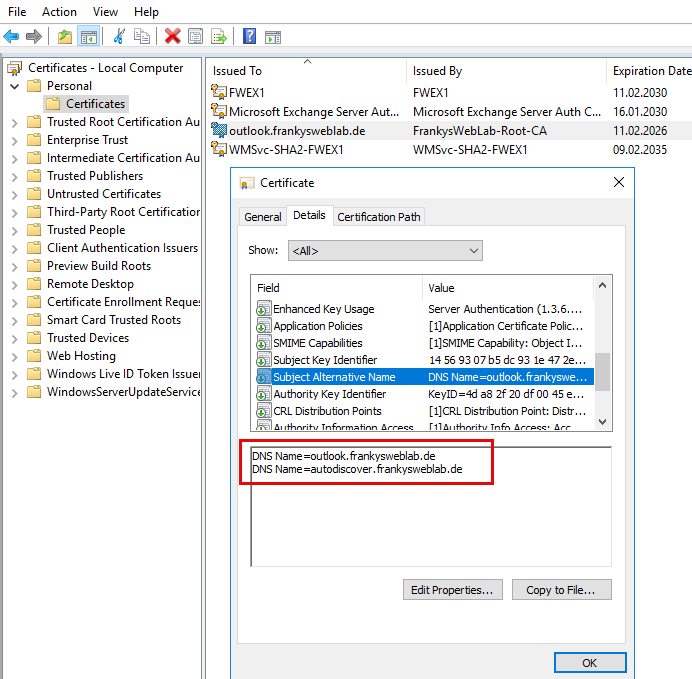
In this case, the certificate comes from an internal certification authority and contains the two names specified above:
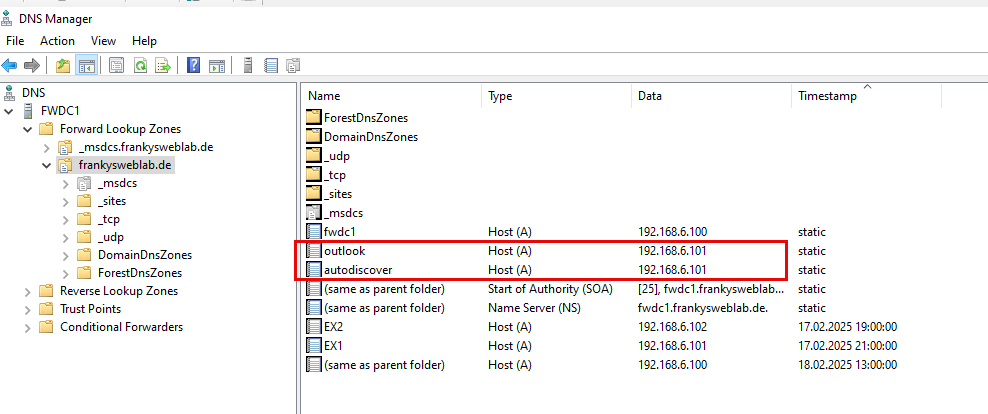
The configured names are also retained for Exchange 2019. The DNS Host-A entries for outlook.frankysweblab.de and autodiscover.frankysweblab.de are entered in the internal DNS (domain controller) and at the hoster of the public DNS zone. This is therefore a classic split brain DNS.
Preparation Exchange Server 2016
To ensure that the migration runs as smoothly as possible, it is important that the Exchange 2016 server is provided with the latest updates. In addition to the latest Exchange 2016 updates, all available Windows updates should of course also be installed.
The latest Exchange updates can be found here:
After all updates have been installed, it is essential to run the Exchange Health Checker. The Exchange Health Checker lists common configuration problems as well as vulnerabilities.
The Exchange Health Checker is executed on the Exchange 2016 server in an administrative Exchange Management Shell with the following commands:
.\HealthChecker.ps1
.\HealthChecker.ps1 -BuildHtmlServersReport
Exchange Health Checker then generates a report in HTML format, which in the best case should not contain any red dots. In particular, the "Vulnerability Detected" item should not contain any vulnerabilities:
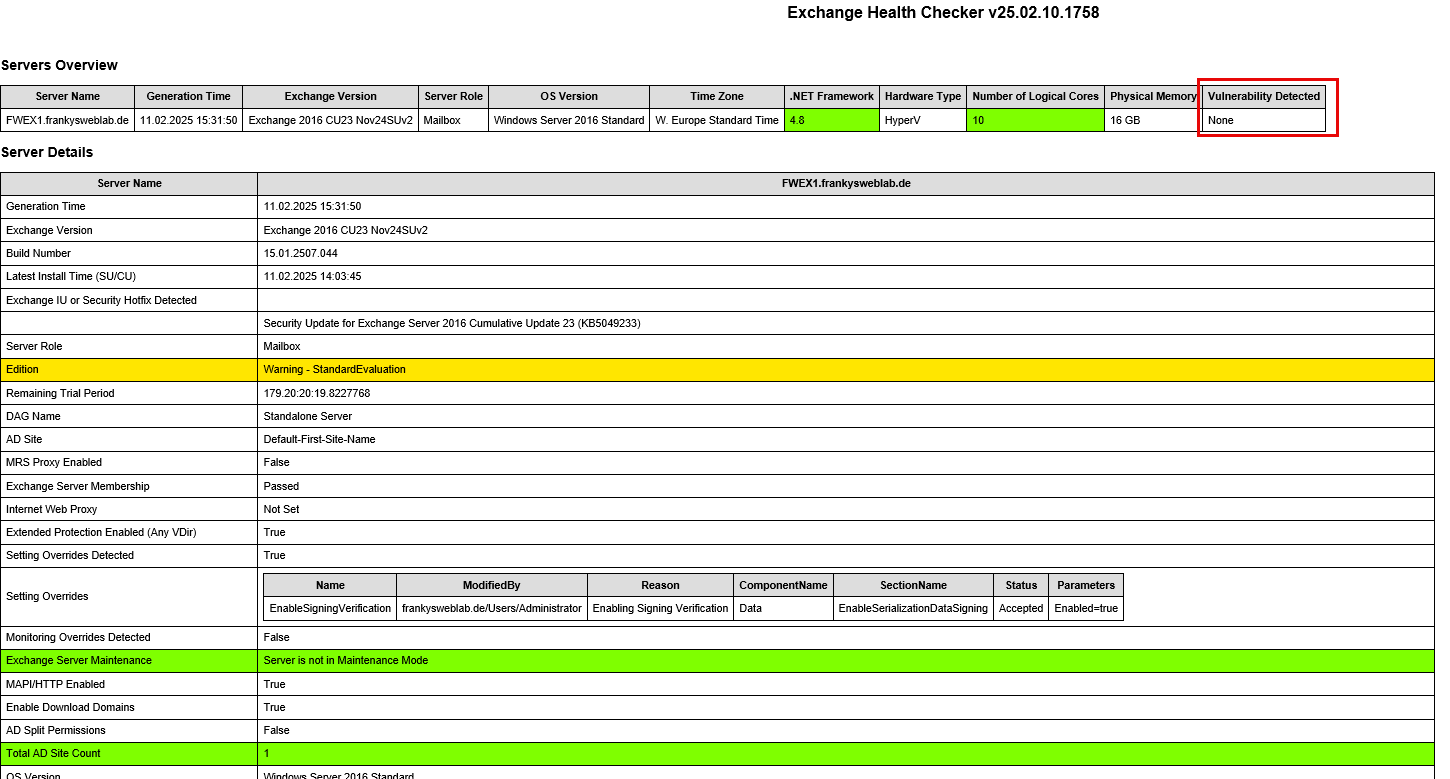
A report that is as clean as possible makes migration much easier, as this also means that security features such as Extended Protection are already activated. This means that there are no difficulties during migration due to configuration errors.
If the Health Checker report contains points such as vulnerabilities, expired certificates or other critical errors, then these points should definitely be fixed and tested before the Exchange 2019 installation. It is much easier to fix the errors now if there is only one Exchange version instead of having to search for the problems in two environments later. It is therefore worth investing a little more time in analyzing the Health Checker report, which may save a lot of work.
The Extended Protection security feature is particularly important, and is now used in the Standard installation activated. Extended Protection must therefore be activated or deactivated on all servers. Mixed operation leads to problems, so the recommendation is to enable Extended Protection on all servers. to activate.
There is also a script here that can activate some settings including Extended Protection:
Next steps
The next step is the installation of Exchange Server 2019 CU15 on Windows Server 2025. The installation will be described in the next article. As soon as the article is finished, I will link it here to make it easier to find. The second part of the article will then deal with the configuration of Exchange 2019.
Update 24.02.2025: Here is the installation from Exchange Server 2019 CU15 to Windows Server 2025. As already mentioned, the next part of the article deals with configuration and migration.