This is the second part of the Exchange 2013 to Exchange 2019 migration. The first part can be found here:
Now that the Exchange 2019 server has been configured in the first part, the actual migration can begin.
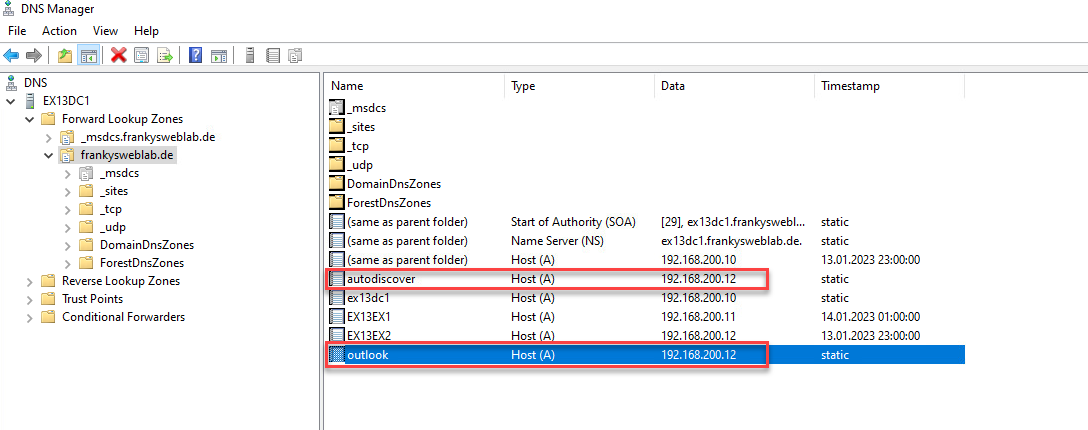
Conversion of DNS entries
Before starting the migration of data such as public folders and mailboxes, the DNS entries for Exchange can be changed to the new server. As the namespace remains the same, in this case only the IP of the new Exchange server needs to be entered for the entries outlook.frankysweblab.de and autodiscover.frankysweblab.de:
Depending on how the Exchange server is accessible from the Internet, the router or firewall must now also point to the new server. After the DNS entries have been changed, the new Exchange 2019 server works as a proxy for the Exchange 2013 server. Access to mailboxes and public folders is therefore possible via the clients. It is best to test the access and mail flow once after the DNS entries have been changed.
If you experience problems with the mail flow, take a look at the settings of the receive and send connectors and adjust the settings accordingly.
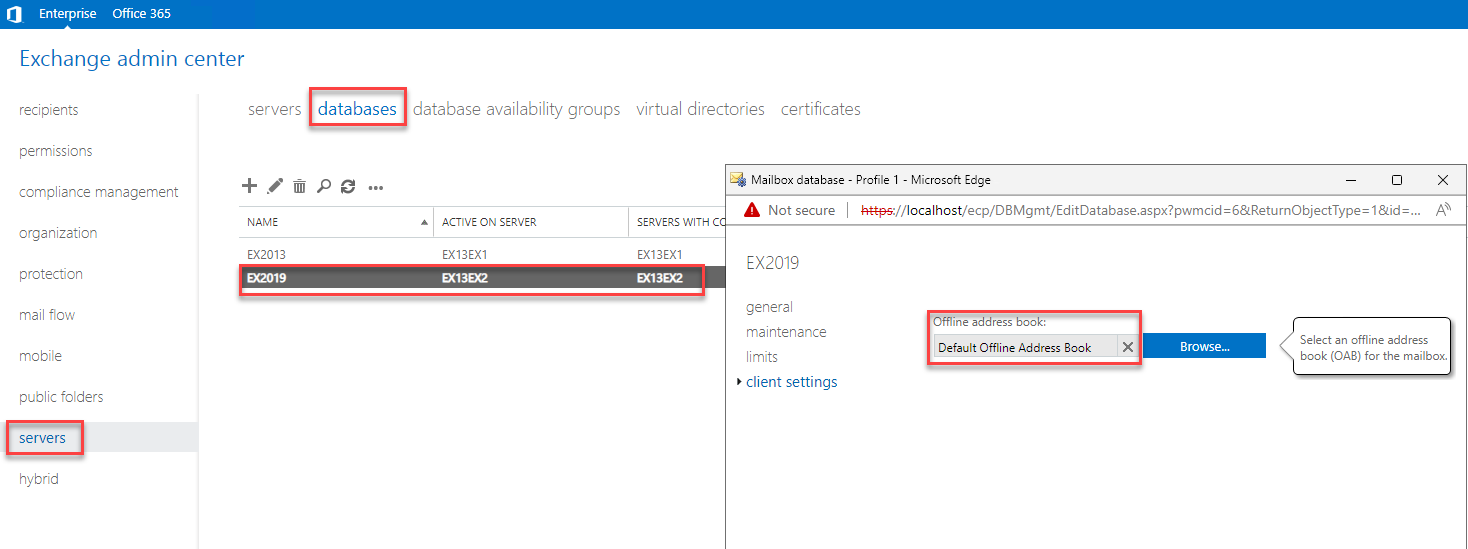
Migration of mailboxes
Before the mailboxes are moved, the offline address book must be assigned to the Exchange 2019 database:
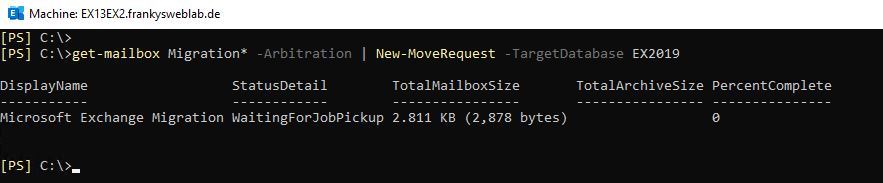
The system box with the name "Migration" should then first be moved to the Exchange 2019 server. The quickest way to do this is via MoveRequest on the Exchange Management Shell. The following command can be used for this, only the database name for the Exchange 2019 server needs to be adjusted:
Get-Mailbox Migration* -Arbitration | New-MoveRequest -TargetDatabase EX2019
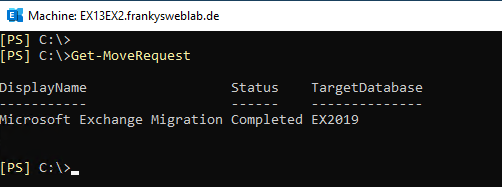
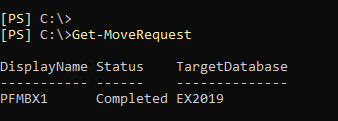
The status can be checked with the following command:
Get-MoveRequest
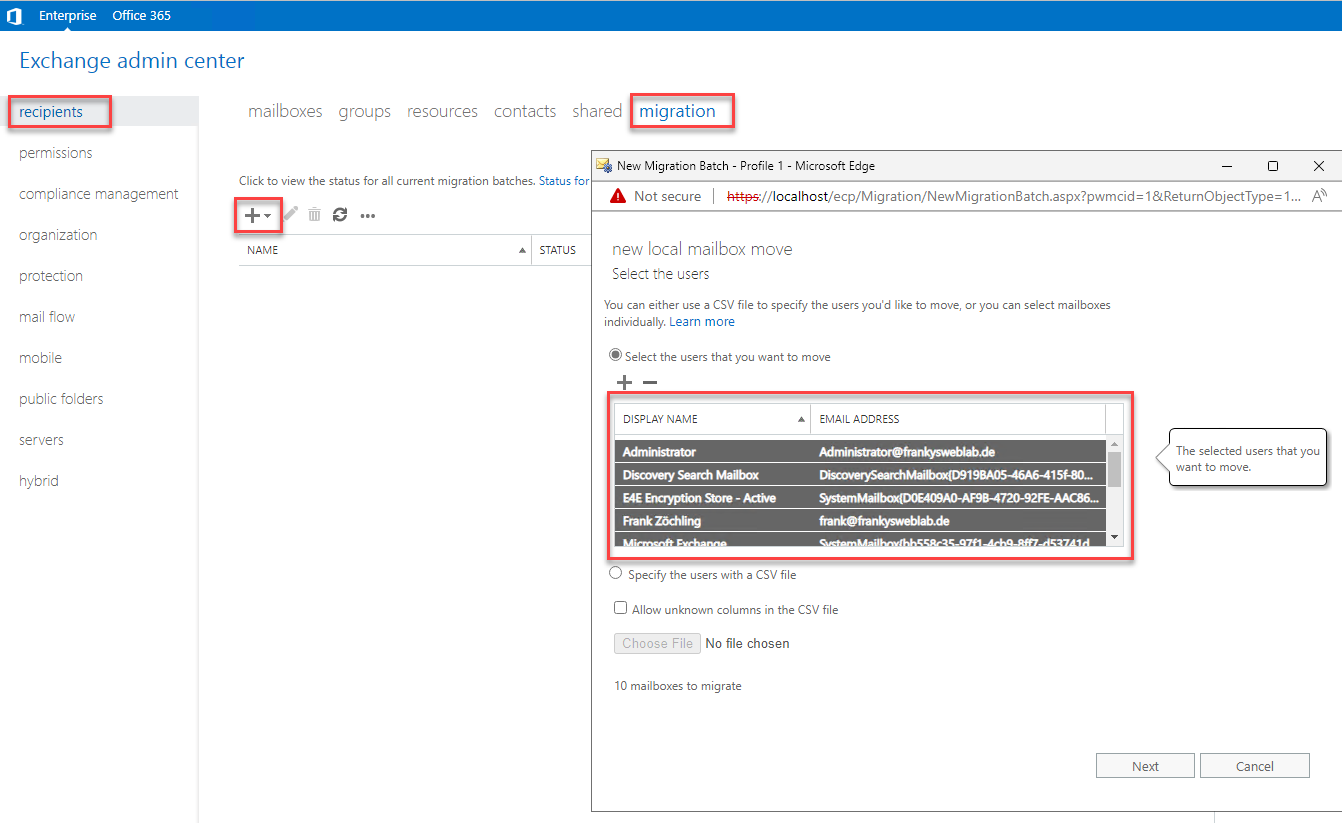
You can now start migrating the mailboxes. As I only have a few mailboxes, I move all mailboxes at the same time in one step. Depending on the environment, however, you can specify exactly which mailboxes are to be moved and when. Several migration batches can easily be created for this purpose. As already mentioned, I only use one migration batch for all mailboxes:
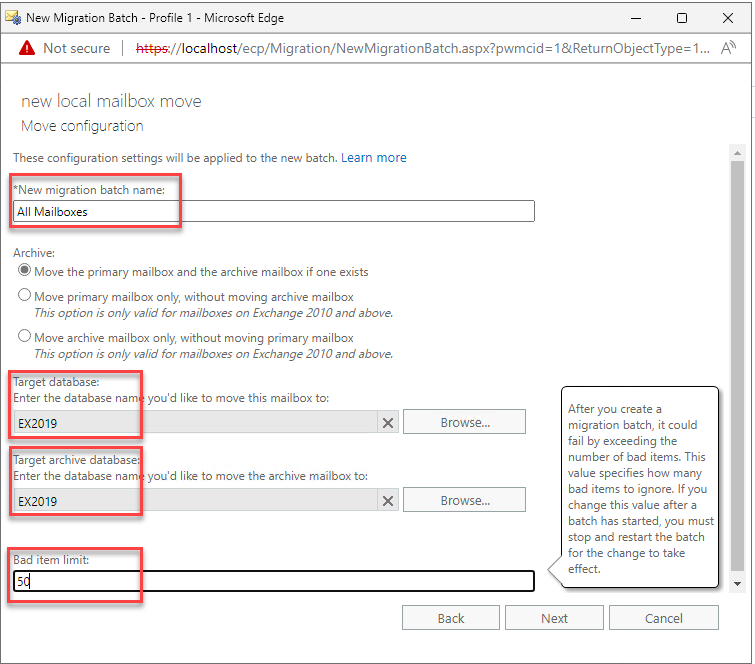
The limit for incorrect entries should be raised slightly. There are often a few incorrect elements, especially in larger mailboxes:
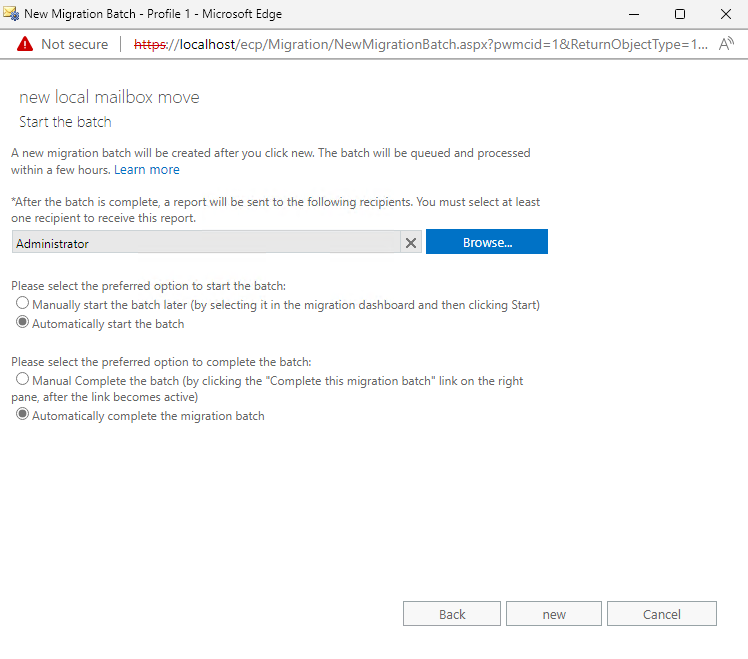
In the last step, you can specify whether the mailboxes should be moved automatically or manually. This allows you to control when the data should be moved. Once the data has been moved, the migration is usually completed immediately and Exchange changes the responsible mailbox server for the user. When migrating from Exchange 20133 to Exchange 2019, however, the user does not notice this, so the migration batch can also be completed directly:
Moving the mailboxes takes time, so you don't have to get nervous if it takes a little longer. Depending on the load on the server, this will take time. It will be finished at some point.
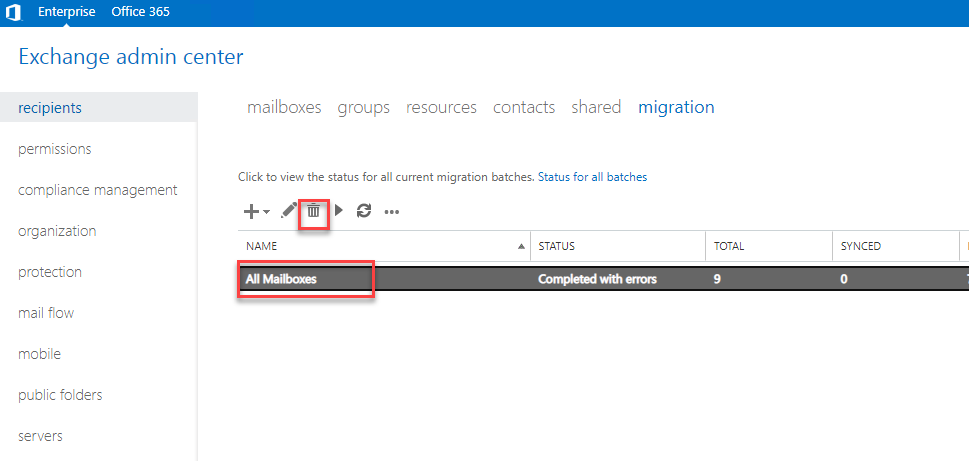
Once all mailboxes have been migrated, the migration batch can be deleted again:
To be on the safe side, you can check once again whether all mailboxes have been moved from the old database. The following commands can be used for this purpose:
Get-mailbox -Database EX2013 -Archive
Get-mailbox -Database EX2013 -Arbitration
Get-mailbox -Database EX2013 -Migration
Get-mailbox -Database EX2013 -PublicFolder
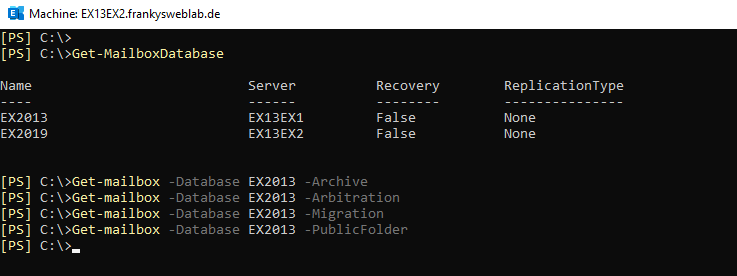
If the commands no longer output any mailboxes, you are done up to this point. If there is still a mailbox for public folders, this can also be moved. Simply continue with the next steps. If not, wait for the next article.
Migration of public folders
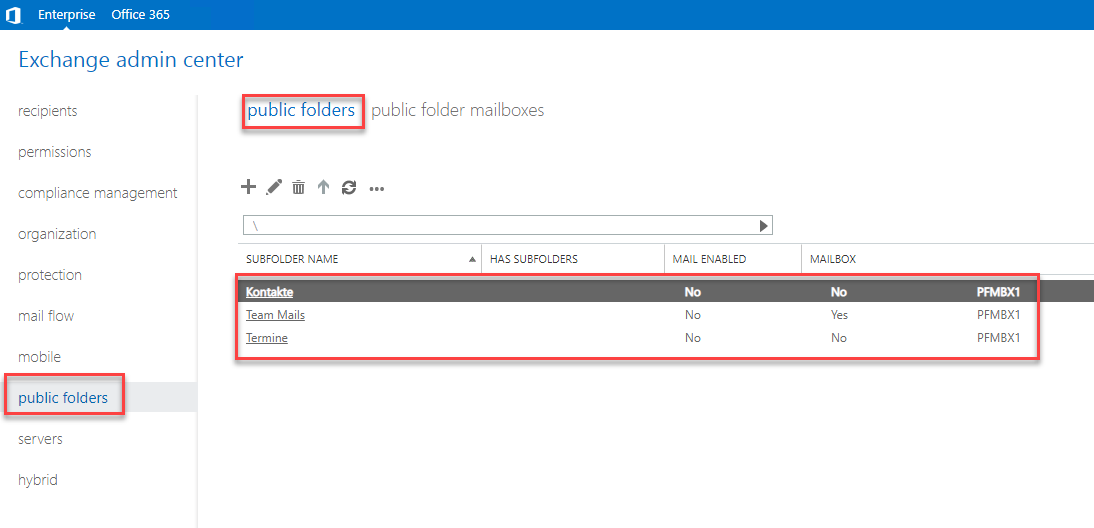
The migration of public folders must of course only be carried out if public folders are used or a public folder mailbox has been created:
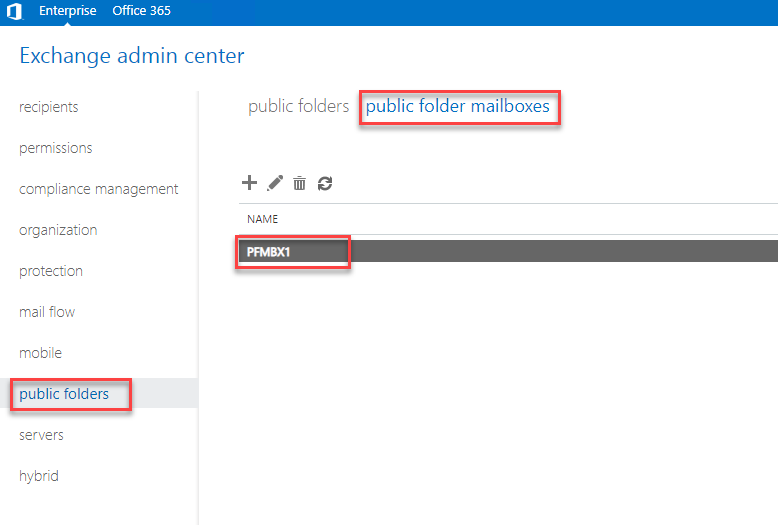
As of Exchange 2013, public folders are stored in a public folder mailbox and no longer in a public folder database. In contrast to older Exchange versions, migration has become much easier, as only the public folder mailboxes need to be moved. Normally, you no longer have to worry about the individual public folders:
The mailboxes for public folders can be migrated using the Exchange Management Shell. For the following command, only the name of the target database on the Exchange 2019 server needs to be adjusted:
Get-Mailbox -PublicFolder | New-MoveRequest -TargetDatabase EX2019
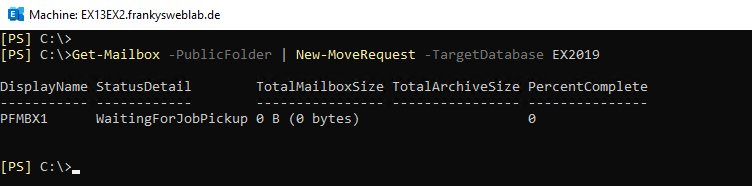
The status can be displayed with the following command:
Get-MoveRequest
Once the migration of the public folders is complete, the migration of the data is finished. The next part continues with the uninstallation of the Exchange 2013 server.

")
")

")
")
Vielen Dank für die ausführliche Anleitung.
Ich habe bei einem Kunden das Problem, dass ein Raum-Postfach nicht migriert werden kann und mit dieser Fehlermeldung abgebrochen wird:
Identifier,Status,ItemsMigrated,ItemsSkipped,ErrorMessage
freigabe@domain.dns,Failed,0,0,Fehler: Benannte Eigenschaftendaten mit Schlüssel = ’null‘ können nicht gelesen werden.
Meine Recherche dazu hat leider noch keinen Hinweis ergeben, auch das Löschen der diversen Elemente im Papierkorb dieses Postfachs hat nicht geholfen.
Hallo Zusammen,
kann mir einer von Euch sagen wie lange die Migration ca. dauert? Würde mich freuen wenn Ihr mir dies mit der Menge der Postfächer/GByte als Referenz nennen könntet.
Grüsse
Bei der Migration, die ich heute durchgeführt habe, hat es knapp zwei Stunden gedauert 36GB zu migrieren.
Hallo Frank,
wie immer Danke für die Top Anleitung !
Beim verschieben der Migration Database
Get-Mailbox Migration* -Arbitration | New-MoveRequest -TargetDatabase *****
kommt die Meldung
Die Postfachdatenbank „Exchange2019“ ist nicht vorhanden.
+ CategoryInfo : NotSpecified: (:) [], ManagementObjectNotFoundException
+ FullyQualifiedErrorId : [Server=EXCHANGE2019,RequestId=29a2ef9d-8081-405a-918e-b5ccd1e63f4c,TimeStamp=19.02.2023
08:29:13] [FailureCategory=Cmdlet-ManagementObjectNotFoundException] F96F1AA4
+ PSComputerName : exchange2019.******.****
Die ist aber da, hast Du/Ihr einen Tipp für mich ?
LG
Heinz R.
OMG man sollte den Namen seiner Datenbank richtig eingeben.
War wohl spät gestern.
Sorry :)
Auch von meiner Seite erstmal ein Dankeschön für die gute Referenzseite zu Exchange.
Ich habe zunächst eine Verständnisfrage: Der neue Exchange ist schon durch Clients erreichbar und über Autodiscover bekannt, die User Mailbox liegt aber noch auf dem alten. Findet die Kommunikation dann zwischen den Exchange Servern statt wenn z.B. ein Client auf zugreift oder eine Mail zugestellt werden soll? Damit wäre dann eine Live Migration im Betrieb denkbar oder spricht etwas dagegen?
Ich habe bei meiner geplanten Umstellung die Besonderheit das beide Exchange Server nicht im selben Subnetz stehen, eine Firewall beschränkt die Kommunikation. Ich würde einfach den beiden Servern für die Migration die uneingeschränkte Kommunikation erlauben und dem neuen Exchange Zugang zur AD als „Domain-Member“ (DFSN, NetBIOS Session Service, NetLogon, DNS, Kerberos, LDAP, LDAP GC, LDAP GC SSL, RPC, EPM, SMB/CIFS, W32 Time, NTP) geben. Hat vielleicht jemand noch eine Idee ob ich hier was übersehe?
https://learn.microsoft.com/de-de/exchange/plan-and-deploy/deployment-ref/network-ports?view=exchserver-2019
Hallo Frank,
herzlichen Dank auch von uns für die super Anleitung
und das Du generell Dein Wissen hier mit uns teilst.
Bzgl. Mobis:
Müssen die sonst in der Quarantäne befindlichen und explizit für den Zugriff freigegebenen Mobis irgendwie noch auf den Neuen migriert werden?
Hallo Andre,
da musst du nichts weiter unternehmen. Die Migration der Mobiles erfolgt mit dem Postfach des Benutzers.
Beste Grüße,
Frank
Hallo Frank
Danke für die tolle Anleitung.
Ich habe es in lab getestet und lief alles problemlos.
In der produktiv hatte ich das Problem, dass ein systemposfach sich nicht verschieben lässt. Alle waren durch nur „ SystemMailbox{e0dc1c29-89c3-4034-b678-e6c29d823ed9} “ Stand 24 Stunden nur bei 20%, habe ich abrechen müssen. Woran kann es liegen?
Welcher Befehl brauche ich um das letzte systemposfach zu verschieben?
Würde es am Wochenende nochmals versuchen.
danke und viele Grüße
Mfj
Vielen Dank für die ausführliche Anleitung!
Ich hätte noch zwei Fragen, kann man während der Migration der Postfächer das Outlook weiter benutzen?
Wenn während der Migration E-Mails empfangen werden, werden diese in dem Migration Batch mit Berücksichtigt ?
Hallo,
Ja, während der Migration können die Postfächer normal benutzt werden. Auch neue Mails werden migriert.
Beste Grüße,
Frank
Danke für die Anleitung.
Wie ist das eigentlich mit eingerichteten Active Sync Geräten (Handys etc.). Muss die Konfiguration auf den Geräten angepasst werden? Oder laufen diese wie die Outlook Clients ohne Anpassung weiter nach der Migration?
Grüße
Hallo,
die Mobiles haben immer eine Verbindung und müssen nicht neu konfiguriert werden.
Beste Grüße,
Frank
Danke auch für diesen tollen Artikel.
Kannst du kurz erklären weshalb das Offline Adressbuch vorher und die Migration Mailbox am Anfang verschoben werden muss und was passieren würde wenn das nicht am Anfang passiert?
Dazu finde ich nämlich nie verlässliche Informationen.
Es funktioniert scheinbar auch wenn man das am Ende der Migration macht.
Vielen Dank
Eben, am Ende egal, aber wenn mans am Anfang erledigt, vergisst mans nicht. ;)
Danke!
Wenn man die Migration Mailbox noch nicht verschoben hat, dann kann man keine Mailboxen per GUI (ECP) auf die neuen Server verschieben (der Auftrag wird zwar erstellt dann per GUI, jedoch macht er dann einfach nichts. Ich nehme mal an, dass MigrationBatchs dann noch nicht sauber funktionieren. Wenn man alle Postfächer per moverequest verschiebt sollte die Reihenfolge aber egal sein.
Das stimmt nicht. Wo hast du sowas denn beobachtet?
Ich muss ergänzen, dass ich diese all mailbox Migrationen 2013 zu 2019. fast alle immer per move request durchgeführt habe. Trotzdem sollte ein Migration batch nicht nichts tun, so zumindest die Erfahrung von 2016 zu 2019. demnächst steht aber die Migration von 2013 bei einem Kunden an, dann teste ich das glatt mal. :)
Das hab ich auch festgestellt. Da ich gerade mittendrin bin und per move-request verschiebe werde ich das jetzt so belassen um nicht in ein anderes Problem reinzurennen, da ich mit dem verschieben fast fertig bin