

This is the second part of the Exchange 2013 to Exchange 2019 migration. The first part can be found here:
Now that the Exchange 2019 server has been configured in the first part, the actual migration can begin.
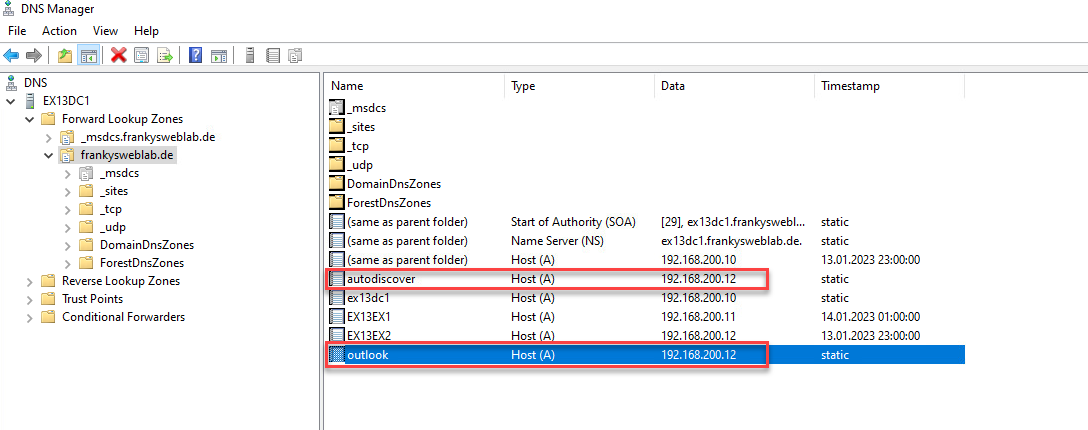
Conversion of DNS entries
Before starting the migration of data such as public folders and mailboxes, the DNS entries for Exchange can be changed to the new server. As the namespace remains the same, in this case only the IP of the new Exchange server needs to be entered for the entries outlook.frankysweblab.de and autodiscover.frankysweblab.de:
Depending on how the Exchange server is accessible from the Internet, the router or firewall must now also point to the new server. After the DNS entries have been changed, the new Exchange 2019 server works as a proxy for the Exchange 2013 server. Access to mailboxes and public folders is therefore possible via the clients. It is best to test the access and mail flow once after the DNS entries have been changed.
If you experience problems with the mail flow, take a look at the settings of the receive and send connectors and adjust the settings accordingly.
Migration of mailboxes
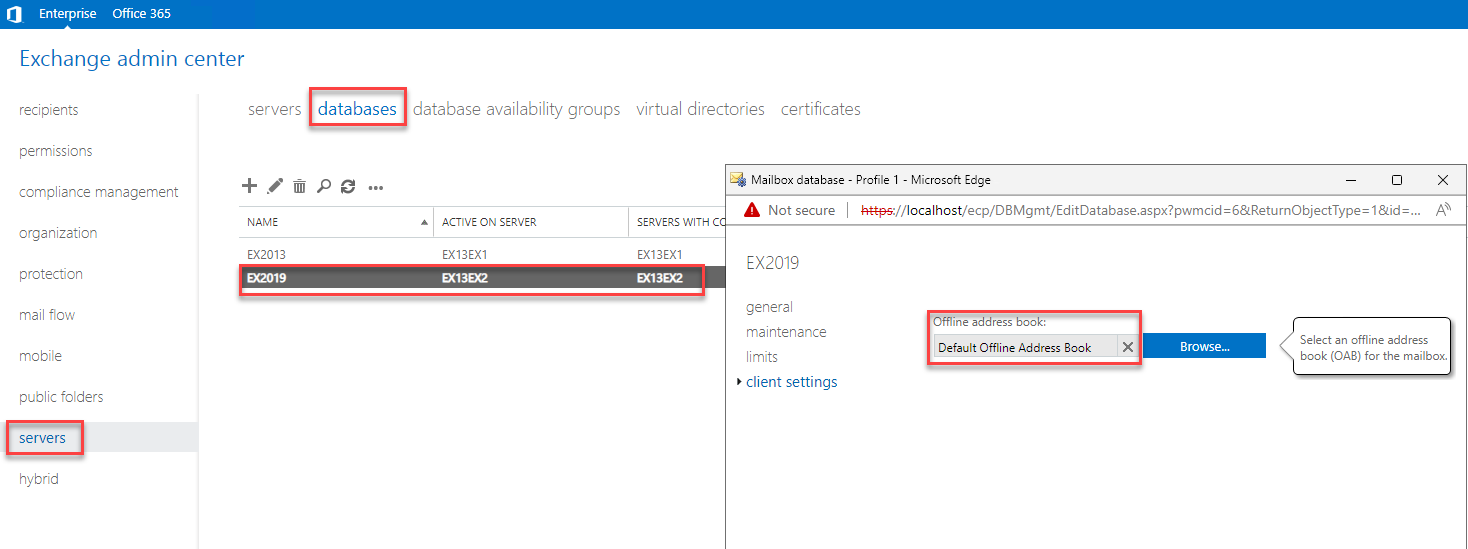
Before the mailboxes are moved, the offline address book must be assigned to the Exchange 2019 database:
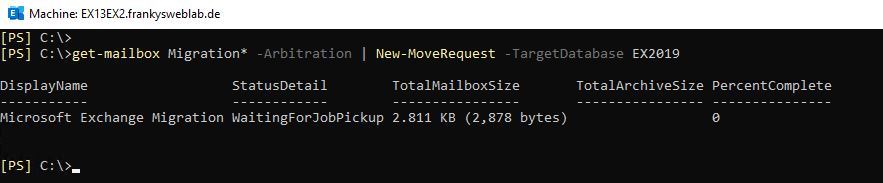
The system box with the name "Migration" should then first be moved to the Exchange 2019 server. The quickest way to do this is via MoveRequest on the Exchange Management Shell. The following command can be used for this, only the database name for the Exchange 2019 server needs to be adjusted:
Get-Mailbox Migration* -Arbitration | New-MoveRequest -TargetDatabase EX2019
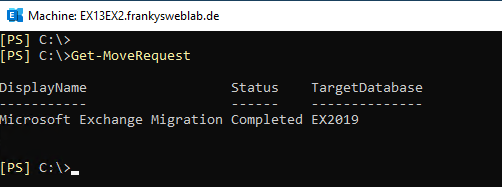
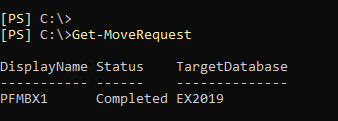
The status can be checked with the following command:
Get-MoveRequest
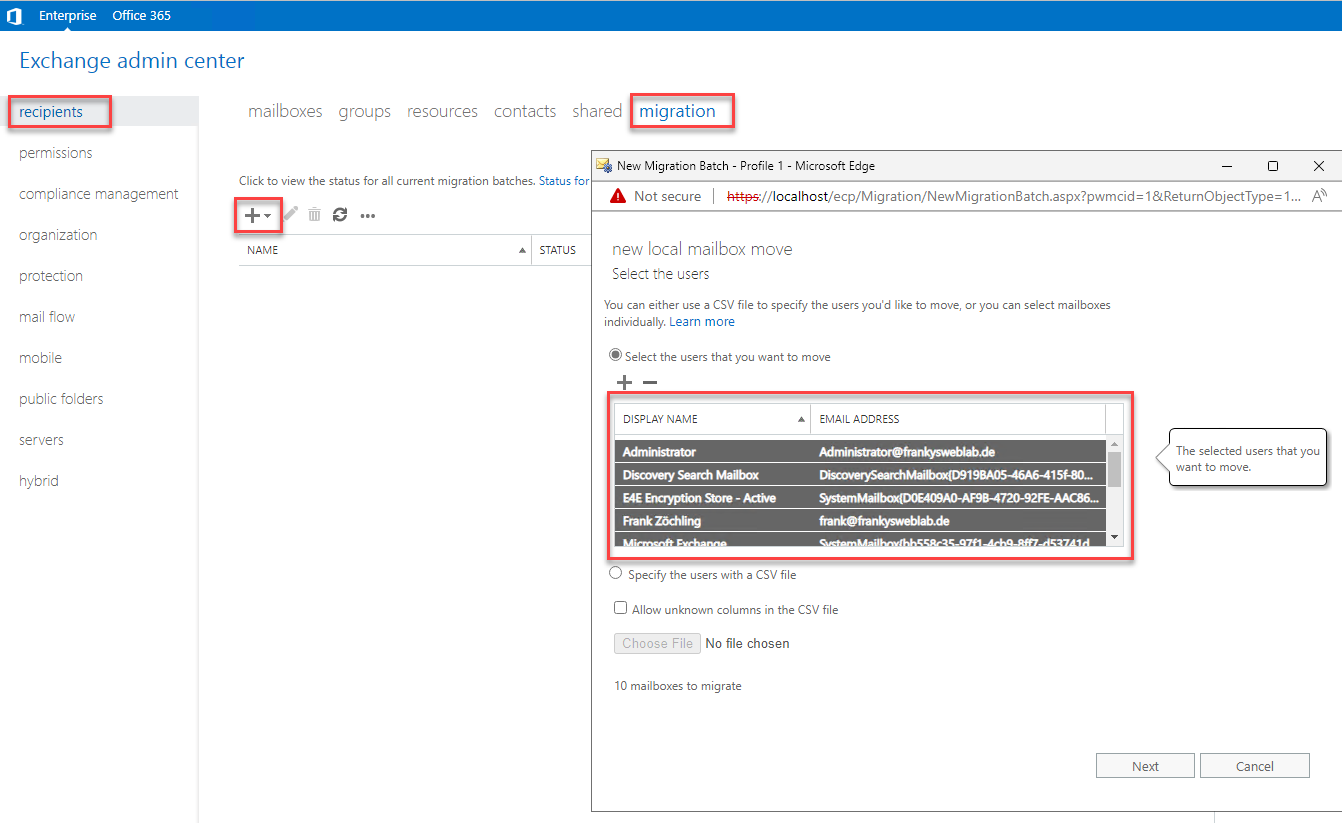
You can now start migrating the mailboxes. As I only have a few mailboxes, I move all mailboxes at the same time in one step. Depending on the environment, however, you can specify exactly which mailboxes are to be moved and when. Several migration batches can easily be created for this purpose. As already mentioned, I only use one migration batch for all mailboxes:
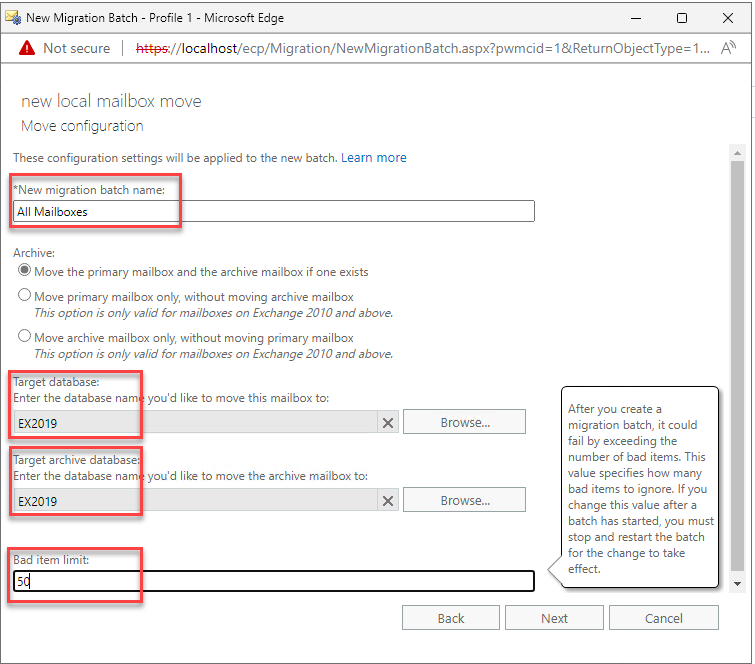
The limit for incorrect entries should be raised slightly. There are often a few incorrect elements, especially in larger mailboxes:
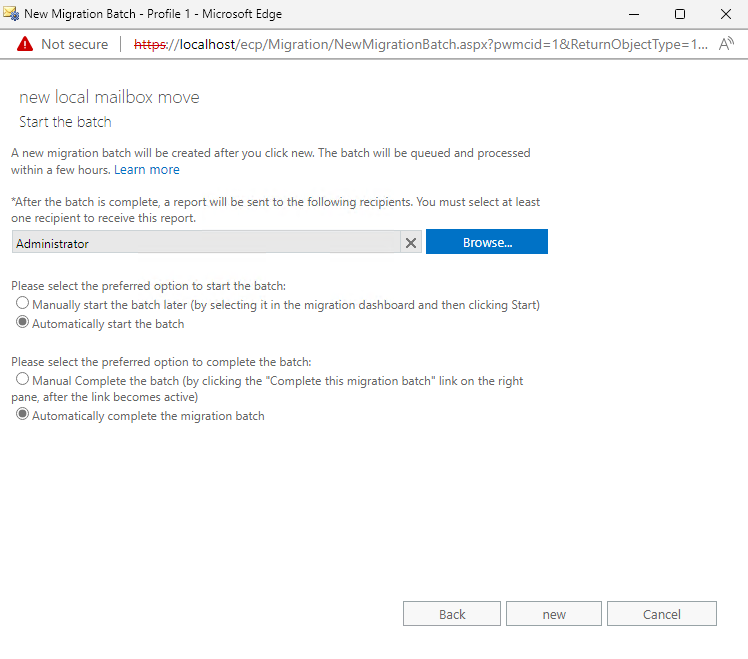
In the last step, you can specify whether the mailboxes should be moved automatically or manually. This allows you to control when the data should be moved. Once the data has been moved, the migration is usually completed immediately and Exchange changes the responsible mailbox server for the user. When migrating from Exchange 20133 to Exchange 2019, however, the user does not notice this, so the migration batch can also be completed directly:
Moving the mailboxes takes time, so you don't have to get nervous if it takes a little longer. Depending on the load on the server, this will take time. It will be finished at some point.
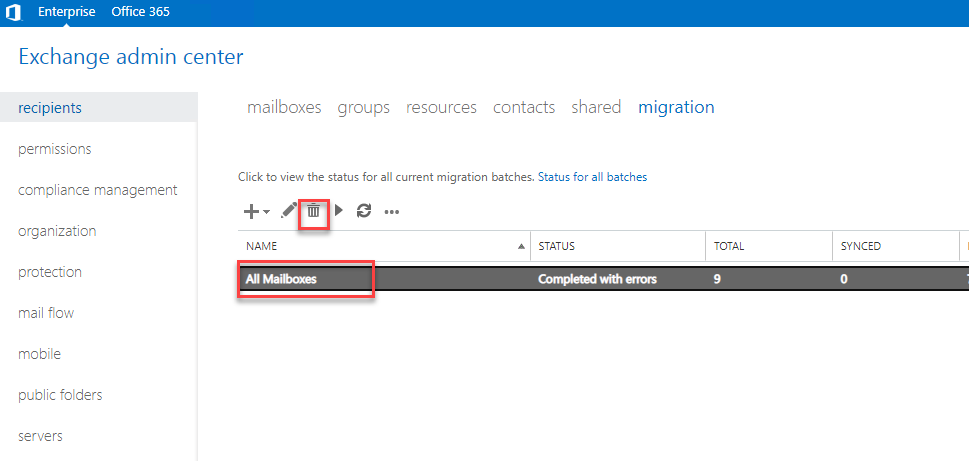
Once all mailboxes have been migrated, the migration batch can be deleted again:
To be on the safe side, you can check once again whether all mailboxes have been moved from the old database. The following commands can be used for this purpose:
Get-mailbox -Database EX2013 -Archive
Get-mailbox -Database EX2013 -Arbitration
Get-mailbox -Database EX2013 -Migration
Get-mailbox -Database EX2013 -PublicFolder
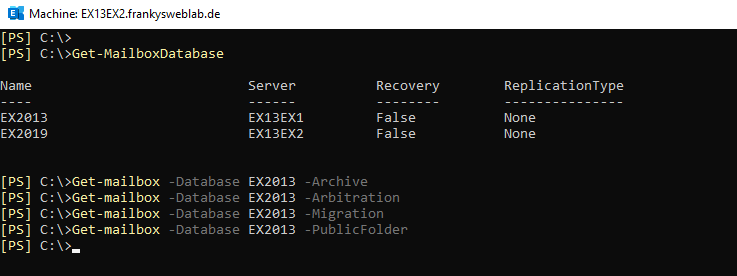
If the commands no longer output any mailboxes, you are done up to this point. If there is still a mailbox for public folders, this can also be moved. Simply continue with the next steps. If not, wait for the next article.
Migration of public folders
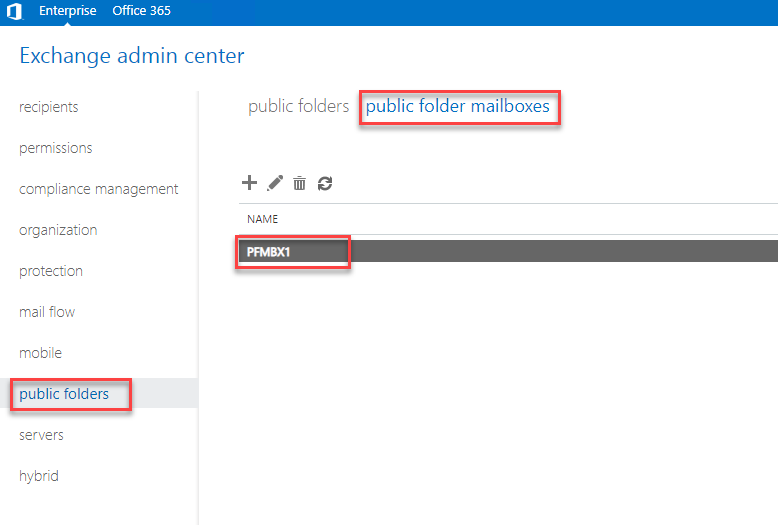
The migration of public folders must of course only be carried out if public folders are used or a public folder mailbox has been created:
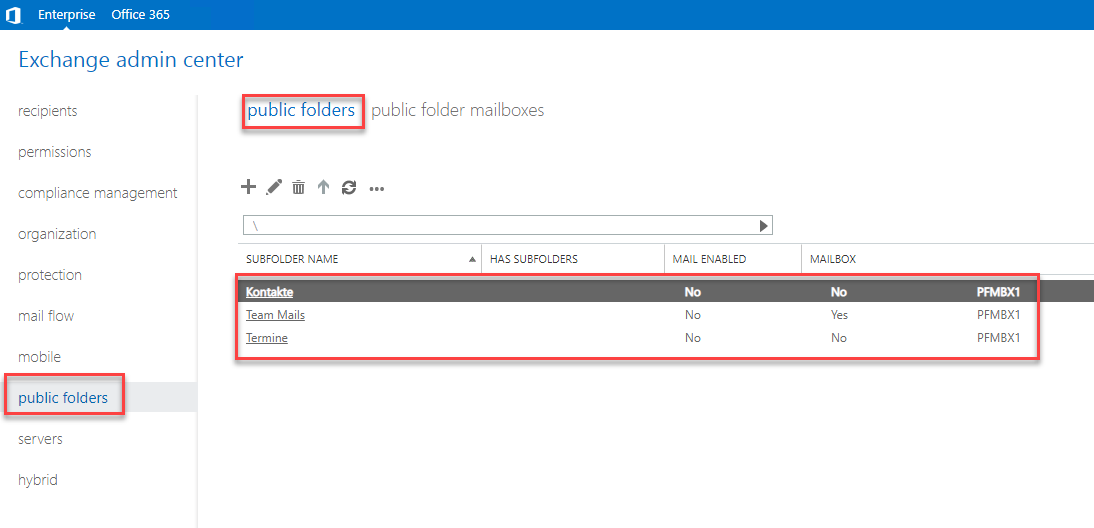
As of Exchange 2013, public folders are stored in a public folder mailbox and no longer in a public folder database. In contrast to older Exchange versions, migration has become much easier, as only the public folder mailboxes need to be moved. Normally, you no longer have to worry about the individual public folders:
The mailboxes for public folders can be migrated using the Exchange Management Shell. For the following command, only the name of the target database on the Exchange 2019 server needs to be adjusted:
Get-Mailbox -PublicFolder | New-MoveRequest -TargetDatabase EX2019
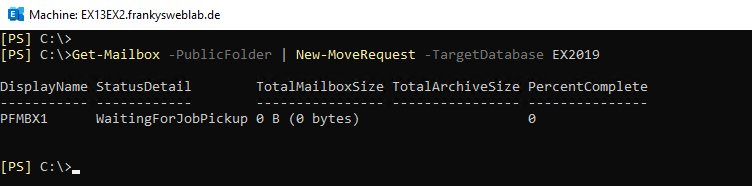
The status can be displayed with the following command:
Get-MoveRequest
Once the migration of the public folders is complete, the migration of the data is finished. The next part continues with the uninstallation of the Exchange 2013 server.