Not only Outlook is often used as an Exchange client, but also smartphones such as the iPhone or smartphones with Android or Windows Phone as the operating system. However, there are sometimes stumbling blocks when setting up smartphones. I would therefore like to describe how to set up current smartphones in this article.
Setting up Windows Phone 7 for Exchange:
To set up Windows Phone 7 for Exchange 2010, the Exchange certificate must first be transferred to the smartphone again. This was also the case with Windows Mobile 6. However, integrating the certificate is a little more difficult than with Windows Mobile 6. As you no longer have direct access to the Windows Phone 7 file system, you can no longer simply copy it via USB cable, but have to get the certificate onto the smartphone in some other way. I have gotten into the habit of sending the certificate as a ZIP file to the e-mail address of the user I want to set up. I then access the mailbox via OWA and install the certificate.
Then press "Mail Setup" on the home screen

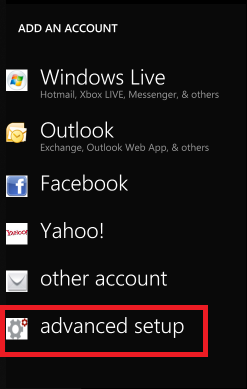
I always select "advanced setup" at this point as the synchronization settings can then be edited directly
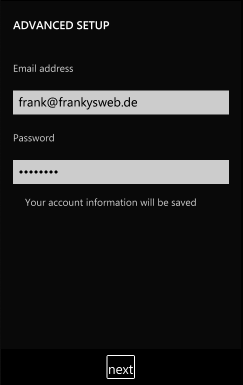
Now enter the e-mail address and the corresponding password of the Active Directory user.
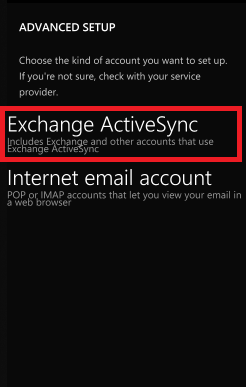
Now select the type of account, here "Exchange ActiveSync" is selected
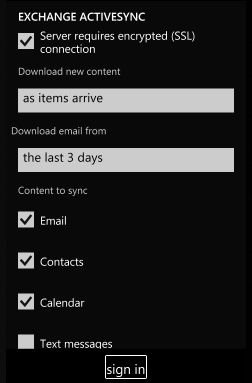
Then the account information is entered, please note that you can also scroll down. For "Domain" it is sufficient to enter the NetBIOS name of the Active Directory domain, for "Server" the external host name of the server is of course entered. As I am only in the local WLAN, I enter the internal host name here. Then I scroll down and specify the synchronization settings.
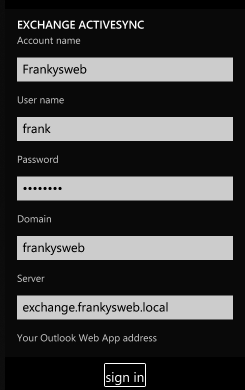
It is important that the SSL certificate of the internal CA or the self-signed certificate of the Exchange server has been imported beforehand. Please note that ActiveSync will not establish a connection if it considers the certificate to be invalid. So please make sure that the host name on the certificate is correct. Then continue with "sign in".
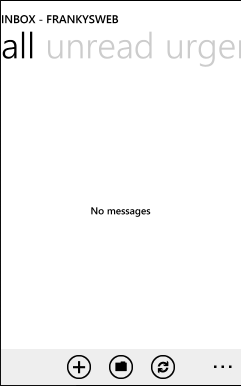
You should now land back on the home screen and find a corresponding account.
If emails are available, these should be synchronized. A little tip: I have come across smartphones that just seem to take a while until the initial synchronization is successful.
Setting up iOS (iPhone) in connection with Exchange:
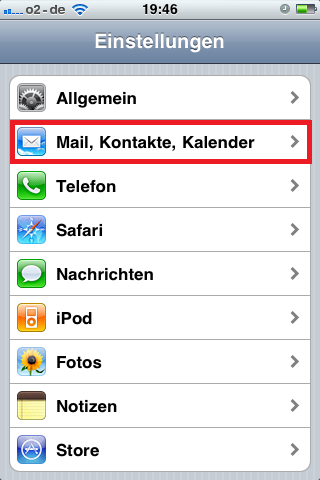
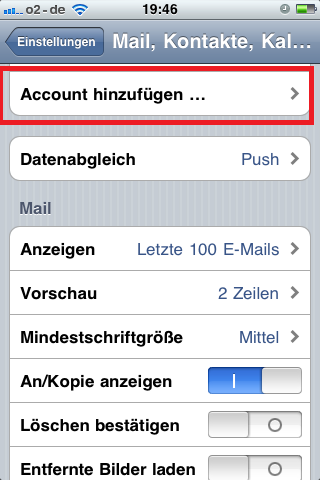
First select "Mail, Contacts, Calendar" under "Settings".
Then select the menu item "Add account"
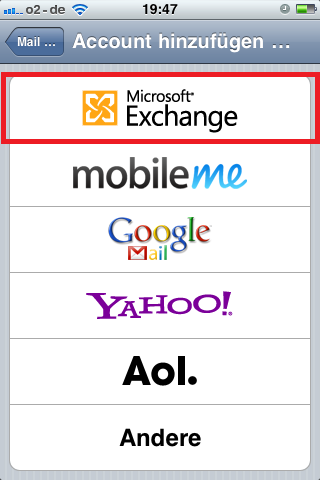
Now the type must be selected, we take "Microsoft Exchange" here
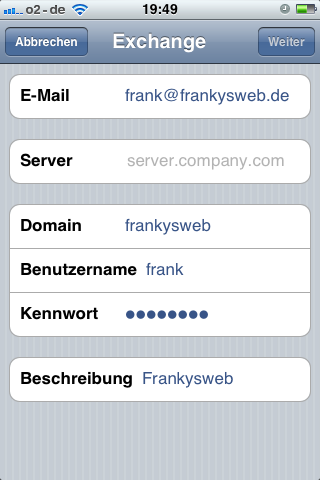
Now we enter the user information, please do not be surprised that the point "Server" is already visible here, the point actually comes in the next dialog, after clicking on next. We enter the e-mail address, domain (please enter the name of the Active Directory domain, in my case this is Frankysweb.local, the NetBIOS name frankysweb also works), the user name (Active Directory user) and the password for the user. Optionally, the name of the account on the iPhone can be customized under "Description".
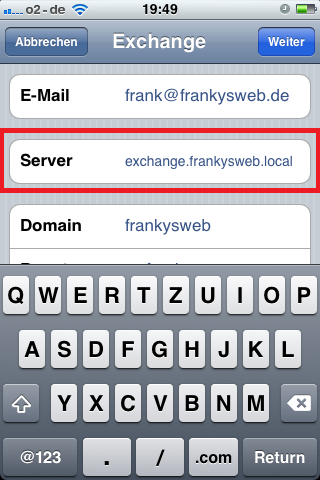
The server name is now requested in the next dialog; I have only entered the internal host name of the Exchange server here. Of course, the "external" host name under which the server can be reached from the Internet should be entered here.
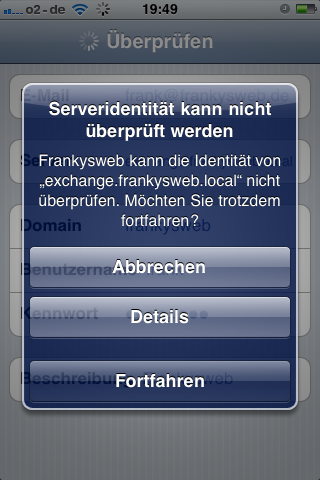
This message is displayed if the certificate cannot be verified or is not trustworthy. In my case, this is OK as it is a self-signed certificate. I confirm the message with "Continue".
The last dialog asks which elements are to be synchronized
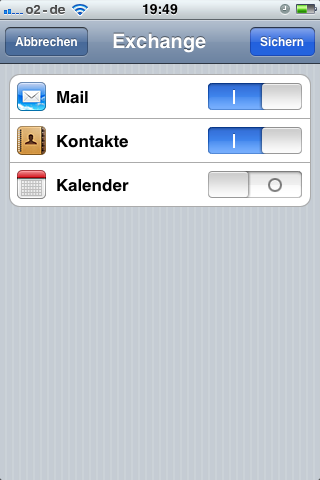
After clicking the "Save" button, the configuration is complete. Don't get nervous if mails or calendar entries are not synchronized immediately. Interestingly, this sometimes takes a few minutes.
Setting up Android 2.2 for Exchange:
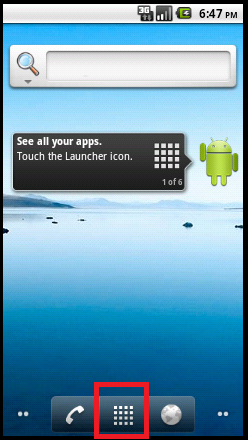
Connecting an Android 2 smartphone to Exchange is just as easy as setting up an iPhone. On the home screen, we first select the menu
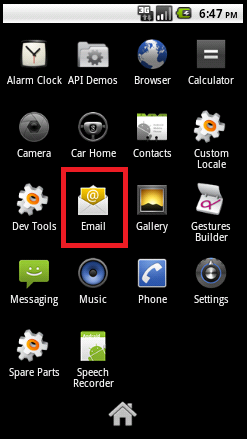
After we are in the menu we select E-Mail
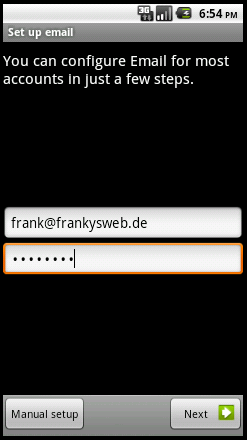
In the dialog, we now enter the e-mail address and password of the Active Directory user and select "Manuel Setup"
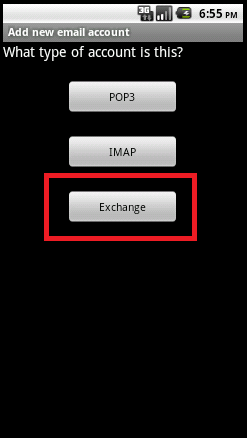
In the following dialog, we naturally select "Exchange"
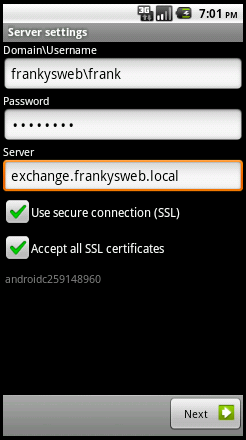
Now we can adjust the account and server options. I had to enter the corresponding values manually for "Domain\Username" and "Server", but this may have been due to the emulator. So please check the information on this page again. If the certificate of the Exchange server was not issued by a trusted CA, you can save yourself the trouble of importing the certificate by selecting "Accept all SSL certificates". After selecting "Next", the initial synchronization starts.
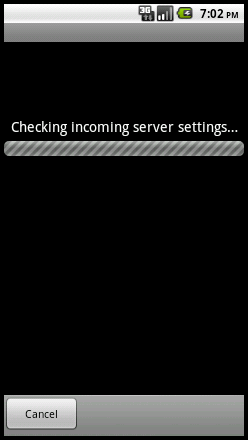
The next screen should only be displayed briefly
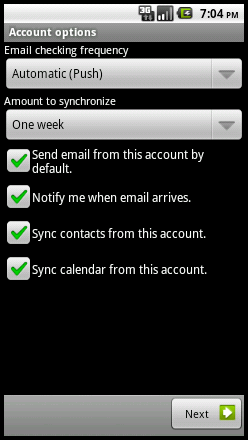
If no error message appears, you should now be able to define the synchronization settings. Please make sure that "Automatic (Push)" is set for "Frequency" and confirm with "Next"
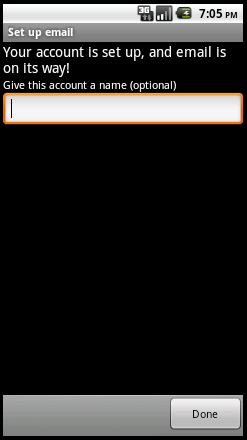
Finally, enter an optional account name and complete the configuration with "Done"
If everything went smoothly, you can then go to your inbox and read your e-mails.
Setting up Windows Mobile 6 for Exchange:
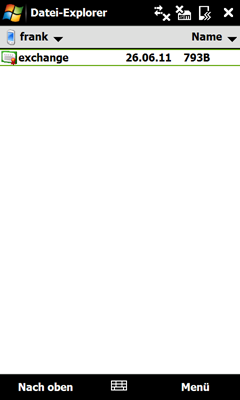
With Windows Mobile 6, the Exchange Server certificate must first be installed if it was not issued signed by a trusted root certification authority. Therefore, if the certificate is a self-signed certificate or a certificate issued by an internal root certification authority, either the root certificate of the root certification authority or the self-signed certificate of the Exchange Server must be installed first. The easiest way to do this is to connect the smartphone to a computer via USB and copy the respective certificate to the smartphone.
On this screenshot you can see that I have copied the self-signed certificate of the Exchange server to the smartphone.
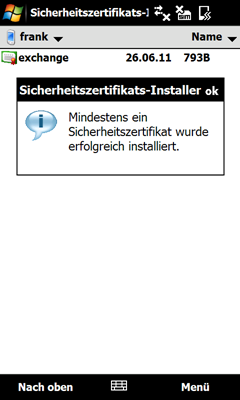
Then the certificate has been installed, if the process was successful, a corresponding message appears
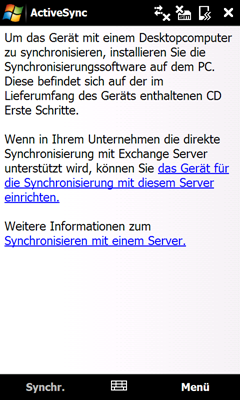
Now select the "Active Sync" item under "Settings"

Once "Active Sync" has started, the "Menu" button appears at the bottom right
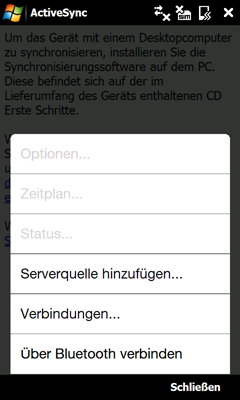
"Add server source" is now selected in the menu
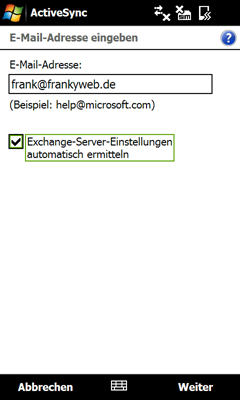
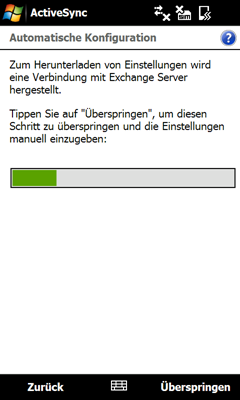
The e-mail address is now entered in the dialog, the check mark for "Automatically determine Exchange server settings" can remain set, if Exchange Autodiscovery is also accessible via the Internet, this makes it a little easier J
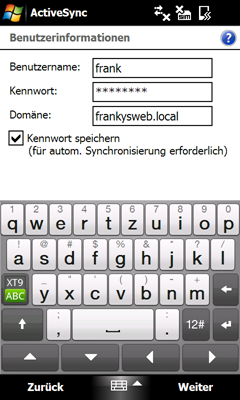
In the next dialog, the Active Directory user and the corresponding password are entered, in the "Domain" field the name of the Active Directory domain is entered, in my case this is "frankysweb.local"
Now Active Sync tries to find the Exchange Server via Exchange Autodiscovery, if AutoDiscovery is not available via the Internet, the step can be skipped here
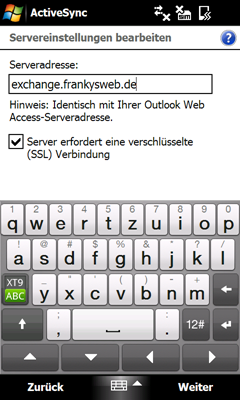
If no Exchange server was found automatically, the external host name of the Exchange server is now entered, since I only wanted to create this guide with the smartphone, I used the internal name.
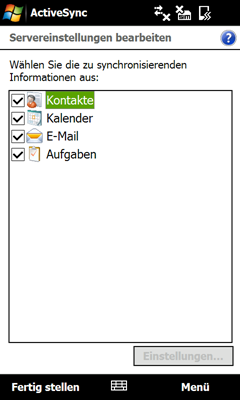
In the next dialog, select which elements are to be synchronized with Exchange
Then the initial synchronization begins
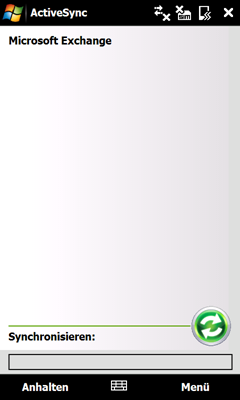
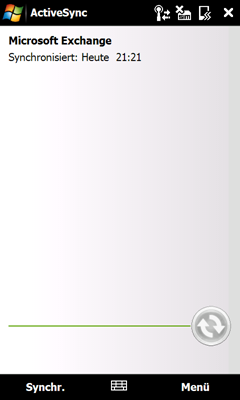
If everything went well, the time of the last synchronization appears after a short time.
If an error occurs during synchronization, you can display the error code using the "Display support code" link. An overview of which error codes mean what can be found here:
http://support.microsoft.com/kb/915152/de
")
")
")

")


Die Einrichting von Android 4 Smartphones gibts hier:
https://www.frankysweb.de/?p=621