Microsoft introduced the Nano Server with Windows Server 2016. Nano Servers have no GUI and are even more reduced than Server Core installations. Nano servers are only managed remotely and corresponding images must first be created. It is quite simple for Hyper-V, as VHD files can be created directly here.
However, it also works with VMware vSphere and ESXi. This HowTo is about running a Nano Server under ESXi 6.
A GUI installation of Windows Server 2016 is required so that the Nano Server image can be created (Build Server). This can also be a VM.
Preparation
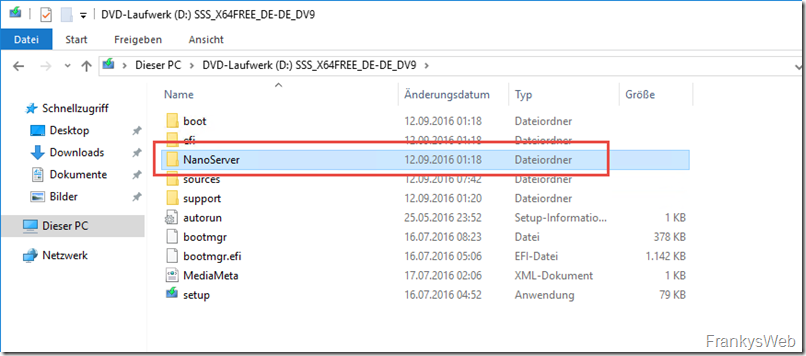
Before the Nano Server image can be created, a few preparations must first be made. The first step is to copy the "NanoServer" directory from the installation DVD to the local hard disk of the build server. I copy the complete directory to C:\
So that the VMware drivers can be integrated later, an empty directory with the name "VMware-Drivers" is created in the directory "c:\NanoServer". The drivers for the SCSI controller and network card will be installed here later:
The WinImage tool is required for the rest of the process. WinImage can be downloaded here as a test version:
http://www.winimage.com/download.htm
The installation of WinImage is self-explanatory.
We continue with the VMware drivers.
Extract drivers from VMware Tools
The required drivers are already included in the VMware Tools image. The VMware Tools can therefore simply be mounted on the build server:
Alternatively, the latest VMware tools can be downloaded directly from the VMware website:
https://my.vmware.com/de/group/vmware/details?downloadGroup=VMTOOLS1009&productId=577
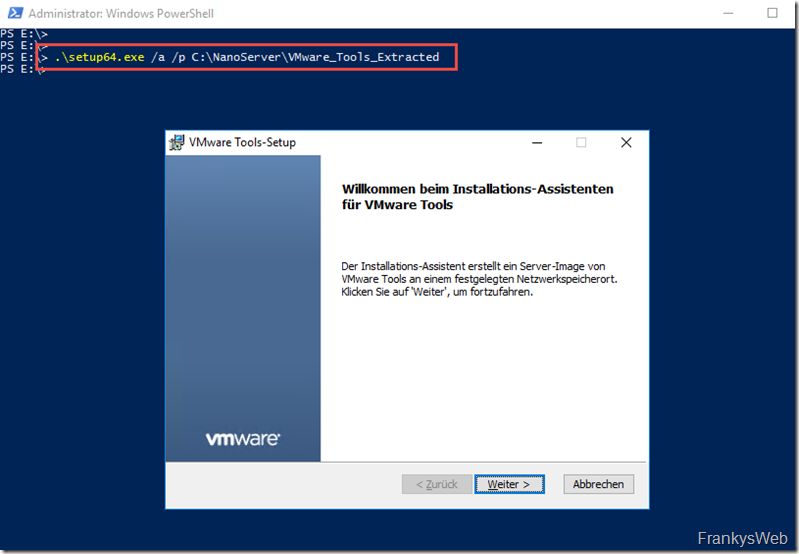
The way the VMware Tools get to the build server does not matter in the end, the VMware Tools only have to be unpacked, but not installed. Unpacking is done with the following command:
.\setup64.exe /a /p C:\NanoServer\VMware_Tools_Extracted
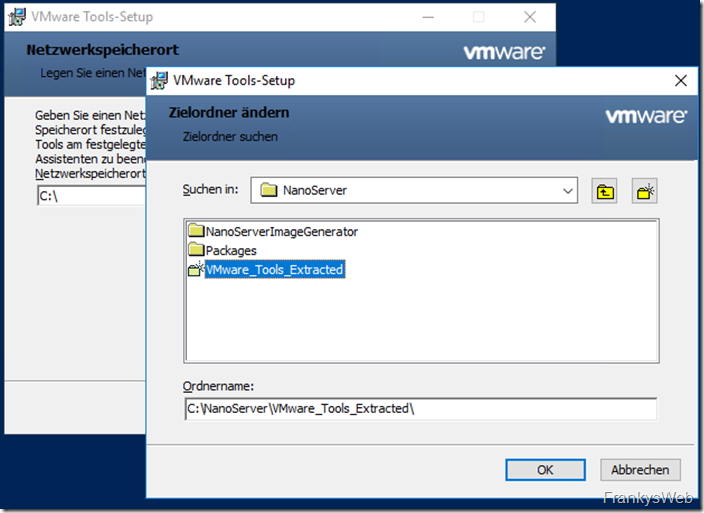
The directory must then be specified again in the dialog. I select the "VMware_Tools_Extracted" directory here:
Once the tools have been unpacked, you should be able to find the corresponding content in the directory:
The drivers for the Nano Server can now be copied to the "VMware-Drivers" directory. I have already found the relevant drivers. If you have used the paths as described above, you can simply execute the following commands:
Copy-Item -Path "C:\NanoServer\VMware_Tools_Extracted\VMware\VMware Tools\VMware\Drivers\vmxnet3\NDIS6\*" -Destination C:\NanoServer\VMware-Drivers -Recurse
Copy-Item -Path "C:\NanoServer\VMware_Tools_Extracted\VMware\VMware Tools\VMware\Drivers\memctl\*" -Destination C:\NanoServer\VMware-Drivers -Recurse Copy-Item -Path "C:\NanoServer\VMware\Tools_Extracted\VMware\VMware Tools\VMware\Drivers\pvscsi\*" -Destination C:\NanoServer\VMware-Drivers -Recurse Copy-Item -Path "C:\NanoServer\VMware_Tools_Extracted\VMware\VMware Tools\VMware\Drivers\video_wddm\*" -Destination C:\NanoServer\VMware-Drivers -Recurse Copy-Item -Path "C:\NanoServer\VMware_Tools_Extracted\VMware\VMware Tools\VMware\Drivers\vmci\device\*" -Destination C:\NanoServer\VMware-Drivers -Recurse
The drivers required for Nano Server are now located under C;\NanoServer\VMware-Drivers:
Create Nano Server VHD
As the NanoServerImageCreator cannot create VMDK files directly, a VHD is created first. In order to create a Nano Server image, the PowerShell modules must first be imported:
Import modules .\NanoServerImageGenerator.psd1
The image can now be created:
New-NanoServerImage -MediaPath D: -TargetPath .\NanoServer1.vhd -ComputerName "NanoServer1" -EnableRemoteManagementPort -DriverPath "C:\NanoServer\VMware-Drivers" -DeploymentType Host -Edition Standard
The administrator password must also be entered:
Now the process starts and builds a Nano Server image:
The image does not yet contain any roles; if you want to install roles directly, you can already specify them accordingly. When the process is complete, the VHD file is available:
Convert VHD to VMDK
The VHD file must be converted to VMDK format so that VMware can do something with the Nano Server. WinImage has been installed for this purpose. Here, the "Convert Virtual Hard Disk image" item can be selected under the "Disk" menu item:
The NanoServer.vhd is then specified:
"Create Fixes Size..." is left as it is:
In the next step, the image is saved as NanoServer.vmdk:
Confirm one last step with OK and the VHD has become a VMDK:
Note: The VMDK format always contains 2 files: -flat contains the data, the other file is a description file.
Create VM
Now we have everything we need to create a VM on the ESXi host. I use the vSphere Client to create the VM. I am still at war with the WebClient. I'll just comment on the relevant parts:
Please note on which datastore the VM was created, the VMDK must be uploaded here later:
Number of CPU and RAM as required:
VMXNET 3 can be selected as the network card, as the drivers have been integrated:
The SCSI controller does not play a role at this point, as no virtual disk is created initially and therefore no SCSI controller is available:
No hard disks are created:
The VM is created. The two VMDK files can now be uploaded to the datastore:
Important: Both .VMDK files must be uploaded to the Datastore. Only one VMDK is displayed in the Datatore browser:
Add VMDK to VM
Once the VMDKs have been uploaded to the datastore, a hard disk can be assigned. To do this, open the properties of the VM and select "Add":
Select "Hard disk":
Select "Existing hard disk":
Specify the corresponding VMDK:
Mount hard disk as IDE disk:
Finalize configuration.
The VM can now be started. Once the Nano Server has started up, the rest of the configuration can be completed:
The IP address can be assigned, for example. This also shows that the drivers have been successfully integrated, as the VMXNET 3 card is recognized:
Note: The ESX indicates that VMware Tools are not installed:
This is also correct, because only the drivers have been integrated, but not the VMware Tools service installed. This does not seem to be possible at the moment. I think VMware will offer a customized version of VMware Tools in the future. At least I hope so.
Further articles on the subject of Nano Server (administration, roles, etc.) will follow in the near future.


nein, ein Nano Server muss nicht aktiviert werden.
Moin,
was ich an diesem ganzen NANO Server Konstrukt nicht verstanden habe: Wie sieht das mit Aktivierung und Windows Updates aus? Muss man den Nanoserver lizenzieren? Über KMS? Kann man den Nanoserver Updaten? Via WSUS?
Weisst du da was?
Gruss